
TP‑Link Deco XE75 3‑Pack Manual – Specs, Features, Setup & Troubleshooting Guide
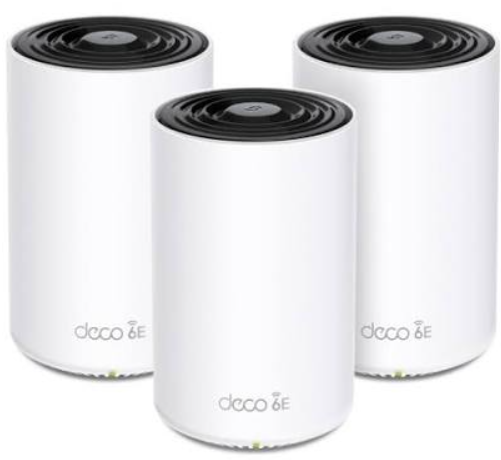
Introduction
TP‑Link ships the Deco XE75 with three identical nodes, a power adapter for each, and a single Ethernet cable. The printed Quick‑Start leaflet covers only the most basic plug‑in steps. Real‑world questions — “where should I place the second node,” “how do I force a device onto the 6 GHz band,” “why is my IoT device not connecting,” or “how do I set up parental controls” — are what owners search for every day. This guide provides the full specifications, every major feature, and clear troubleshooting steps, without the jargon.
Full Specifications
| Specification | Detail |
|---|---|
| Model | Deco XE75 (3‑pack) |
| Wi‑Fi Standard | Wi‑Fi 6E (802.11ax), tri‑band |
| Bands | 2.4 GHz (up to 574 Mbps), 5 GHz (up to 2402 Mbps), 6 GHz (up to 2402 Mbps) |
| Total Throughput | AXE5400 |
| Antennas | 4 high‑performance internal antennas per node (beamforming) |
| Ports per Node | 3 × Gigabit WAN/LAN auto‑sensing ports (1 can be used as WAN, the others as LAN) |
| USB Port | None |
| Processor | Qualcomm 1.7 GHz quad‑core CPU |
| Memory | 512 MB RAM |
| Mesh Technology | TP‑Link Mesh with AI‑Driven Mesh (self‑healing, seamless roaming) |
| Coverage | Up to 6,600 sq. ft. (3‑pack) |
| Max Connected Devices | 200+ |
| Security | WPA3, TP‑Link HomeShield (basic features free; Pro subscription optional) |
| Voice Assistant | Works with Amazon Alexa, Google Assistant |
| App | TP‑Link Deco app (iOS 14.0+, Android 9.0+) |
| Parental Controls | Built‑in (profiles, time limits, content filters, bedtime) |
| Guest Network | Yes (isolated, with bandwidth control) |
| Dimensions per Node | 4.33 × 4.33 × 5.43 in (110 × 110 × 138 mm) |
| Power | 12V/2A DC adapter (included for each node) |
| Operating Temperature | 0°C–40°C (32°F–104°F) |
| In‑the‑Box | 3 Deco XE75 nodes, 3 power adapters, 1 RJ45 Ethernet cable, Quick‑Start Guide |
Key Features at a Glance
- Tri‑Band Wi‑Fi 6E: The dedicated 6 GHz band provides ultra‑fast, interference‑free connections for the latest phones, laptops, and gaming consoles that support Wi‑Fi 6E. It acts as a dedicated wireless backhaul between nodes by default, ensuring fast communication between the main node and satellites without slowing down your devices.
- AI‑Driven Mesh: The system automatically learns your network environment and adjusts the connection path between nodes. If one node loses connection, devices seamlessly roam to another node without a dropout.
- Seamless Roaming: Your phone or laptop stays connected to the same network name (SSID) as you move around the house. The system hands off the connection to the nearest node with the strongest signal without disconnecting.
- HomeShield Security: Built‑in network security that scans for threats, provides real‑time IoT device protection, and lets you set up parental controls. Basic features are free; advanced features (like intrusion prevention, advanced content filters, and detailed reports) require a HomeShield Pro subscription.
- Easy App Setup: The Deco app walks you through plugging in the main node, connecting it to your modem, and adding the satellite nodes in minutes. No web interface or PC required.
What’s Inside the Box
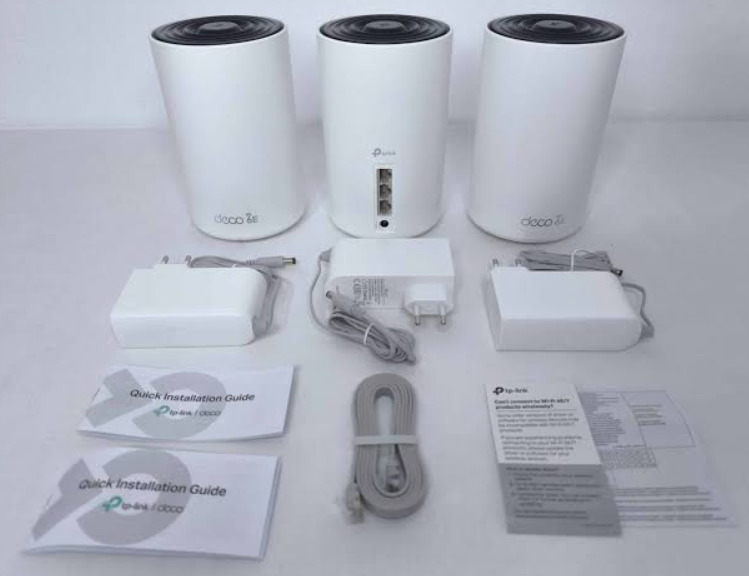
- Three Deco XE75 nodes (identical, any can act as the main node)
- Three 12V/2A power adapters with regional plugs
- One flat RJ45 Ethernet cable (about 1.5 metres)
- Quick‑Start Guide and warranty information
No modem is included. You’ll need an existing modem or ONT from your internet service provider.
First‑Time Setup
First‑Time Setup: Main Node and Internet Connection
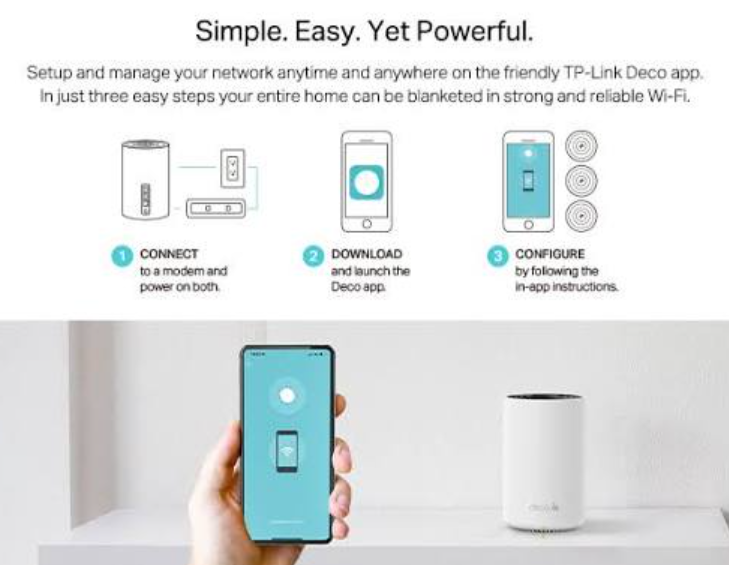
- Choose a location for the main node: near your modem, on an open surface (not inside a cabinet). It should be upright, not on its side.
- Connect the hardware: Unplug your modem (or turn it off) for 2 minutes to clear its cache. Using the included Ethernet cable, connect one end to your modem’s LAN port and the other end to any of the three ports on the main Deco node. Plug the power adapter into the node and the wall. Wait for the LED to pulse blue.
- Download the Deco app (iOS or Android). Create a TP‑Link ID or sign in.
- In the app, tap “Add your first Deco” and select the XE75 model. The app will detect the main node via Bluetooth and guide you through setting up your internet connection type (Dynamic IP is the default for most homes). If your ISP requires PPPoE, have the username and password ready.
- Set your Wi‑Fi name (SSID) and password. The app will ask whether you want to create a single network name for all three bands (Smart Connect). It’s best to keep this enabled so devices automatically connect to the best band. The 6 GHz band is set as the dedicated wireless backhaul by default, but you can open it for devices later.
- The main node will reboot. Wait for the LED to turn solid green. Internet is now active.
Adding the Satellite Nodes (Mesh Network)
[Image Placeholder 3: A floor plan showing three Deco nodes placed in di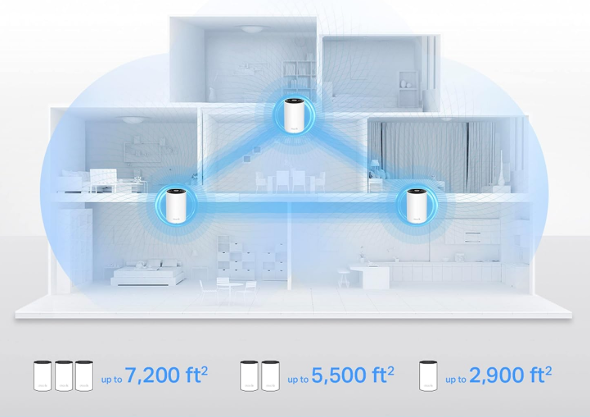 fferent rooms, with Wi‑Fi signal arcs covering the entire house. Alt text: “Deco XE75 node placement diagram”]
- Place the second node roughly halfway between the main node and the area with weak Wi‑Fi. Keep it at least 6 metres (20 feet) from the main node, but not more than 15 metres (50 feet) if there are walls. An open shelf or tabletop is ideal; avoid placing it on the floor.
- Power on the satellite node. Wait for the LED to pulse blue.
- In the Deco app, go to the Network tab, tap the “+” icon, and choose “Add a Deco unit.” The app will find the satellite via Bluetooth and configure it automatically. The LED will turn solid green when connected.
- Add the third node in the same way, placing it to extend coverage to the farthest area. After all nodes are online, the app will show a mesh topology with green connection lines indicating strong links between nodes. If a line is yellow or red, try moving the node a little closer to the next one.
Understanding the Deco App and Key Settings
- Network Map: Shows all connected Deco nodes and their signal strength. Tap a node to see which devices are connected to it. You can reboot a node remotely from here.
- HomeShield: Tap to access security scans, parental controls, and device isolation. Basic features are free; Pro features include advanced content blocking, time‑based rewards, and detailed browsing history.
- Parental Controls: Go to HomeShield > Parental Controls. Create a profile for a family member, assign their devices, and set time limits, bedtime schedules, and content filters (by age group). You can also pause internet access for a profile with one tap.
- Guest Network: Tap Wi‑Fi Settings > Guest Network. Enable it, set a name and password. The guest network is isolated — devices on it cannot access your main network devices or files. You can also set a bandwidth limit for guests.
- IoT Network (under Wi‑Fi Settings): Some Deco models offer a separate 2.4 GHz network specifically for smart home devices (bulbs, plugs, cameras). If your IoT devices struggle to connect, enable this network and connect them to it.
Forcing a Device onto the 6 GHz Band
By default, the 6 GHz band is used as the wireless backhaul (for node‑to‑node communication). If you want to use it for your Wi‑Fi 6E‑compatible phone or laptop:
- In the Deco app, go to Wi‑Fi Settings > Advanced Settings.
- Look for “6 GHz Band” or “Dedicated Backhaul.” Set it to “Open for devices.” The network name and password will be the same as your main Wi‑Fi. Wi‑Fi 6E devices will automatically connect to the 6 GHz band when in range of a node.
Troubleshooting Common Issues
| Problem | Likely Cause | What to Try |
|---|---|---|
| Main node LED is red (no internet) | Modem not providing connection | Restart the modem (unplug for 2 minutes). Check the Ethernet cable between the modem and the main Deco. Contact your ISP to check for outages. |
| Satellite node LED is yellow/red | Too far from the main node, or interference | Move the satellite closer. In the app, tap the satellite, then Signal Source to see which node it’s connected to. If it shows “–” or a poor link, reposition it. Avoid placing nodes near microwaves, Bluetooth speakers, or large metal objects. |
| Devices not switching to the nearest node | Seamless roaming takes time | Walk closer to the desired node. If a device sticks stubbornly, turn its Wi‑Fi off and on. Under Advanced Settings, enable Fast Roaming (802.11r) for better hand‑off. |
| IoT (smart bulbs, plugs) not connecting | Requires 2.4 GHz, but band‑steering keeps pushing it to 5 GHz | Enable the separate IoT Network (2.4 GHz only) in Wi‑Fi settings and connect those devices to it. Alternatively, temporarily disable the 5 GHz band in the app when pairing IoT devices. |
| 6 GHz band not visible on device | Device doesn’t support Wi‑Fi 6E, or band is set to backhaul‑only | Check your device’s specs for Wi‑Fi 6E support. In the Deco app, ensure the 6 GHz band is set to “Open for devices” under Advanced Settings. |
| Parental controls not blocking content | HomeShield Pro not active, or content filter set to “Low” | For advanced content blocking, subscribe to HomeShield Pro. For basic filtering, in the profile, set the filter level to High and add specific blocked categories. |
| Deco app says “Device offline” | Node lost power or crashed | Check the power adapter. Unplug the node, wait 10 seconds, and plug it back in. The LED should turn solid green within 2 minutes. If it stays red, press and hold the reset button (bottom) for 5 seconds with a paperclip to reset and re‑add the node. |
How to Reset and Restart
Restart (soft): In the Deco app, tap Network > … > Restart Network. This reboots all nodes without erasing settings.
Restart a single node: Unplug the power, wait 10 seconds, and plug it back in.
Factory reset (single node): With the node powered on, use a paperclip to press and hold the small reset button on the bottom for about 5 seconds until the LED flashes yellow. Release. The node will reset and can be re‑added as a satellite. Note: If you reset the main node, the entire network configuration will be lost, so only do this if absolutely necessary.
Factory reset (all nodes, clear everything): In the Deco app, go to Settings > Remove network (or similar) and confirm. This erases all settings, Wi‑Fi names, and parental controls.
Quick Reference Card
| Task | How |
|---|---|
| Restart entire network | Deco app > Network > … > Restart Network |
| Add a satellite node | Deco app > Network > “+” > Add a Deco unit |
| Set up parental controls | HomeShield > Parental Controls > Create Profile |
| Enable IoT network | Wi‑Fi Settings > IoT Network > On |
| Force a device to reconnect to the nearest node | Turn the device’s Wi‑Fi off and on |
| Factory reset a node | Hold reset button (bottom) for 5 seconds until LED flashes yellow |
| Check node signal strength | Deco app > Network Map > tap on a node > view Signal Source |
Official TP‑Link Support and Manuals
For warranty, firmware downloads, and the official PDF manual, visit: https://www.tp-link.com/support
Frequently Asked Questions
- Can I mix the Deco XE75 with older Deco models?
Yes, Deco mesh systems are backward‑compatible. You can add an older Deco M5 or Deco X20 unit to the network, but the older node will limit performance on that branch. For best results, use all XE75 units. - Does the XE75 support a wired backhaul?
Yes. You can connect any satellite node to the main node via Ethernet cable. The Deco automatically detects the wired connection and switches from wireless backhaul to wired for that node, improving speed and reliability. - Can I use the 6 GHz band for my gaming PC?
Yes, if your PC has a Wi‑Fi 6E adapter. Open the 6 GHz band for devices in the app, and connect your PC to the network as normal. The 6 GHz band provides the lowest latency and maximum throughput. - How do I block specific websites on my child’s device?
In HomeShield > Parental Controls, edit the profile, go to Content Filtering, select Blocked Categories, and add custom URLs in Blocked Websites. - Is the Deco XE75 a router or just a mesh system?
Each node can act as a router. The main node connects to your modem and manages your network. The satellites act as access points. You do not need a separate router. - Does the system support VPN?
Yes, in the Deco app under Advanced > VPN Client, you can configure OpenVPN, PPTP, or L2TP. The Deco can connect to a VPN service, and you can route specific devices through the VPN. - How do I update the firmware?
The Deco app automatically checks for updates. You’ll see a red dot on the Network tab when an update is available. Tap to install. The system will reboot each node one by one; internet will be briefly interrupted. - Can I use the Deco XE75 with Starlink?
Yes. Connect the Starlink Ethernet adapter to the Deco’s main node. In the Deco app, set the internet connection type to Dynamic IP. - What is the difference between the XE75 and the XE75 Pro?
The Pro model has a 2.5 Gbps WAN/LAN port for multi‑gig internet plans and faster wired backhaul. The standard XE75 has only Gigabit ports. - How do I disable the LED lights at night?
In the Deco app, go to Advanced > LED Control. You can set a schedule to turn off the LED (e.g., from 10 PM to 7 AM). - Can I use the nodes in Access Point mode?
Yes, if you already have a router and just want to add mesh Wi‑Fi, you can switch the Deco system to Access Point mode under Advanced > Operation Mode. All routing and firewall functions will be handled by your existing router. - What should I do if the 6 GHz band is not available in my country?
Regulatory restrictions vary. Ensure the Deco’s region is set correctly in the app (under Advanced > Region). The 6 GHz band is available in most countries but may require a firmware update.
Other Manuals You May Like
If this guide was helpful, here are a few more popular manuals from productsmanuals.com that you might find useful:
- iPhone 14 – Settings, Camera & Hidden Features Manual
Master Dynamic Island, the Action button, and battery‑health tricks. - Samsung Galaxy S24 Ultra – S Pen, Galaxy AI & Pro Camera Guide
Get the most from the 200 MP sensor, Circle to Search, and DeX mode. - Nest Hub Max – Face Match, Camera Privacy & Smart Home Dashboard
Set up photo frame, control lights, and use voice commands like a pro. - Dell XPS 15 – Drivers, Wi‑Fi Fix & Performance Tuning
Solve slow boot, driver issues, and upgrade your SSD in minutes. - Haier Super T3 AC – Remote, Self‑Clean & Error Codes Guide
Cool efficiently and fix blinking lights with simple steps.
Browse all guides at productsmanuals.com .
Copyright Warning ⚠
Copyright 2026 productsmanuals.com All rights reserved. This TP‑Link Deco XE75 3‑Pack manual is original content and may not be copied, republished, or redistributed without written permission. TP‑Link, Deco, and the TP‑Link logo are trademarks of TP‑Link Technologies Co., Ltd. This guide is unofficial and not affiliated with TP‑Link.
