Sony A7 IV Manual And Complete Setup Settings and Hidden Features Guide
Introduction
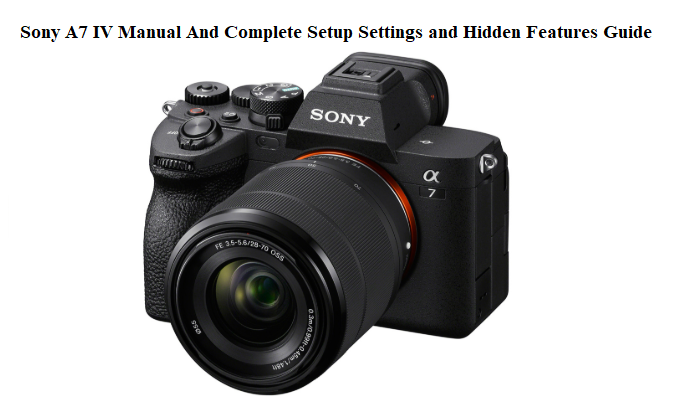
You’ve just unboxed one of the most popular full‑frame cameras on the planet. Inside the box: the body, a strap, a battery, a USB‑C cable, and a thin Start‑up Guide that basically tells you to download the PDF. There is no printed manual that explains how to set up the autofocus properly, which 4K video codec to choose, what the custom buttons should do, or how to stop the battery from draining overnight. That’s why thousands of photographers and videographers search “Sony A7 IV manual” every single day—and why this guide exists.
This Sony A7 IV manual is the missing user guide, written by a real shooter. I’ll walk you through the crucial menu settings, show you which buttons to remap for speed, demystify S‑Log3 and autofocus tracking, and hand you the battery and connectivity tricks that make a real difference on a paid shoot. Bookmark this page. The next time your eye‑AF wanders, your memory card throws an error, or you need to set up the camera for a specific job, come straight here.
What You Should Do Before You Ever Press the Shutter
Don’t rush outside. A few setup moves at a table will save you hours of frustration later.
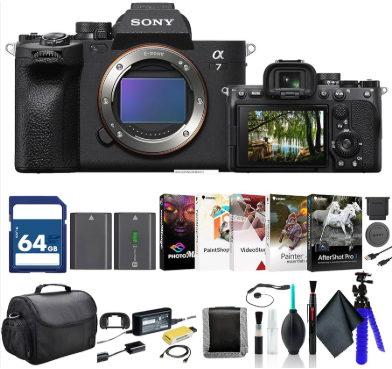
Insert the battery and memory card
Slide the battery in (it only fits one way) and lock it until you hear a click. The A7 IV takes either an SD card (UHS‑II recommended) or a CF express Type A card in Slot 1; Slot 2 is SD only. For video, you almost certainly want a V60 or V90 SD card. Format both cards in the camera: Menu > Shooting > Media > Format.
Attach a lens
Remove the body cap and align the white dot on the lens with the white dot on the mount, then rotate until it clicks. Never force it. If the camera displays “Lens not attached properly,” clean the contacts with a dry cloth.
Set the date, time, and region
The first startup forces this. Use 24‑hour time if you shoot across midnight events. Choose the correct NTSC or PAL region depending on your lighting: NTSC if you shoot under artificial lights at 60Hz (most of North America), PAL if 50Hz (Europe, Asia).
Charge the battery
Use the supplied USB‑C cable and a PD‑compatible charger (18W or higher). The orange charge lamp turns off when full. A brand new battery arrives with only a small charge, so plug in while you read this guide.
Buttons, Dials, and What They Should Do
Out of the box, the camera works. But you can make it work for you by remapping the custom keys.
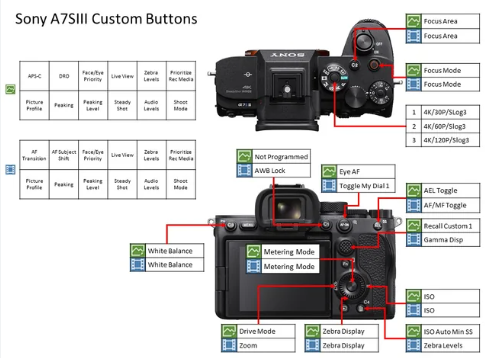
Critical button remapping
- C1 (top, near shutter): I set it to “White Balance.” You’ll change this often outdoors.
- C2 (top, near C1): “Focus Mode.” Toggle between AF‑S, AF‑C, and MF quickly.
- C3 (back, near the menu button): “Subject Recognition.” Switch between Human, Animal, Bird, or Insect.
- C4 (trash button, back): “Silent Shooting.” Instant on/off when you need to be discreet.
- AF‑ON button: Keep it as back‑button focus, but I also set it to “AF On + Tracking” so you can lock onto a subject and recompose.
The exposure dials
The front dial (by the grip) controls aperture by default. The rear dial (top right) controls shutter speed. The wheel on the back (control wheel) adjusts ISO. All three can be locked by pressing the lock lever on the top. You can reverse the front/rear dial directions in Menu > Setup > Dial Customization.
The joystick
You can use it to move the focus point, but also to navigate menus. Press it straight in to re center the focus point. In playback, use it to move around a zoomed image.
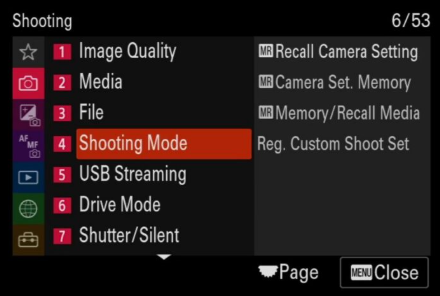
The mode dial
The A7 IV has the standard P‑A‑S‑M plus three custom modes (1, 2, 3) on the dial. Save complete setups for stills, video, and high‑speed shooting there.
The Menu System: Settings That Actually Change Your Image
Sony’s new menu is colour‑coded and searchable. But you still need to know where the gold is.
File Format and Resolution
Menu > Shooting > Image Quality. For stills, choose RAW (compressed or uncompressed) + JPEG if you need instant sharing. For video, the File Format decision is crucial: XAVC S 4K for broad compatibility, XAVC HS for efficient HEVC compression (saves space), and XAVC S‑I for the highest quality editing codec (but huge files). I use XAVC S 4K 200M 4:2:2 10‑bit for most client work.
Picture Profile and S‑Log
Menu > Shooting > Image Quality > Picture Profile. For a flat, gradable image, choose PP8 (S‑Log3). For a quick Rec.709 look that still has dynamic range, PP10 (HLG) works well. Avoid the default “Standard” if you colour grade.
Autofocus setup
- AF Tracking Sensitivity: Menu > AF/MF > AF Tracking Sensitivity. Set to 5 (Locked‑on) if the subject will stay in frame, or 1 (Responsive) if you switch subjects often.
- AF/MF > Focus Area: I register “Tracking: Expand Spot” as my default; the camera follows anything under the spot.
- Face/Eye AF: Turn on for both humans and animals. In video, you can also set “Face/Eye Priority in AF” to On.
Silent shooting and anti‑flicker
Menu > Shooting > Shutter/Silent. Turn on “Anti‑flicker Shoot.” for photos under artificial light. For silent shooting, remember it uses electronic shutter and may cause rolling shutter with fast motion.
Zebra and peaking
Menu > Shooting > Zebra Display. Set to 94+ for S‑Log3 exposure (skin tones around 65%). Peaking: Menu > Focus > Peaking Display, turn it on with red colour and high sensitivity for manual focus aids.
Autofocus That Won’t Let You Down
The A7 IV’s Real‑time Tracking is superb, but only when set up correctly.
How to start tracking a subject
Set the focus area to “Tracking” and half‑press the shutter, or press the AF‑ON button if you’ve set it to “AF On + Tracking.” A green box appears and sticks to the subject. Touch the screen to override and pick a new subject instantly.
Human, Animal, Bird, Insect
Go to Menu > AF/MF > Subject Recognition. Select the appropriate subject type. The camera will automatically find eyes, faces, and bodies. In video, it works seamlessly.
Touch tracking in video
When recording, simply tap the screen to initiate tracking on a person or object. The camera will follow it even if you move the frame.
Low‑light AF
The A7 IV focuses down to ‑4 EV. If it hunts, use a lens with a wide aperture, increase ISO temporarily, or switch to AF‑S and focus assist beam.
Video, 4K, and Slow Motion—Made Practical
Choosing the right 4K mode
- 4K 60p: Super 35 crop only. Use this for slow motion; remember the crop factor.
- 4K 30p/24p: Full‑frame, oversampled from 7K. Sharpest and most cinematic.
- 4K 120p: Only in S&Q mode. No audio, and it’s heavily cropped.
S&Q (Slow & Quick)
Turn the mode dial to S&Q. In the menu, set the frame rate and playback speed. For 5x slow motion, record at 120fps and set playback at 24fps. The camera processes it in‑camera; no editing required.
Recording codec and colour depth
For HDR grading, use XAVC S 4K 200M 4:2:2 10‑bit. For quick delivery, XAVC S 4K 100M 4:2:0 8‑bit is smaller and edits smoothly on older computers.
Heat management
The A7 IV can record continuously for over an hour, but in hot environments it may overheat. Set “Auto Power OFF Temp.” to “High” in Menu > Setup > Power Setting. Also flip out the screen and use an external fan if needed.
Headphone and mic jacks
Both are present. Use a proper external mic for serious work. In Menu > Audio > Audio Rec Level, set levels manually and monitor with headphones.
Colour, White Balance, and Picture Profiles That Save You in Post
Manual white balance
Press C1 (if you set it to WB) and use the rear dial to select a Kelvin value. For natural light, 5600K is daylight; 3200K is tungsten. For tricky mixed light, use a grey card and the Custom WB option.
S‑Log3 exposure trick
Expose to the right (ETTR) without clipping highlights. Turn on the histogram and keep the right edge from piling up. Many shooters set exposure compensation to +1.7 to +2.0 stops for S‑Log3. Always use a grey card for white balance.
HLG for quick HDR
PP10 (HLG) gives you a ready‑to‑use Rec.2020 colour space that looks great on HDR TVs. You can play it directly on compatible displays without grading.
Creative Look
For those who don’t want to grade, the A7 IV includes “Creative Look” presets like FL, IN, VV. FL is a favourite for a film‑like, low‑contrast aesthetic straight out of camera.
Wireless Connections and the Creators’ App
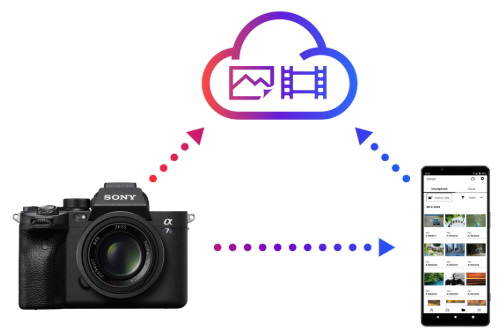
Ditch the old Imaging Edge Mobile. Sony’s Creators’ App is faster and more reliable.
Pairing via Bluetooth and Wi‑Fi
- Turn on Bluetooth and Wi‑Fi on the camera (Menu > Network > Bluetooth/Wi‑Fi > On).
- Open the Creators’ App on your phone, tap “Connect New Camera,” and scan the QR code displayed on the camera.
- After pairing, you can transfer images (JPEG/RAW) and remote‑control the camera. For high‑speed transfer, use the 5GHz Wi‑Fi band.
FTP transfer for professionals
The A7 IV can send images directly to a server over Wi‑Fi or wired LAN (with a USB‑Ethernet adapter). Set up in Menu > Network > FTP Transfer Function. This is how sports and news shooters deliver images in real time.
Remote shooting
In the Creators’ App, tap “Remote Control.” You see a live view, can change aperture/shutter/ISO, and even touch to focus. Great for self‑portraits or placing the camera in hard‑to‑reach spots.
Lenses and Compatibility
The E‑mount accepts both full‑frame and APS‑C lenses. If you mount an APS‑C lens, the camera automatically crops to Super 35 mode. You can override this in Menu > Shooting > Image Quality > APS‑C/Super 35mm > Off (but the lens will vignette heavily).
Adapter for third‑party lenses
Using a Canon EF to E adapter? Set “Release w/o Lens” to “Enable” in Menu > Setup > Release w/o Lens. Autofocus performance will vary.
Lens breathing compensation
A small but brilliant video feature. Turn on Lens Breathing Compensation in Menu > Shooting > Image Quality > Lens Compensation. It slightly crops the image to eliminate the slight zooming effect when pulling focus, making focus pulls cinematic.
Battery and Power Hacks for Long Shooting Days
The NP‑FZ100 battery is robust, but you can stretch it.
Real‑world battery life
Approximately 500‑600 shots (CIPA) for stills, or about 120 minutes of continuous 4K recording. Cold weather reduces this.
USB‑C PD power and charging
You can power the camera directly via USB‑C (18W PD). While shooting video, connect a high‑capacity power bank and the internal battery will barely drain. The menu shows “USB Power Delivery” when active.
Auto power‑off and finder/monitor
Set “Power Save Start Time” to 1 minute in Menu > Setup > Power Setting. Use “Monitor (Manual)” or “Viewfinder (Manual)” to turn off the unused screen and save power.
Battery health
Menu > Setup > Battery Info shows the remaining charge as a percentage and the battery’s remaining lifespan. If it drops below 60% capacity, replace it.
How to Reset, Update Firmware, and Solve Freezes
Soft restart
Turn the camera off and on. If it freezes, remove the battery, wait 10 seconds, and reinsert.
Factory reset
Menu > Setup > Reset/Save Settings > Setting Reset > Camera Settings Reset or Initialize. This clears all custom button assignments and menu tweaks but does not affect the firmware version.
Firmware update
- Download the latest .DAT file from Sony’s support site onto a formatted SD card (root directory).
- Insert the card into Slot 1.
- Menu > Setup > Version > Software Update. Follow the prompts. Do not turn off the camera during the update.
Memory card recovery
If a card becomes unreadable, try a different USB reader and run a disk repair utility. Format the card only in the camera, never on a computer.
Common Annoyances and How to Fix Them
| Problem | Fix |
|---|---|
| Eye‑AF doesn’t work | Check Subject Recognition is set to Human (or Animal). Ensure AF mode is AF‑C. Switch the focus area to Tracking. |
| Overheating warning | Set Auto Power OFF Temp. to High. Flip out the screen. Use an external fan if shooting long clips. |
| Camera won’t connect to Creators’ App | Turn the camera’s Wi‑Fi off and on. Forget the camera in the app and re‑pair. Avoid VPNs on your phone. |
| Flickering under LED lights | Enable Anti‑flicker Shoot for stills. For video, switch to a shutter speed of 1/50 (PAL) or 1/60 (NTSC). |
| Image is too dark in the viewfinder | Set Live View Display to “Setting Effect ON” in Menu > Setup > Live View Display. |
| Card error | Format the card in the camera. If that fails, try a different card and contact Sony if the slot itself is faulty. |
Quick Reference for the Field
| Action | How |
|---|---|
| Format memory card | Menu > Shooting > Media > Format |
| Toggle silent shooting | Press C4 (if set) or Menu > Shutter/Silent |
| Enable S‑Log3 | Menu > Shooting > Image Quality > Picture Profile > PP8 |
| Start tracking | Half‑press shutter with Tracking focus area, or tap the screen |
| Remote trigger with phone | Creators’ App > Remote Control |
| Force restart | Remove and reinsert battery |
| Factory reset | Menu > Setup > Reset/Save Settings > Initialize |
Download the Sony A7 IV Cheat Sheet
A one‑page PDF with button maps, recommended settings for stills and video, and troubleshooting fixes. Keep it on your phone for when you’re on location and need a quick setting recall.
“Sony A7 IV Quick Guide (PDF)”
Official Sony Support and Manual Link
The official Sony online manual and firmware downloads are available here:
https://www.sony.com/electronics/support/e-mount-body-ilce-7m4-series/ilce-7m4/downloads
Final Word
The Sony A7 IV is a hybrid powerhouse, but Sony’s own documentation leaves out the practical workflows that make it a joy to use. This manual puts the settings, button layouts, and hidden features into language you can actually use on set. Bookmark it, share it with your second shooter, and come back whenever the menu tree confuses you.
Wishing you sharp focus, clean files, and batteries that outlast the sunset.
Copyright Warning!
© 2026 productsmanuals.com All Rights Reserved.
Sony, A7 IV, and the Sony logo are trademarks of Sony Corporation. This guide is unofficial and not affiliated with or endorsed by Sony. Any part of this manual cannot be copied or recreate.