
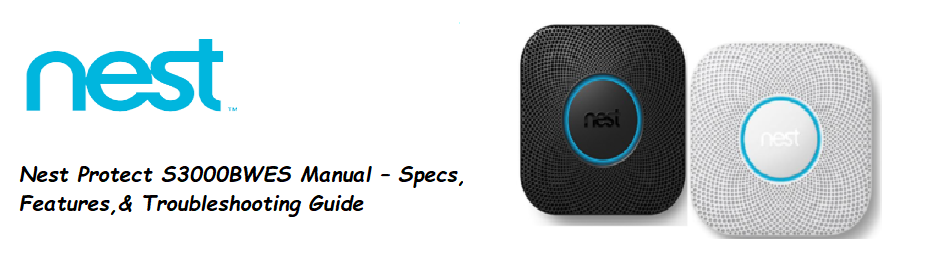
Nest Protect S3000BWES Manual – Specs, Features,& Troubleshooting Guide
Introduction
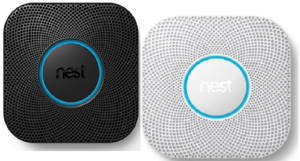
The Nest Protect is a smart smoke and carbon monoxide (CO) detector that speaks to you in a clear voice, sends alerts to your phone, and tests itself automatically. Nest ships the battery‑powered S3000BWES with a mounting plate, screws, and a Quick‑Start leaflet. The printed guide is very brief, and many users search for a “Nest Protect manual” because they need help connecting to Wi‑Fi, silencing a false alarm, understanding the colour ring, or replacing the batteries. This guide provides all the specifications, key features, and clear step‑by‑step troubleshooting — in plain language.
Full Specifications
Key Features at a Glance
- Split‑Spectrum Smoke Sensor: Detects both fast‑flaming fires (like burning paper) and smoldering fires (like an electrical fire behind a wall). This reduces nuisance alarms from cooking or steam.
- Voice Alerts: Before the loud horn sounds, a human voice announces the type of danger (“Heads‑up: there’s smoke in the hallway”) and its location, giving you a calm early warning.
- Wireless Interconnect: All your Nest Protects talk to each other. If the basement unit detects CO, the bedroom unit also sounds the alarm and says “Carbon monoxide detected in the basement.”
- Self‑Test & Health Monitoring: Every 30 days, the unit silently tests its speaker, horn, and sensors. You can also run a manual test from the app or by pressing the centre button. If a sensor fails, the app notifies you.
- Pathlight: When you walk under the Protect in the dark, a soft white ring lights up just enough to see your way, without being blinding. You can adjust the brightness or turn it off in the app.
- 10‑Year CO Sensor: The CO sensor never needs replacing for the life of the product. After 10 years, the unit itself will expire and prompt you to replace it. (The smoke sensor also lasts up to 10 years.)
- App Alerts: Whether you’re home or away, the Google Home app sends push notifications for smoke, CO, low battery, and sensor issues.
What’s Inside the Box
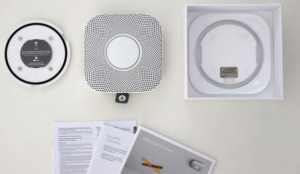
- Nest Protect smoke and CO alarm (with the 6 AA batteries pre‑installed)
- White mounting backplate (circular, with screw holes)
- 4 screws and wall anchors
- Quick‑Start Guide and safety booklet
No screwdriver is included; you’ll need a Phillips‑head screwdriver for installation.
How to Install Your Nest Protect
What You’ll Need
- A Phillips‑head screwdriver
- The included mounting backplate, screws, and wall anchors
- A stable ladder or step stool
- Your smartphone with the Google Home app (for setup after installation)
Before You Start: Choose the Right Spot
- Install on the ceiling whenever possible, at least 10 cm (4 inches) from the wall.
- If you must install on a wall, place it high up, within 30 cm (12 inches) of the ceiling.
- In bedrooms, mount it near the sleeping area.
- In hallways, place it outside sleeping areas.
- On every level of your home, including the basement.
- Avoid these locations:
- Near windows, doors, or vents (drafts can prevent smoke from reaching the sensor)
- In bathrooms or very humid rooms (steam triggers false alarms)
- In garages (temperature extremes and car exhaust)
- Directly above a toaster or stove
 Step 1: Install the Mounting Backplate
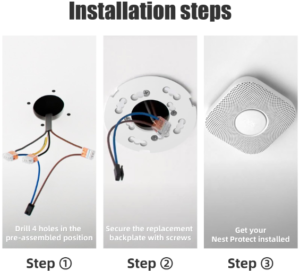
- Hold the white circular backplate against the ceiling or wall where you want to install the Protect. Ensure the “UP” arrow on the backplate points toward the ceiling (if on a wall) or is oriented as desired.
- Use a pencil to mark the screw holes. If you’re installing on drywall or plaster, use the included plastic wall anchors for a secure hold. Drill pilot holes if necessary, then push the anchors in.
- Position the backplate over the holes and screw it in place using the four provided screws. Tighten until the backplate is flush and doesn’t wiggle.
Step 2: Power On the Nest Protect
- Your Nest Protect arrives with 6 AA Energizer Ultimate Lithium batteries pre‑installed. Locate the small plastic pull tab extending from the battery compartment.
- Pull the tab firmly to remove it. The colour ring will glow blue, and a voice will say: “Ready to set up. Use the Nest app.”
- If you don’t hear anything, twist the unit off the backplate (if already attached) and ensure the batteries are seated correctly.
Step 3: Set Up in the Google Home App
- On your smartphone, open the Google Home app. If you don’t have it, download it from the App Store or Google Play.
- Tap the “+” icon (Add) > “New device” . The app scans for nearby devices.
- When the Nest Protect appears, tap it. You’ll be asked to scan the QR code – it’s on the back of the Protect, or on the included Quick‑Start card.
- Follow the in‑app steps to connect the Protect to your 2.4 GHz Wi‑Fi network. Enter your Wi‑Fi password when prompted.
- The app will ask you to name the room where the Protect is installed (e.g., “Kitchen”, “Master Bedroom”). This name is used for voice alerts (“There’s smoke in the kitchen”) and notifications. Choose a clear, descriptive name.
-
Once connected, the ring glows green, and the voice says: “Everything is ready.”
Step 4: Attach the Nest Protect to the Backplate
- Hold the Nest Protect with the face toward you. Align the small tabs on the back of the unit with the slots on the mounted backplate.
- Gently push the unit onto the backplate and rotate it clockwise (about a quarter turn) until it clicks into place. The unit should sit flush and secure.
- The Protect will automatically run a brief self‑check, and the ring will glow green if everything is normal.
Step 5: Verify Installation
- Press the centre button once. The Protect will perform a test: “This is a test. The alarm will sound.” You’ll hear the horn and voice. This confirms the speaker, horn, and sensors are working.
- In the Google Home app, you should see the Protect listed with a green status.
- If you have multiple Nest Protects, repeat the above steps for each one. They will automatically connect to each other via wireless interconnect after setup.
After Installation: What to Expect
- Pathlight: When you walk under the Protect in the dark, a soft white ring lights up to gently illuminate the area. You can adjust its brightness or turn it off in the app.
- Self‑Test: The Protect silently tests its sensors every 30 days. You’ll get a notification in the app if anything needs attention.
- Battery Life: The 6 lithium AA batteries should last up to 5 years under normal use. When they’re low, the unit will chirp and the app will notify you.
That’s it – your Nest Protect is now actively monitoring your home for smoke and carbon monoxide.
First‑Time Setup
First‑Time Setup: Wi‑Fi and the Google Home App
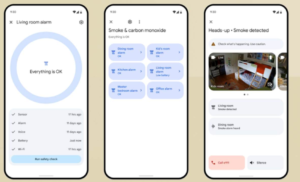
- Pull the battery tab to power on the device. The colour ring will glow blue, then the unit will speak: “Ready to set up. Use the Nest app.”
- Download the Google Home app (or the legacy Nest app, which still works for many users). Create or sign in with your Google account.
- In the Google Home app, tap “+” > Add device > New device. The app will scan for the Protect. When it appears, tap it.
- Scan the QR code on the back of the Protect (or the one included on the Quick‑Start card) when prompted.
- The app will guide you through connecting the Protect to your 2.4 GHz Wi‑Fi network. If your router combines bands, the Protect will automatically use the 2.4 GHz band. Enter your Wi‑Fi password.
- Once connected, the ring will glow green, and the voice says “Everything is ready.”
- Name the room where the Protect is installed (e.g., “Kitchen” or “Master Bedroom”). This name is used for voice alerts and notifications.
Installation and Placement Tips
- Where to install: On the ceiling or high on a wall, at least 10 cm (4 inches) from the wall/ceiling corner. Install in every bedroom, outside each sleeping area, and on every level of your home, including the basement. Do not install in drafty areas (near windows, doors, vents, or fans), or in very humid rooms like bathrooms.
- Mounting: Attach the backplate to the ceiling or wall using the included screws and anchors. Align the Nest Protect with the backplate and turn it clockwise until it clicks. The unit will say “Ready” and the ring will glow green.
Understanding the Colour Ring and Voice Alerts
Testing the alarm manually: Press the centre button once. The unit will sound the horn and test the speaker: “This is a test. The alarm will sound.” It will then go through a short series of beeps and announcements. You can also start a test from the Google Home app.
Silencing a False Alarm
If you burn toast or steam sets off the alarm:
- Press the centre button on the Protect. It will say “Alarm silenced.”
- The alarm will remain quiet for about 10 minutes while the smoke clears. The ring will glow yellow during this time.
- You can also silence the alarm from the Google Home app. A notification will appear on your phone whenever an alarm goes off; tap it and choose Silence.
If the alarm keeps triggering without an obvious cause, clean the sensor (see below) or move the Protect further from the kitchen or bathroom.
Replacing the Batteries
The 6 AA Energizer Ultimate Lithium batteries last up to 5 years. When the batteries are low, the Protect will chirp once every 60 seconds and the app will send a notification. Replace all 6 batteries at the same time, even if only some are low.
- Twist the Protect counter‑clockwise to remove it from the backplate.
- Slide open the battery compartment and remove the old batteries. Insert 6 new Energizer Ultimate Lithium AA batteries (do not use alkaline or rechargeable NiMH — they will not last as long or may cause errors).
- Slide the compartment closed, reattach the Protect to the backplate, and twist clockwise. The unit will run a brief self‑check and the ring will glow green.
Troubleshooting Common Issues
How to Factory Reset and Restart
Restart: Remove the Protect from the backplate and take out one battery for 10 seconds. Reinsert it. The unit will restart and reconnect to Wi‑Fi. No settings are lost.
Factory reset (clear all settings, Wi‑Fi, and app connection):
- Remove the Protect from the backplate.
- Press and hold the centre button, then reinsert all batteries while holding the button. Continue holding for about 10 seconds until the ring glows blue and the unit says “Erasing all settings.”
- Release the button. The Protect will reset and enter setup mode. You’ll need to re‑add it in the app.
Quick Reference Card
Frequently Asked Questions
- Can the Nest Protect differentiate between smoke and steam?
Yes, the split‑spectrum sensor helps reduce false alarms from steam. However, installing the Protect in a steamy bathroom or directly above a toaster can still trigger it. Move it a few feet away from these sources.
- How do I know if the unit is working?
The ring glows green when everything is normal. Every 30 days, it runs a silent self‑test. You can also press the centre button for a manual test, or check the app for any alerts.
- Does the Nest Protect work without Wi‑Fi?
Yes. All safety functions (smoke and CO detection, interconnect, horn, and voice) work without Wi‑Fi. You only lose remote notifications and app control if Wi‑Fi is down.
- Can I use rechargeable batteries?
No. The Protect requires Energizer Ultimate Lithium AA batteries (non‑rechargeable). Alkaline or NiMH batteries will not provide the required voltage and may cause false low‑battery warnings.
- How long does the Nest Protect last?
The product has a 10‑year lifespan from the date of manufacture. After 10 years, the unit will chirp and the app will tell you to replace it. The CO sensor is not replaceable.
- Will the alarm wake me up?
Yes, the 85 dB horn and the voice alert are designed to wake most people. If you sleep with earplugs or have hearing loss, consider an additional bed‑shaker device.
- Can I interconnect Nest Protects with other brands of smoke alarms?
No, the wireless interconnect works only between Nest Protect units (and Nest Secure, which was discontinued). You cannot wirelessly link them to other brands. If you have hardwired interconnect wires, Nest Protect (wired model) can connect to those.
- What does it mean when the ring glows yellow but there’s no alarm?
A steady yellow ring with a voice message (“Heads‑up”) means the sensor has detected a low level of smoke or CO. It’s a warning. Press the button to silence and investigate. If it clears, the ring returns to green.
- How do I clean the sensor?
Gently vacuum the sensor chamber (the large opening on the face of the unit) using a soft brush attachment, or use compressed air. Do not insert anything into the chamber.
- Can I move the Protect to a different room after it’s been set up?
Yes. Remove it from the backplate, unscrew the backplate, and reinstall it in the new location. The Protect will automatically detect its new position. You should rename it in the app to match the new room.
- Is the Nest Protect compatible with Apple HomeKit?
No, the Nest Protect does not support Apple HomeKit. It works with the Google Home app, Amazon Alexa, and some third‑party integrations via Google Home.
- What happens during a power outage?
The battery‑powered model continues to work normally. All safety functions are fully operational. The Wi‑Fi connection will be lost, so remote notifications won’t be sent, but the local alarms and interconnect still function.
Browse all guides at productsmanuals.com .
Copyright Warning ⚠
Copyright 2026 productsmanuals.com All rights reserved. This Nest Protect S3000BWES manual is original content and may not be copied, republished, or redistributed without written permission. Nest, Nest Protect, and the Nest logo are trademarks of Google LLC. This guide is unofficial and not affiliated with Google.

[…] Nest Protect S3000BWES Manual – Smart Smoke & CO Alarm Setup Install, test, and silence false alarms with this smart detector. […]