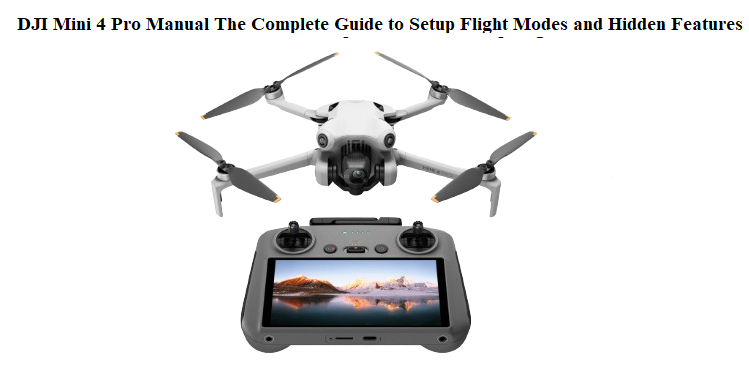
DJI Mini 4 Pro Manual The Complete Guide to Setup Flight Modes and Hidden Features
Introduction
DJI packages the Mini 4 Pro with an intelligent flight battery, a set of propellers, a USB‑C cable, and a Quick Start Guide that barely scratches the surface. The full manual is a dense online PDF that reads like an engineering textbook. So every day, thousands of drone pilots search “DJI Mini 4 Pro manual” looking for practical help: how to bind the remote, what every flight mode actually does, how to set up the return‑to‑home properly, why the camera is beeping, and how to keep the battery healthy.
This DJI Mini 4 Pro manual is the field guide DJI should have included. It’s built from real‑world flying, crashes, firmware updates, and the questions that keep popping up in drone forums. Whether you’re unboxing your first Mini 4 Pro or you’re a seasoned pilot who just wants to master ActiveTrack 360, you’ll find clear, actionable instructions here. Bookmark it — the next time the remote won’t connect, the gimbal acts up, or you can’t remember how to calibrate the compass, the answer is right here.
The box contains
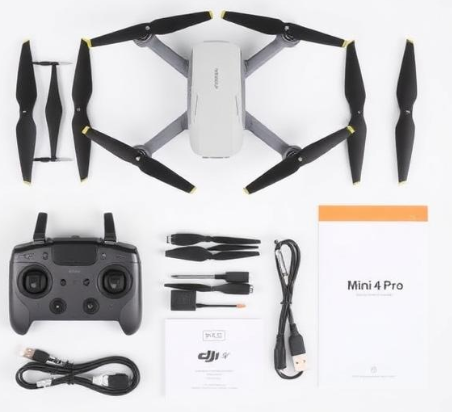
Your DJI Mini 4 Pro box contains:
- Mini 4 Pro aircraft (with gimbal protector and camera cap)
- DJI RC 2 remote controller (with built‑in screen) or DJI RC‑N2 (phone‑based), depending on your bundle
- One Intelligent Flight Battery
- Spare propellers (two pairs)
- Screwdriver
- USB‑C PD charging cable
- USB‑C to USB‑C cable (for controller charging)
- Quick Start Guide and Safety Guidelines
Not included: ND filters, extra batteries, charging hub, propeller guard, or carrying case. Those are part of the Fly More Combo.
Physical Tour of the Drone and Remote
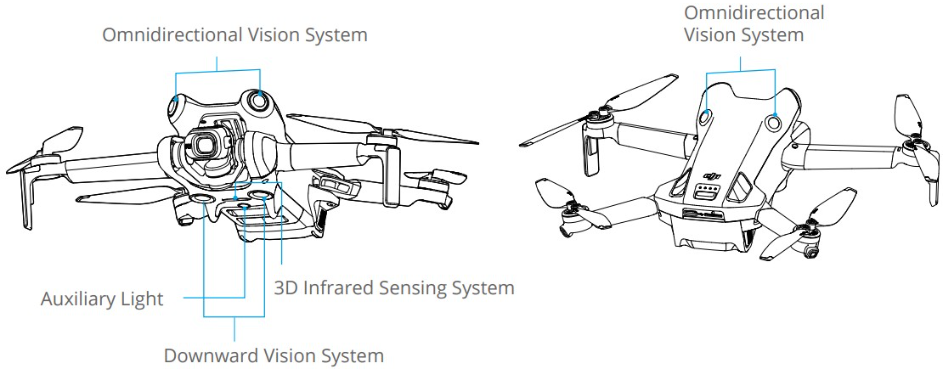
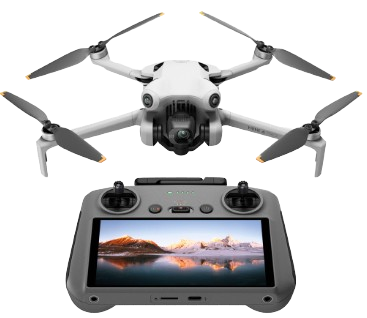
The Mini 4 Pro weighs under 249 grams but is packed with sensors. The front and rear obstacle sensors sit in the nose and tail. The bottom sensors (two vision cameras and an infrared sensor) enable stable hovering indoors. The gimbal stabilizes the 1/1.3‑inch camera that shoots 4K/100fps and tilts from ‑90° to +60°.
The Intelligent Flight Battery slides into the rear. Press once, then hold to power on. The USB‑C port on the drone is for data transfer and charging when the battery is removed (using a power bank). The power button also doubles as the battery level indicator (four LEDs).
On the DJI RC 2, the sticks unscrew and store on the back. The shoulder dial on the left adjusts gimbal tilt. The C1 and C2 buttons on the back are customizable. The record button is on the left shoulder, the shutter button on the right.
First‑Time Setup and Activation
Before taking off, you must activate the drone and go through a few critical steps. Do this at home, with Wi‑Fi and a fully charged battery.
Activation and binding
- Power on the remote controller, then power on the drone (press, then press and hold the battery button).
- The controller screen will prompt you to activate. Follow the on‑screen steps: connect to Wi‑Fi, log into your DJI account, and choose a subscription plan (optional).
- Bind the drone to your account. If it doesn’t happen automatically, go to Profile > Device Management > Bind.
Firmware updates
After activation, check for updates: on the DJI RC 2, swipe down from the top, tap the settings gear, go to System > Software Update. Update both the controller and the aircraft firmware. A new battery may also prompt a firmware update, so repeat this process with each extra battery.
Compass and IMU calibration
You’ll be prompted to calibrate the compass when you first fly in a new location. Before your first outdoor flight, go to Settings > Safety > Compass > Calibrate. Rotate the drone as shown in the animation. If the gimbal seems tilted or the drone drifts, also calibrate the IMU: Settings > Safety > IMU > Calibrate. Place the drone on a flat surface and follow the prompts.
Propeller installation
The propellers are marked A and B. Match them to the motor hubs (also marked A and B). Press down and rotate the propeller opposite to the locking direction until it clicks. Remove them by pressing down and twisting in the unlock direction. Only use the supplied screwdriver for any maintenance.
Remote Controller Deep Dive
DJI RC 2 touchscreen runs a streamlined version of the DJI Fly app. No phone is needed. The screen brightness is 700 nits; you can increase it manually in quick settings.
Customizing buttons
- Go to Settings > Control > Button Customization.
- C1 (back left): I recommend “Centre the gimbal” or “Toggle Auxiliary Light.”
- C2 (back right): “Switch between Photo and Video” or “Toggle Obstacle Avoidance.”
- The 5D button (right shoulder) can be pressed up/down/left/right for gimbal tilt, zoom, or exposure adjustment. Set it to your preference.
Stick modes
Default is Mode 2 (left stick throttle/yaw, right stick pitch/roll). If you come from a different RC background, change it in Settings > Control > Stick Mode.
RTH button
The physical RTH button on the top left of the remote. Short press to initiate Smart RTH, long press for forced emergency RTH. The drone will ascend to the set RTH altitude and fly straight back to the home point.
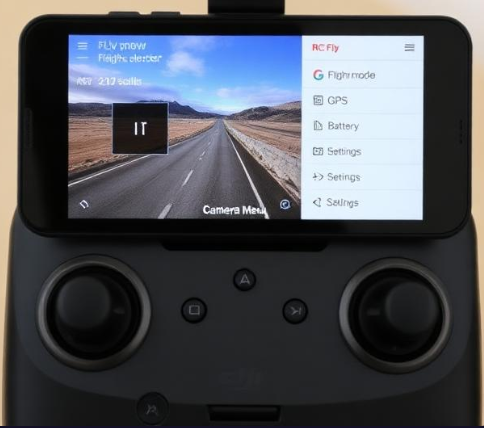
Flight Modes and Intelligent Features
Swipe the flight mode selector on the left of the screen to switch between:
- Cine: Slow, stable movement, max speed 5 m/s. Ideal for smooth cinematic shots.
- Normal: Balanced speed and obstacle avoidance, max 12 m/s.
- Sport: Maximum agility and speed up to 16 m/s. Obstacle avoidance is disabled. Use with caution.
Master Shot and Quick Shots
Tap the Quick Shots icon (rocket symbol) to access automated flight patterns: Dronie, Rocket, Circle, Helix, Boomerang. The drone executes the move and automatically generates a short edited video.
Active Track 360
Trace, Parallel, or Spotlight a moving subject. Draw a box around the target on screen, then select your tracking mode. The drone can now circle around the subject while you control only the camera. Works best on vehicles, people, and pets at moderate speed.
Waypoint Flight
Plan a route with multiple waypoints, set altitude, speed, and camera action at each point. The drone will fly the mission autonomously. Great for repeatable time‑lapses or complex reveals.
Hyper lapse
Create dynamic time‑lapse videos with options: Free, Circle, Course Lock, Waypoints. The drone stabilizes the footage and renders it into a shareable clip directly on the RC 2.
Camera Settings and Photography Tips
The 1/1.3‑inch sensor captures 4K/100fps video and 48MP stills. Here’s how to get the best image quality.
Resolution and frame rate
For cinematic footage, use 4K 24fps or 25fps with a 1/50 shutter speed (180‑degree rule). For slow motion, 4K 100fps is stunning. For YouTube, 4K 30fps is universal.
Colour profile
- Normal: Ready‑to‑share, with enhanced contrast and saturation.
- D‑Log M: Flat profile with more dynamic range. Requires colour grading in post. Best for serious editing.
- HLG: Hybrid Log Gamma for HDR displays.
ND filters
The Mini 4 Pro’s aperture is fixed at f/1.7. In bright sunlight, the shutter speed will exceed the ideal 1/50s. Use ND16 or ND32 filters to bring it back down and maintain smooth motion blur.
Photo modes
- Single: Standard 12MP or 48MP JPEG/DNG.
- AEB (Auto Exposure Bracketing): Takes 3 or 5 shots at different exposures for HDR merging later.
- Timed Shot: Interval of 2/3/5/7/10/15/20/30 seconds.
- Smart Photo: The drone automatically adjusts scene recognition (sunset, snow, grass, sky).
Gimbal control
The left shoulder dial tilts the gimbal. You can also set the 5D button to vertical tilt. For straight‑down shots, press C1 (if customised) or swipe the screen to tilt the gimbal to ‑90°.
Battery Care and Safe Storage
Intelligent Flight Battery requires special care to prolong its life.
Charging
- Use the included USB‑C PD charger (30W or higher recommended).
- Charge time: ~70 minutes for a single battery.
- The battery LEDs show charge level: press the button once to check.
Auto‑discharging
-
If stored with a charge above 72% for more than 3 days, the battery auto‑discharges to about 72% to prevent swelling. This is normal.
Storage
- Store batteries at 40‑65% charge in a cool, dry place.
- Never leave batteries in a hot car or in direct sunlight.
Battery firmware
-
When you update the aircraft, also insert each battery and power on to update its internal firmware. The RC will prompt you.
Self‑heating (cold weather)
-
In freezing temperatures, the battery may need to warm up before takeoff. A notification will appear. Let it heat until the prompt clears.
Return‑to‑Home (RTH) and Safety Settings
RTH is a lifesaver, but only if configured correctly.
Setting RTH altitude
Go to Settings > Safety > RTH Altitude. Set it higher than the tallest obstacle in your flying area (e.g., 50 meters). The drone climbs to this altitude before flying home.
Smart RTH
Initiated by short press of the RTH button or by the app. The drone retraces its path for 50 meters (if enabled) then flies directly to home point.
Failsafe RTH
When the signal is lost for more than 11 seconds (or 2 seconds in some modes), the drone automatically initiates RTH. You can set the action to “RTH,” “Land,” or “Hover” in Settings > Safety > Signal Lost.
Low Battery RTH
The drone calculates if it can make it back. A warning pops up; you can cancel or continue. At critically low battery, it will auto‑land.
Precision Landing
The Mini 4 Pro records the take‑off location with the bottom camera. On RTH, it lands within centimeters of the exact spot if lighting is good.
Auxiliary LED
In low light, the bottom auxiliary light turns on automatically to help with precision landing. You can manually toggle it from the quick settings menu.
How to Reset and Unbind
Reset camera settings
Go to Camera Settings > three‑dot menu > Reset Camera Settings. This only resets image parameters, not flight data.
Factory reset of the aircraft
- Power on the drone.
- Press and hold the battery power button for 9 seconds until you hear three beeps.
- The drone resets to factory defaults. Pairing info with the remote remains unless you unbind.
Unbind the drone from your DJI account
On the RC 2, go to Profile > Device Management > tap the drone > Remove Device from Account. You’ll need internet access and your DJI account password. This is required before selling the drone.
Reset the remote controller
On the RC 2, go to Settings > System > Reset > Factory Data Reset. This wipes all settings and downloaded maps.
Common Problems and Quick Fixes
| Problem | Fix |
|---|---|
| Drone won’t connect to remote | Ensure both are charged. Use the bind button: Settings > Control > Re‑Pair to Aircraft. |
| GPS signal weak | Move to an open area, away from buildings and metal. Calibrate compass. |
| Gimbal vibrating or tilted | Calibrate the gimbal: Settings > Control > Gimbal Calibration. Place drone on a level surface. |
| Video feed lag or pixilation | Switch transmission to “Smooth” mode (Settings > Transmission). Lower the channel bandwidth to 20MHz. |
| SD card error | Use a UHS‑I Speed Class 3 or higher card. Format it in the drone: Settings > Camera > Storage > Format. |
| Battery not charging | Check the USB‑C cable and adapter. If the battery has been deeply discharged, leave it plugged in for 30 minutes; it may wake up. |
| Motor unable to start | Check propellers are correctly installed and not obstructed. Calibrate IMU and compass. |
Hidden Features and Pro Tips
Digital zoom
In Photo mode, pinch the screen to zoom up to 2x (4K) or 4x (1080p). Lossless zoom is achieved by cropping the sensor.
Panorama modes
The Mini 4 Pro can shoot 180°, wide‑angle, and sphere panoramas. The drone automatically stitches them in the album.
Quick Transfer
Download footage to your phone wirelessly: power on the drone, open the DJI Fly app on your phone, and tap QuickTransfer. No remote needed.
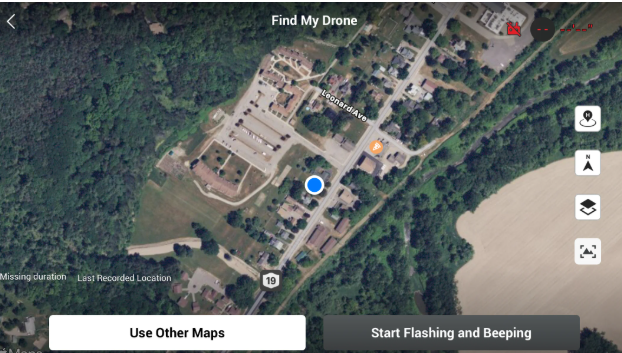
Find My Drone
If you lose the drone, open Profile > Find My Drone. The map shows the last known location. You can make the drone’s front LED flash and emit a sound.
Voice prompts
The RC 2 can announce critical warnings. Enable them in Settings > Sound > Voice Prompts.
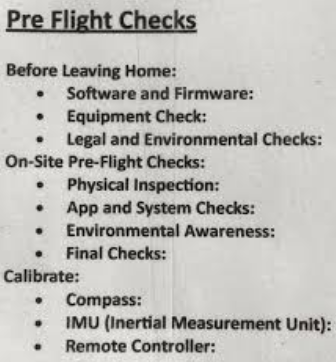
Pre‑Flight Checklist
Before every flight, run through this mental list:
- Battery fully charged and clicked into place.
- Propellers undamaged and correctly mounted.
- Gimbal protector removed, lens clean.
- MicroSD card inserted with sufficient free space.
- Remote controller and drone antennas oriented correctly.
- Home point updated and RTH altitude set.
- GPS lock acquired (at least 10 satellites, shown in white).
- Airspace is clear and legal to fly.
Quick Reference Card
| Action | How |
|---|---|
| Power on battery | Press once, then press and hold for 2 seconds |
| Auto takeoff | Tap the takeoff icon in the app |
| Auto land | Tap the land icon or hold the RTH button long |
| Emergency stop motors | Pull both sticks down and inwards (or outwards) and hold |
| Centre gimbal | Press C1 (if customized) or swipe gimbal slider to 0° |
| Enter Sport mode | Slide flight mode selector all the way right |
| Reset aircraft | Hold battery button 9 seconds until 3 beeps |
| Bind remote | Settings > Control > Re‑Pair to Aircraft |
Download the DJI Mini 4 Pro Cheat Sheet
A one‑page PDF with all button combos, flight modes, camera settings, battery care, and the pre‑flight checklist. Keep it on your phone when you’re in the field with no signal.
“DJI Mini 4 Pro Quick Guide (PDF)”
Official DJI Support Page
For firmware downloads, warranty, and DJI’s official digital manual, visit:
https://www.dji.com/support/product/mini-4-pro
Final Word
The DJI Mini 4 Pro is an incredibly capable little drone, but its official documentation doesn’t speak the language of a real pilot. This manual gives you the practical know‑how to fly safely, capture stunning footage, and troubleshoot the most common issues without scouring forums. Bookmark it, share it with a flying buddy, and revisit it whenever a new setting or warning leaves you stumped.
Wishing you clear skies, strong GPS, and buttery smooth hyper lapses.
Copyright Warning!
© 2026 productsmanuals.com All Rights Reserved.
DJI, Mini, and the DJI logo are trademarks of SZ DJI Technology Co., Ltd. This guide is unofficial and not affiliated with or endorsed by DJI. Any part of this manual cannnot be copied or recreate.