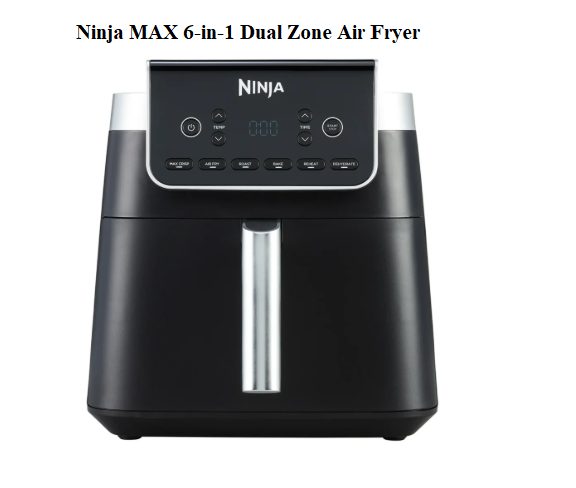
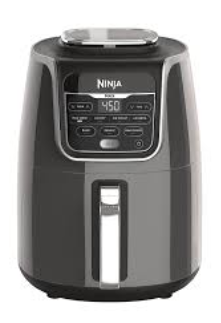
Ninja MAX 6-in-1 Dual Zone Air Fryer
Introduction
The Ninja Air Fryer has become one of the world’s most popular kitchen appliances, and for good reason. It uses rapid air circulation to cook food with up to 75% less fat than traditional frying methods, delivering crispy, golden results without the guilt.
This guide is written for you—the home cook who wants to:
- Set up your Ninja Air Fryer correctly from the very first use.
- Master every button and function with confidence.
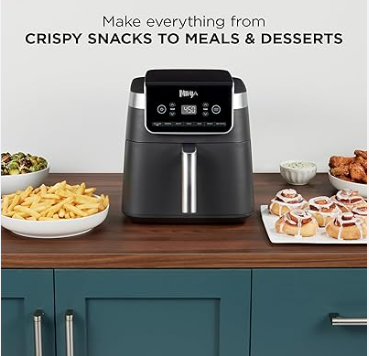
- Cook perfect air-fried meals, from frozen fries to roasted vegetables.
- Troubleshoot common errors like uneven cooking or the unit not turning on.
Whether you own the Ninja Foodie, Ninja Dual Zone, or a classic single-basket model, this manual applies to most popular Ninja air fryer models. Let’s get cooking.
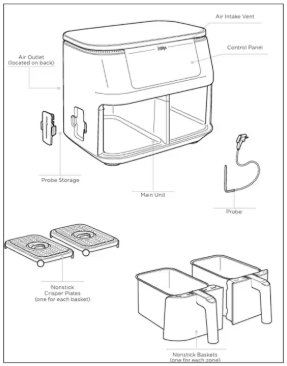
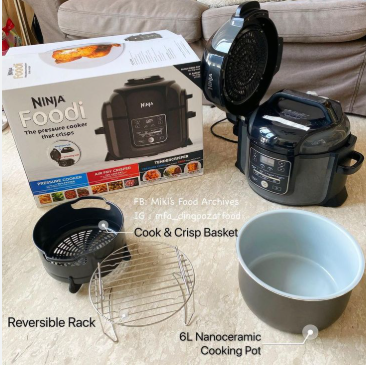
The Box Contains
| Item | Description |
|---|---|
| Main unit | Air fryer base with heating element and fan |
| Cooking basket | Non-stick, dishwasher-safe basket (capacity varies by model: 4qt, 5.5qt, 6.5qt, or 8qt) |
| Crisper plate | Removable plate that elevates food for 360° air circulation |
| Quick start guide | Basic setup instructions |
| Recipe booklet (select models) | 15–25 beginner-friendly recipes |
Missing an item? Contact Ninja customer support with your model number located on the bottom sticker.
Getting Started
First Time Setup
Follow these steps before using your Ninja Air Fryer for the first time.
Step 1 – Unbox and Remove Packaging
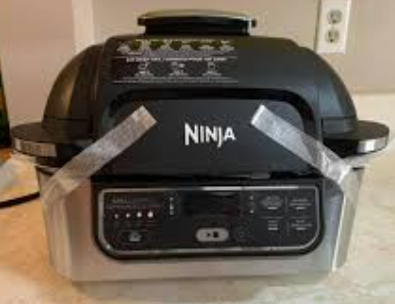
- Remove all packaging materials, including any plastic wrap or tape.
- Remove the cooking basket and check inside for any hidden foam or cardboard.
Step 2 – Wash the Basket and Crisper Plate
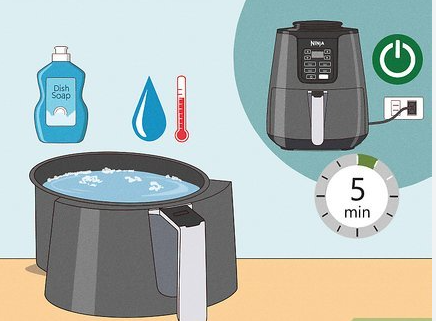
- Wash the cooking basket and crisper plate with warm, soapy water.
- Rinse thoroughly and dry completely.
- These parts are dishwasher-safe (top rack only).
- Do not wash the main unit. Never submerge it in water.
Step 3 – Wipe the Main Unit
- Wipe the interior and exterior of the main unit with a damp cloth.
- Let it dry completely before plugging in.
Step 4 – Place on a Safe Surface
- Place the air fryer on a flat, heat-resistant surface.
- Leave 5 inches (13 cm) of clearance around all sides for proper ventilation.
- Do not place near walls, curtains, or cabinets.
Step 5 – Run a Test Cycle (Burn-Off)
- Before cooking food, run an empty cycle to burn off any factory residue:
- Plug the unit in.
- Insert the empty basket and crisper plate.
- Set temperature to 450°F (200°C).
- Set time to 10 minutes.
- Press Start.
- Some smoke or a slight odor is normal during this first use.
- Your Ninja Air Fryer is now ready for cooking.
Control Panel & Button Functions
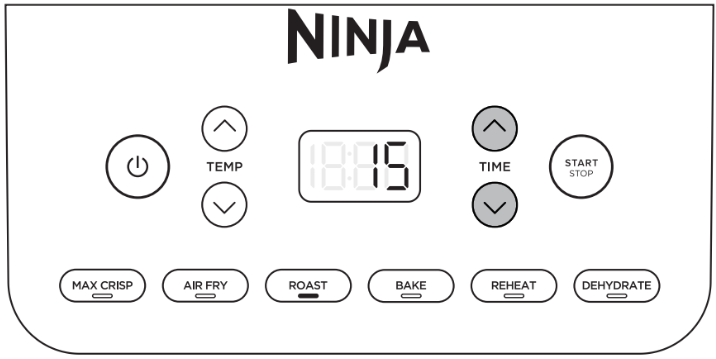
| Button | Icon | Function |
|---|---|---|
| Power | ⏻ | Turns unit on/off. Press and hold to shut down completely. |
| Temp (↑/↓) | + / – | Adjust cooking temperature (typically 105°F to 400°F / 40°C to 200°C). |
| Time (↑/↓) | + / – | Adjust cooking time in 1-minute increments (up to 60–120 minutes depending on model). |
| Air Fry | 🍟 | Default mode – rapid hot air for crispy results. |
| Roast | 🍗 | Gentler heat for roasting meats and vegetables. |
| Reheat | 🔄 | Low-temperature reheating without drying out food. |
| Dehydrate | 🥭 | Low fan heat for making dried fruit, jerky, or herbs. |
| Keep Warm | 🔥 | Maintains 150°F (65°C) for up to 2 hours after cooking. |
| Start/Stop | ▶/⏹ | Begins or pauses cooking. |
| Dual Zone (select models) | ↔️ | Syncs both baskets to finish at the same time. |
Pro tip: For Dual Zone models, use the MATCH button to copy settings from Zone 1 to Zone 2.
Cooking Functions Guide
| Function | Best For | Temperature Range | Notes |
|---|---|---|---|
| Air Fry | French fries, chicken wings, onion rings, frozen snacks | 300°F – 400°F | Shake basket halfway through for even crispiness. |
| Roast | Whole chicken, roasted vegetables, meatloaf | 250°F – 400°F | Use crisper plate for better air circulation. |
| Reheat | Leftover pizza, fried foods, leftovers | 250°F – 310°F | Faster than a microwave and restores crispiness. |
| Dehydrate | Apple chips, beef jerky, dried herbs | 105°F – 165°F | Runs for several hours at low fan speed. |
| Keep Warm | Holding food until serving | 150°F | Activates automatically after cooking on some models. |
Cooking Time & Temperature Chart
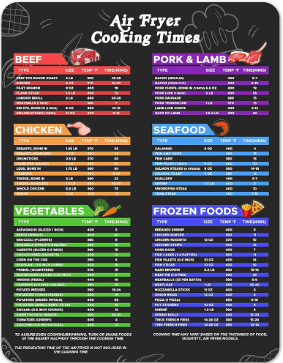
| Food | Temperature (°F) | Temperature (°C) | Time (minutes) | Notes |
|---|---|---|---|---|
| Frozen french fries | 400°F | 200°C | 12–15 | Shake basket halfway |
| Chicken wings | 380°F | 193°C | 20–25 | Flip halfway |
| Chicken breast (boneless) | 375°F | 190°C | 15–18 | Check internal temp (165°F) |
| Salmon fillet | 390°F | 199°C | 8–10 | No flipping needed |
| Steak (1-inch thick) | 400°F | 200°C | 10–12 (medium-rare) | Flip halfway |
| Broccoli | 375°F | 190°C | 6–8 | Toss with oil |
| Brussels sprouts | 380°F | 193°C | 10–12 | Shake basket halfway |
| Baked potato | 400°F | 200°C | 35–40 | Poke with fork first |
| Frozen mozzarella sticks | 380°F | 193°C | 6–8 | No thawing needed |
| Bacon | 375°F | 190°C | 7–9 | Place in single layer |
| Donuts (canned biscuit dough) | 350°F | 175°C | 5–7 | Flip halfway |
| Apple chips (dehydrate) | 135°F | 57°C | 4–5 hours | Slice thin |
Times are estimates. Always check food for doneness, especially meat and poultry.
Cleaning & Maintenance

| Task | Frequency | How To |
|---|---|---|
| Clean basket and crisper plate | After every use | Wash with warm soapy water. Dishwasher safe (top rack). |
| Wipe main unit | After every use | Use a damp cloth. Never submerge. |
| Clean heating element | Weekly (if used daily) | After unit cools, wipe with damp cloth to remove grease splatters. |
| Deep clean | Monthly | Soak basket in warm soapy water for 15 minutes. Use soft brush on hard-to-reach areas. |
| Check vents | Monthly | Ensure air intake and exhaust vents are free of dust or debris. |
Never use metal utensils, steel wool, or abrasive cleaners on the non-stick coating.
Troubleshooting Common Issues
| Problem | Likely Cause | Solution |
|---|---|---|
| Unit won’t turn on | Not plugged in, or basket not fully inserted | Check power cord. Push basket firmly until it clicks. |
| Food not crispy | Basket overcrowded or not enough oil | Cook in single layer. Lightly spray or toss with 1 tsp oil. Shake basket halfway. |
| Uneven cooking | Food piled up or not shaken | Shake or flip food halfway through cooking time. |
| Unit smoking | Grease buildup on heating element | Clean heating element. Avoid cooking high-fat foods at max temperature. |
| Error code “E1” | Temperature sensor issue | Unplug for 1 minute, then restart. If persists, contact Ninja. |
| Error code “E2” | Circuit communication error | Unplug for 1 minute. If persists, contact Ninja support. |
| Unit turns off mid-cycle | Overheating protection activated | Let unit cool for 30 minutes. Clean vents. |
| Display flickers or freezes | Power fluctuation or software glitch | Unplug for 2 minutes, then plug back in. |
| Basket won’t close | Crisper plate not seated correctly | Remove plate and reinsert flat. |
| Food burning on top | Temperature too high or too close to heating element | Lower temperature by 25°F. Parchment paper liners can help. |
For Dual Zone Models:
| Problem | Solution |
|---|---|
| Smart Finish not working | Both zones must have same cook time. Adjust time in one zone to match the other. |
| One zone not heating | Check that basket is fully inserted. Try restarting unit. |
Prefer the official PDF from Ninja? Visit ninjakitchen.com/support and search for your model number.
Final Tips & Next Steps
You now have everything you need to master your Ninja Air Fryer. Here’s how to get even more value:
- Preheat for 3 minutes before adding food – this ensures maximum crispiness.
- Don’t overcrowd – air needs space to circulate. Cook in batches if needed.
- Shake or flip halfway through for even browning.
- Use a tiny amount of oil – spray or toss lightly (1–2 teaspoons is usually enough).
- Bookmark this page – you’ll reference the troubleshooting section again.
Help Others Find This Guide
If this guide saved you time or made your air fryer meals better, please:
- Share this page on Reddit (r/airfryer, r/ninja), Facebook, or Pinterest
- Link to us from your food blog, forum post, or recipe site
- Leave a comment below – we read every message and answer questions
- Rate this guide – your feedback helps us improve
Copyright Notice
© 2026 ProductsManuals.com – Original content written for real users. You may print or save one copy for personal use. Redistribution, scraping, or republishing without permission is prohibited.
Thank you for using ProductsManuals.com – we make product manuals simple.