
September 27, 2026

How To Install A.O. Smith HSE-SDS-015 Water Heater Yourself

A.-O.-logo-Productsmanuals.com

How To Install A.O. Smith HSE-SDS-015 Water Heater Yourself

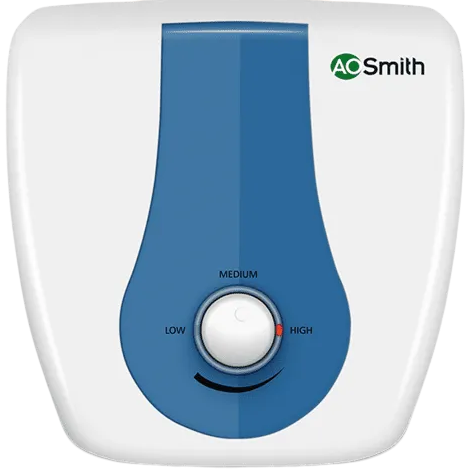
A.-O.-Smith-HSE-SDS-015-Manual-–-Setup-&-Troubleshooting-Product-img-Productsmanuals.com

Introduction

The A. O. Smith HSE-SDS-015 is a 15-litre vertical storage water heater designed for bathrooms with large wall spaces. It is part of A. O. Smith’s 5-star rated HSE-SDS line, known for its energy efficiency and durable Blue Diamond glass-lined tank. This manual covers everything you need to know about installing, operating, and maintaining your geyser, from temperature adjustment to safety features and troubleshooting.

Product Overview

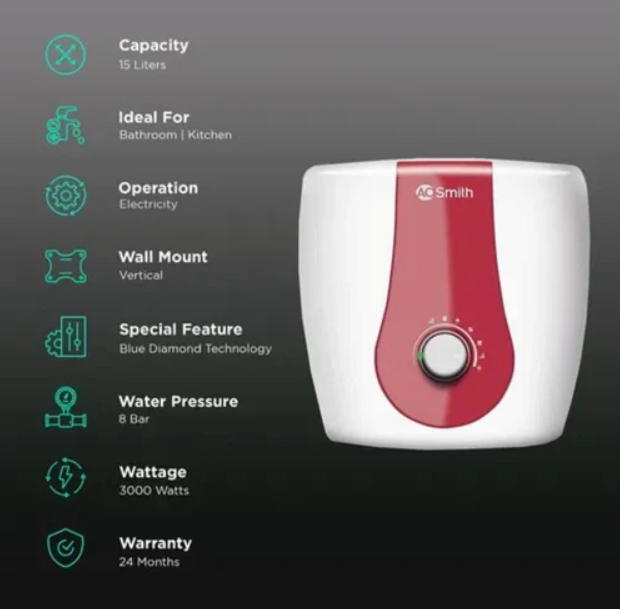
The HSE-SDS-015 is a compact vertical storage water heater with a 15-litre capacity, ideal for small to medium households. It features a 2000W heating element, a temperature range of 25°C to 75°C, and an 8-bar pressure rating that makes it suitable for high-rise buildings. The ABS plastic body is rust-proof and impact resistant, while the Blue Diamond glass-lined inner tank provides superior corrosion resistance. The geyser includes a thermal cutout for safety and a multi-function safety valve that automatically relieves pressure if it exceeds preset limits.

Full Specifications
A.-O.-Smith-HSE-SDS-015-Manual-–-Setup-&-Troubleshooting-fig-1-Productsmanuals.com

Specification Detail
Model HSE-SDS-015
Type Vertical Storage Water Heater
Capacity 15 Litres
Power 2000 W
Voltage / Frequency 230 V / 50 Hz
Rated Water Pressure 8 Bar
Temperature Range 25°C to 75°C
Reheating Time (35°C rise) 18 minutes
Net Weight 9.81 kg
Dimensions 373 x 373 x 348 mm
Inner Tank Blue Diamond Glass Lined
Heating Element Glass Coated
Body Material ABS Plastic (Rust-proof)
Energy Rating BEE 5-Star
Warranty 7 years on inner tank, 4 years on heating element, 2 years comprehensive

Key Features

  • Blue Diamond Glass Lining: The inner tank is coated with a patented glass lining that is stronger and more corrosion-resistant than standard tanks, extending the life of the water heater.
  • Glass Coated Heating Element: The heating element is coated with glass to prevent scale and sediment buildup, which can lead to premature failure.
  • Temperature Control Knob: A simple knob allows you to set the water temperature precisely between 25°C and 75°C.
  • Thermal Cutout: If the water temperature exceeds a preset level, the thermal cutout automatically cuts off the power supply for safety.
  • Safety Valve: The multi-function safety valve automatically relieves pressure and discharges water if the pressure overshoots the preset limit.
  • 5-Star Energy Rating: The geyser is one of the most energy-efficient models available, helping to reduce electricity costs.
  • PUF Insulation: High-density PUF injection ensures zero gaps between the tank and insulation, preventing heat loss and keeping water hot for longer.

How to Use

What’s in the Box
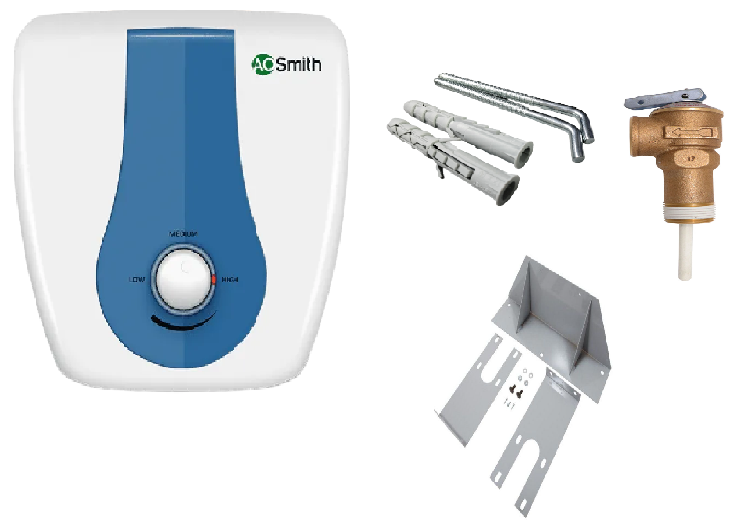
A.-O.-Smith-HSE-SDS-015-Manual-–-Setup-&-Troubleshooting-fig-2-unboxing-Productsmanuals.com

  • A. O. Smith HSE-SDS-015 water heater
  • User manual and warranty card
  • Mounting brackets and screws
  • Safety valve
  • Installation kit

First-Time Setup

  1. Installation: The geyser must be installed vertically on a wall capable of supporting its weight. It is recommended to have installation performed by an authorized A. O. Smith technician.
  2. Connect Water Supply: Connect the inlet pipe to the cold water supply and the outlet pipe to your hot water tap. Ensure all connections are sealed with Teflon tape to prevent leaks.
  3. Connect Power: Plug the geyser into a grounded 230V outlet. Do not use an extension cord.
  4. Fill the Tank: Open the hot water tap and allow the tank to fill completely with cold water. Once water flows steadily from the tap, the tank is full. Close the tap.
  5. Power On: Turn on the power switch. The heating indicator light will glow, indicating the element is heating the water.

Installation Guide

The A. O. Smith HSE-SDS-015 must be installed vertically on a solid wall that can support its weight (approximately 10 kg when filled). A. O. Smith recommends installation by an authorized technician to ensure safety and warranty compliance. If you are installing it yourself, follow these steps carefully.

Tools and materials needed:

  1. Drill with masonry bits
  2. Spirit level
  3. Adjustable wrench
  4. Teflon tape
  5. Mounting brackets and screws (included)
  6. Safety valve (included)
  7. Pipe wrench

Step-by-step installation:

  1. Choose the location: Select a dry, indoor location close to a power outlet and water supply. The geyser should be at least 30 cm away from any combustible surface. Ensure the wall is strong enough to bear the weight.
  2. Mark the mounting holes: Hold the mounting bracket against the wall and use a spirit level to ensure it is perfectly horizontal. Mark the four screw holes with a pencil.
  3. Drill the holes: Use a masonry drill bit suitable for your wall type (concrete, brick, or tile). Drill holes to the depth of the wall anchors. Insert the anchors.
  4. Secure the bracket: Screw the mounting bracket firmly into the wall anchors. Ensure it is tight and cannot wobble.
  5. Mount the geyser: Lift the geyser and hook it onto the mounting bracket. Ensure it sits securely and is level.
  6. Connect the safety valve: Apply Teflon tape to the threads of the safety valve and screw it into the designated port on the geyser. Tighten with a wrench. Do not overtighten.
  7. Connect the inlet pipe: Connect the cold water inlet pipe to the inlet port. Apply Teflon tape to the threads. Tighten securely.
  8. Connect the outlet pipe: Connect the hot water outlet pipe to the outlet port. Apply Teflon tape and tighten.
  9. Connect the drain pipe: Connect a drain pipe to the safety valve outlet and route it to a floor drain or bucket. This allows water to escape safely if the valve releases pressure.
  10. Fill the tank: Open the hot water tap and allow the tank to fill. Once water flows steadily from the tap, close it. The tank is now full.
  11. Check for leaks: Inspect all connections for leaks. Tighten any that are dripping.
  12. Connect power: Plug the geyser into a grounded 230V outlet. Turn on the power switch.

Important: Never turn on the geyser before the tank is full. Running the heating element in an empty tank will damage it within seconds.

Maintenance Schedule

Regular maintenance extends the life of your geyser and keeps it running efficiently. Follow this schedule for best results.

Frequency Task
Monthly Check for leaks around pipe connections and the safety valve. Test the safety valve by lifting the lever briefly to ensure it is not stuck.
Every 3 months Inspect the heating element for scale buildup if you live in a hard water area. Clean or descale if necessary.
Every 6 months Check the magnesium anode rod (if equipped) and replace it if it is more than 50% consumed. The anode rod protects the tank from corrosion.
Annually Drain and flush the tank to remove sediment. Check the thermal cutout and thermostat for proper operation. Inspect the power cord for damage.
Every 2 years Have a qualified technician inspect the internal components, including the heating element, thermostat, and safety valve.
Every 5-7 years Depending on water quality and usage, the tank may need to be replaced. The Blue Diamond glass lining is durable, but all tanks eventually corrode.

How to drain and flush the tank:

  1. Turn off the power supply at the circuit breaker.
  2. Close the cold water inlet valve.
  3. Open a hot water tap to relieve pressure.
  4. Connect a hose to the drain valve at the bottom of the geyser.
  5. Route the hose to a floor drain or outside.
  6. Open the drain valve and allow the tank to empty completely.
  7. Once empty, open the cold water inlet briefly to flush out sediment. Repeat until the water runs clear.
  8. Close the drain valve, remove the hose, and refill the tank.
  9. Restore power.

Energy Saving Tips

Water heating accounts for a significant portion of household electricity bills. These tips can help you reduce energy consumption without sacrificing comfort.

  • Set the temperature to 55°C: Most households do not need water hotter than 55°C. Every 5°C reduction in temperature can save 3-5% on water heating costs.
  • Turn off the geyser when not in use: If you only need hot water in the morning, turn off the geyser after your morning shower. Use a timer plug to automate this.
  • Insulate the pipes: Insulating the first 2-3 metres of hot water pipes reduces heat loss and delivers hotter water to the tap faster.
  • Fix leaks promptly: A dripping hot water tap wastes both water and the energy used to heat it.
  • Use low-flow showerheads: Less hot water used means less energy consumed.
  • Install a timer: If your geyser does not have a built-in timer, use an external plug-in timer to heat water only during the hours you need it.
  • Consider a solar water heater: If you live in a sunny area, a solar water heater can pre-heat water before it enters the electric geyser, reducing electricity consumption by up to 70%.
  • Use the 5-star rating wisely: The HSE-SDS-015 is already highly efficient. To maximize savings, avoid setting the temperature higher than necessary and avoid leaving the geyser on 24/7.

Comparison with Other Models

Feature HSE-SDS-015 HSE-SDS-025 HSE-VAS-X-015 Elegance Slim Neo 15H
Capacity 15 Litres 25 Litres 15 Litres 15 Litres
Type Vertical Vertical Vertical Horizontal
Power 2000 W 2000 W 2000 W 2000 W
Pressure Rating 8 Bar 8 Bar 8 Bar 8 Bar
Inner Tank Blue Diamond Glass Blue Diamond Glass Blue Diamond Glass Blue Diamond Glass
Energy Rating 5-Star 5-Star 5-Star 5-Star
Warranty (Tank) 7 Years 7 Years 7 Years 7 Years
Ideal For Small bathrooms Large bathrooms Small bathrooms Tight spaces
Weight 9.81 kg 13.5 kg 9.5 kg 11 kg

Common Mistakes to Avoid

  • Turning on the geyser before filling the tank: This is the most common and most damaging mistake. The heating element will burn out within seconds if it is not submerged in water. Always fill the tank first.
  • Setting the temperature to maximum: Setting the knob to 75°C wastes energy, increases the risk of scalding, and accelerates scale buildup. Set it to 55°C for most uses.
  • Ignoring the safety valve: The safety valve is a critical safety component. Never block it, plug it, or remove it. Test it monthly to ensure it is not stuck.
  • Using an extension cord: The geyser draws 2000W, which can overload an extension cord and cause a fire. Plug it directly into a grounded wall outlet.
  • Skipping maintenance: Sediment buildup and a corroded anode rod are the leading causes of tank failure. Follow the maintenance schedule.
  • Installing on a weak wall: A 15-litre geyser weighs approximately 25 kg when filled. Ensure the wall can support this weight. Use appropriate anchors for your wall type.
  • Ignoring leaks: Even a small leak can cause significant water damage and indicates a problem that will worsen over time. Fix leaks immediately.
  • Using the geyser with hard water without descaling: Hard water causes scale to build up on the heating element, reducing efficiency and shortening its life. Descale regularly if you live in a hard water area.

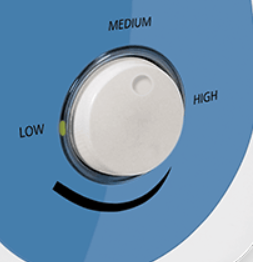
Temperature Control

A.-O.-Smith-HSE-SDS-015-Manual-–-Setup-&-Troubleshooting-Temperature-Control-Productsmanuals.com

  • Locate the temperature control knob on the front of the geyser.
  • Turn the knob clockwise to increase the temperature and counter-clockwise to decrease it.
  • The recommended setting for most households is between 50°C and 60°C. Setting it higher than 60°C increases the risk of scalding and wastes energy.
  • The heating indicator light will turn off once the water reaches the set temperature.

Daily Use

  • The geyser will automatically maintain the water temperature at the set level. It will reheat as needed.
  • For optimal energy savings, turn off the geyser when not in use, especially during long periods away from home.
  • If you need hot water quickly, you can set the temperature knob to the maximum (75°C) for faster heating, but remember to lower it for regular use.

Troubleshooting & Common Problems

Problem Likely Cause What to Try
No hot water No power, tripped thermal cutout, or faulty heating element Check that the power switch is on and the outlet is working. Reset the thermal cutout (if accessible). If the element is faulty, contact service.
Water is not hot enough Temperature knob set too low Turn the knob clockwise to increase the temperature.
Water is too hot Temperature knob set too high Turn the knob counter-clockwise to lower the temperature.
Leaking from the safety valve Normal pressure relief, or excessive pressure The safety valve may release water during heating. If it leaks continuously, the inlet pressure may be too high. Install a pressure reducing valve.
Leaking from pipe connections Loose fittings Tighten the connections. If the leak persists, replace the washers or apply new Teflon tape.
Heating indicator light not glowing No power, or faulty indicator Check the power supply. If the geyser is heating but the light is off, the indicator may need replacement.
Geyser makes a hissing sound Normal during heating This is the sound of the heating element. If the sound is loud or accompanied by a burning smell, turn off the power and contact service.
Water has a strange smell Sediment buildup in the tank Drain and flush the tank. If the smell persists, contact service for a descaling.

Warranty & Service Information

The A. O. Smith HSE-SDS-015 comes with one of the most comprehensive warranties in the electric geyser market. Understanding what is covered, what is not, and how to claim service will help you get the most from your investment.

Warranty Coverage

Component Warranty Period
Inner Tank 7 Years
Heating Element 4 Years
Comprehensive Product 2 Years

The 7-year inner tank warranty covers leakage or failure due to manufacturing defects in the Blue Diamond glass lining. The 4-year heating element warranty covers the glass-coated element against failure under normal use. The 2-year comprehensive warranty covers all other parts and labour for manufacturing defects.

What Is Covered

  • Manufacturing defects in the inner tank, heating element, thermostat, thermal cutout, safety valve, and other electrical components.
  • Leakage from the inner tank due to a manufacturing defect.
  • Failure of the heating element under normal operating conditions.
  • Free service visits during the warranty period for covered defects.

What Is Not Covered

  • Damage caused by improper installation, incorrect voltage, or use of an ungrounded outlet.
  • Damage from hard water scale buildup, sediment, or lack of maintenance.
  • Physical damage from dropping, impact, or improper handling.
  • Damage from lightning, power surges, or floods.
  • Normal wear and tear of consumable parts (e.g., gaskets, washers, magnesium anode rod).
  • Products with altered or removed serial numbers.
  • Damage caused by unauthorized repair or modification.

How to Claim Warranty Service

  1. Locate your invoice: The warranty is valid only with proof of purchase. Keep your original invoice or a digital copy.
  2. Note the serial number: The serial number is on the rating label on the side or bottom of the geyser.
  3. Contact A. O. Smith Customer Care: Call the toll-free number or visit the website to register a complaint.
  4. Schedule a service visit: A technician will be assigned to inspect the product. If the defect is covered under warranty, the repair or replacement will be done free of charge.
  5. Keep the service report: After the visit, ask for a service report. This is useful for future claims or if the issue recurs.

Service Tips

  • Register your product: Register your geyser on the A. O. Smith website within 30 days of purchase to activate your warranty and receive updates.
  • Keep the invoice safe: Without proof of purchase, the warranty may be denied. Store the invoice in a safe place or take a photo of it.
  • Use authorized service only: Unauthorized repairs void the warranty. Always call A. O. Smith customer care for service.
  • Follow the maintenance schedule: Regular maintenance, including descaling and anode rod replacement, is required to keep the warranty valid. Keep records of maintenance.
  • Be clear about the issue: When calling customer care, describe the problem clearly (e.g., “no hot water,” “leaking from safety valve,” “heating indicator not glowing”) to help the technician prepare.
  • Escalate if needed: If your issue is not resolved within a reasonable time, ask for the service manager or escalate through the website’s grievance portal.

Out-of-Warranty Service

If your geyser is out of warranty, A. O. Smith still provides paid service. The technician will inspect the product and provide an estimate for parts and labour. You can approve the estimate before work begins. Genuine A. O. Smith spare parts are used to ensure quality and safety.

Frequently Asked Questions

  • What is the capacity of the HSE-SDS-015?
    It is a 15-litre storage water heater, suitable for small to medium bathrooms.
  • Is it suitable for high-rise buildings?
    Yes. With an 8-bar pressure rating, it is suitable for high-rise buildings and areas with high water pressure.
  • What is the warranty period?
    It comes with a 7-year warranty on the inner tank, 4 years on the heating element, and 2 years comprehensive warranty on the product.
  • How long does it take to heat water?
    The reheating time for a 35°C rise is approximately 18 minutes.
  • Does it have a temperature display?
    No, it has a temperature control knob, not a digital display. You set the temperature by turning the knob.
  • Can I install it horizontally?
    No, the HSE-SDS-015 is a vertical model. For horizontal installation, look for the HSE-SDS-015-H (horizontal variant).
  • What should I do if the safety valve leaks?
    The safety valve may release water during heating as a normal function. If it leaks continuously, the inlet pressure is likely too high. Contact a plumber to install a pressure reducing valve.

Tips

  • Set the temperature to 55°C: This is hot enough for most uses and reduces the risk of scalding and energy waste.
  • Turn off when not in use: If you don’t need hot water for several hours, turn off the geyser to save electricity.
  • Flush the tank annually: Drain and flush the tank once a year to remove sediment buildup, which improves efficiency and extends the life of the tank.
  • Check the safety valve: Test the safety valve periodically by lifting the lever to ensure it is not stuck.
  • Use a timer: If your geyser does not have a built-in timer, use an external timer to heat water only when needed.

Safety Information

  • Electrical Safety: Ensure the geyser is connected to a grounded outlet. Do not use an extension cord. If the power cord is damaged, it must be replaced by an authorized service technician.
  • Temperature Safety: Water above 60°C can cause scalding. Always test the water temperature before use, especially for children and the elderly.
  • Pressure Safety: Do not block or tamper with the safety valve. It is a critical safety component.
  • Installation: Installation must be performed by a qualified technician. Do not attempt to install the geyser yourself.
  • Maintenance: Only A. O. Smith authorized service personnel should maintain or repair the water heater.
  • Children: Keep children away from the geyser while it is in operation. The outer body can become hot.

You can also save the official manual as a PDF by opening it in your browser and using File > Print > Save as PDF.

Browse all guides at productsmanuals.com .

Copyright 2026 productsmanuals.com. All rights reserved. This A. O. Smith HSE-SDS-015 manual is original content and may not be copied, republished, or redistributed without written permission. A. O. Smith and the A. O. Smith logo are trademarks of A. O. Smith Corporation. This guide is unofficial and not affiliated with A. O. Smith.

Comments

Emerio EB-123177.12 Egg Boiler Manual | Productsmanuals.com - productsmanuals.com

[…] A. O. Smith HSE-SDS-015 Manual – 15-Litre Vertical Storage Water Heater […]

Leave a Reply

Your email address will not be published. Required fields are marked *