
Whirlybird BEB14B Roof Turbine Vent Setup Guide
Introduction
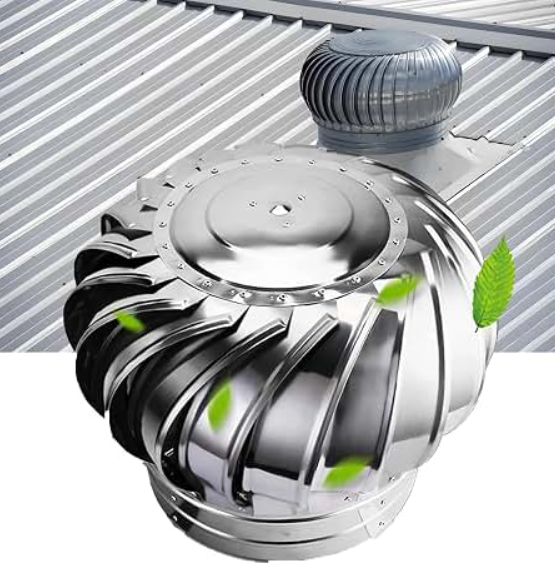
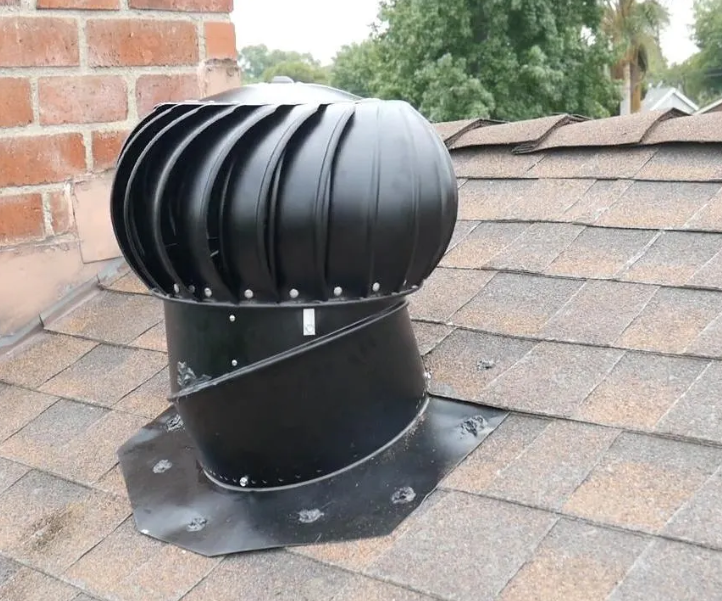
The Whirlybird BEB14B is a 14-inch, externally braced roof turbine vent designed to remove hot, moist air from your attic. Unlike powered attic fans that require electricity, the Whirlybird uses wind power to spin its turbine head, creating a continuous upward draft that pulls stale air out of the attic and replaces it with cooler, drier outside air. This passive ventilation helps protect insulation from moisture damage, reduces the load on your air conditioner, and extends the life of your roof. The BEB14B features a black aluminium finish, a locking clamp for secure installation, and a rotating top for easy levelling. This manual covers installation, maintenance, and troubleshooting so you can get the most from your roof turbine vent.
Full Specifications
| Specification | Detail |
|---|---|
| Model | BEB14B (Whirlybird 14-inch Externally Braced Turbine Vent) |
| Diameter | 14 inches (355 mm) |
| Material | Aluminium, black finish |
| Type | Wind-driven rotary roof ventilator |
| Bracing | Externally braced (visible braces on the outside of the turbine head) |
| Mounting | Roof pitch adjustable elbow and base flashing |
| Roof Pitch Compatibility | Adjustable to match most residential roof pitches |
| Throat Size | 14-inch diameter throat |
| Ventilation Capacity | Approximately 580 CFM at 5 mph wind (for 12-inch model; 14-inch capacity is higher, typically 700–800 CFM depending on wind speed) |
| Warranty | Guaranteed against defects in workmanship, parts, or mechanical failure forever (residential attic use only) |
| In-the-Box | Turbine head, base flashing with adjustable elbow, locking clamp, screws, installation instructions |
| Tools Needed | Screwdriver, level, jig saw, putty knife, utility knife, drill, hammer, tape measure |
Key Features
- Wind-Driven Operation: No electricity required. The turbine spins with the wind, creating a vacuum effect that pulls hot, moist air from the attic.
- Externally Braced Design: The BEB14B has external braces for added stability and durability in high winds.
- Adjustable Roof Pitch: The base flashing and elbow can be adjusted to match your roof pitch, ensuring a proper fit and weather-tight seal.
- Locking Clamp: The turbine head is secured to the base with a locking clamp, preventing it from coming loose in strong winds.
- Rotating Top for Levelling: The top of the elbow can be rotated to ensure the turbine sits level, maximizing spin efficiency.
- All-Weather Aluminium Construction: The black aluminium finish resists rust and corrosion, and is designed to withstand the elements.
- Lifetime Guarantee: Lomanco guarantees the Whirlybird against defects in workmanship, parts, or mechanical failure for residential attic use.
How to Use
What’s in the Box
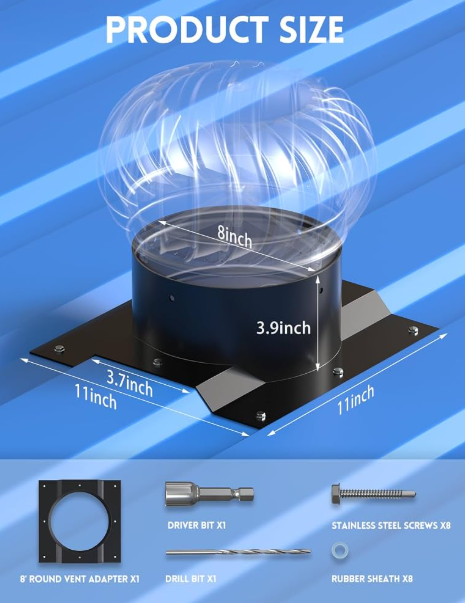
- Turbine head (pre-assembled with external braces)
- Base flashing with adjustable elbow
- Locking clamp
- Mounting screws
- Installation instructions
Installation Overview
Important: Installation should be performed by a qualified professional, especially if you are not comfortable working on a roof. Always follow local building codes and safety standards.
- Determine Roof Pitch: Use the gauge provided in the instructions. Place it on the peak of the roof and read the roof pitch. Align the corresponding pitch number on the elbow with the indicator line on the base flashing. Secure with three screws through the pre-drilled holes.
- Locate the Opening: Place the base opening between rafters and mark the hole to be cut. Locate rafters by tapping the roof. Cut the hole as marked with a jig saw.
- Seal the Hole: Seal around the entire perimeter of the hole with roofing cement.
- Slide Flashing Under Shingles: Slide the top half of the flashing under the shingles. Secure with nails at the top and sides.
- Level the Turbine: Rotate the top of the elbow to a level position by turning it counter-clockwise. Place the locking clamp across the seam and tighten with the included screw.
- Seal All Seams: Seal the adjusting seam, the base/elbow connection seam, the locking clamp holes, and all exposed nails with roofing cement.
- Attach Turbine Head: Position the Whirlybird turbine head on the base. Line up the pre-drilled holes in the brackets and elbow, and fasten with sheet metal screws.
- Check Rotation: After installation, check that the turbine spins freely. In transportation it may have shifted slightly. If necessary, gently pry the lowest point of the turbine upward to remove any wobble.
Placement Tips
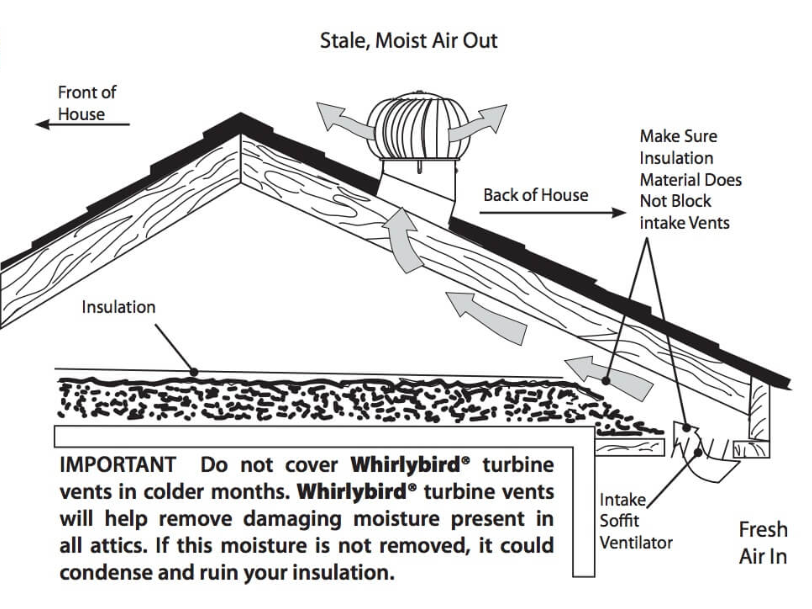
- Install the Whirlybird near the peak of the roof on the rear slope, exposed to wind from all directions.
- For best results, ensure adequate intake vents (soffit vents or gable vents) are present to allow air to enter the attic as the turbine exhausts air.
- For two turbines on a 40-foot roof, place each one 10 feet from each end of the house.
Maintenance
- Annual Inspection: Check the turbine once a year, preferably before storm season. Ensure it spins freely and that the locking clamp is tight.
- Clean Debris: Remove leaves, twigs, or bird nests that may obstruct the turbine or the opening.
- Check Flashing: Inspect the flashing and roofing cement for cracks or deterioration. Re-seal as needed with roofing cement.
- Lubrication: The Whirlybird uses sealed bearings and does not require lubrication. Do not apply oil or grease.
Troubleshooting & Common Problems
| Problem | Likely Cause | What to Try |
|---|---|---|
| Turbine does not spin | Debris, bent shaft, or tight bearing | Remove debris. Gently check if the turbine spins by hand. If it wobbles or grinds, the bearing may be worn. Contact the manufacturer for a replacement. |
| Turbine spins but attic is still hot | Insufficient intake ventilation, or turbine too small | Ensure soffit or gable vents are open and not blocked. Consider adding a second turbine vent for larger attics. |
| Water leaks around the base | Flashing not sealed properly, or roofing cement cracked | Inspect the flashing and seams. Re-seal with roofing cement. Ensure the flashing is properly tucked under shingles. |
| Turbine is noisy | Worn bearing or loose locking clamp | Tighten the locking clamp. If the noise is a grinding sound, the bearing may be failing. |
| Turbine wobbles | Bent shaft or damaged turbine head | Check for visible damage. If the shaft is bent, the unit may need replacement. Minor wobble can sometimes be corrected by gently prying the lowest point upward. |
| Rust or corrosion | Exposure to salt air or acid rain | The aluminium construction resists rust, but in coastal areas, rinse occasionally with fresh water. |
Frequently Asked Questions
- Does the Whirlybird BEB14B require electricity?
No. It is a wind-driven turbine vent that requires no electrical power. It spins with the wind to exhaust attic air. - How much attic ventilation does one Whirlybird provide?
A 14-inch Whirlybird can exhaust approximately 700–800 CFM at moderate wind speeds. For a typical attic, one unit may be sufficient, but larger attics may need two or more. - Can I install the Whirlybird myself?
If you are comfortable working on a roof and have basic carpentry skills, you can install it yourself. However, if you are unsure, hire a professional roofer to ensure a watertight installation. - What is the warranty on the Whirlybird BEB14B?
Lomanco guarantees this product against defects in workmanship, parts, or mechanical failure forever for residential attic use. The guarantee is transferable to subsequent owners. - Does the turbine need maintenance?
Very little. An annual inspection to remove debris and check the flashing is sufficient. The bearings are sealed and do not require lubrication. - Will the turbine vent remove moisture from the attic?
Yes. By continuously exhausting air, it helps remove moisture that can lead to mould, mildew, and insulation damage. - Can I paint the turbine?
The BEB14B comes with a factory black finish. If you wish to paint it, use a paint suitable for aluminium and avoid painting the bearing area.
Tips
- Combine with soffit vents: For optimal airflow, ensure your home has adequate soffit or gable intake vents. Without intake air, the turbine cannot exhaust effectively.
- Install near the peak: The highest point of the roof is where the hottest air accumulates. Placing the turbine near the peak maximizes heat removal.
- Use roofing cement generously: Seal all seams, nail heads, and the base perimeter to prevent leaks.
- Check the turbine before storm season: High winds can loosen the locking clamp. Tighten it annually.
- Consider two turbines for large attics: For attics over 1,500 square feet, two turbines spaced evenly will provide better ventilation than one.
Safety Information
- Roof safety: Working on a roof is dangerous. Use a sturdy ladder, wear non-slip shoes, and never work alone. If you are not experienced, hire a professional.
- Electrical safety: Although the Whirlybird does not use electricity, be aware of nearby power lines when working on the roof.
- Sharp edges: The aluminium flashing and turbine blades have sharp edges. Wear canvas gloves during installation and handling.
- Weather conditions: Do not install the turbine in high winds, rain, or icy conditions. Choose a calm, dry day.
- Local codes: Ensure your installation complies with local building codes, especially regarding roof penetrations and ventilation requirements.
- Fall protection: If working on a steep roof, use fall protection equipment.
Related Manuals
If this guide was helpful, here are a few more popular manuals from productsmanuals.com that you might find useful:
- Samsung Galaxy Watch 7 Manual – Health Sensors, Galaxy AI & Battery Tips
Master ECG, body composition, sleep apnea detection, and more. - Hunter Builder Deluxe 53090 Ceiling Fan Manual – Pull Chain, Reversible Motor & Balancing
Install and maintain a traditional ceiling fan with reversible blades. - GFC Aura GF-5603 Ceiling Fan Manual – Remote Control, LED Light & Decorative Blades
Set up and balance your decorative GFC ceiling fan. - Honeywell T5 Smart Thermostat Manual – Geofencing, App Setup & Scheduling
Automate your home’s heating and cooling for comfort and savings. - Dell Inspiron 15 3520 Manual – Laptop Setup, Upgrades & Troubleshooting
Upgrade RAM and SSD, and fix common performance issues.
Browse all guides at productsmanuals.com .
Copyright 2026 productsmanuals.com All rights reserved. This Whirlybird BEB14B roof turbine vent manual is original content and may not be copied, republished, or redistributed without written permission. Whirlybird, Lomanco, and the Whirlybird logo are trademarks of Lomanco, Inc. This guide is unofficial and not affiliated with Lomanco.
