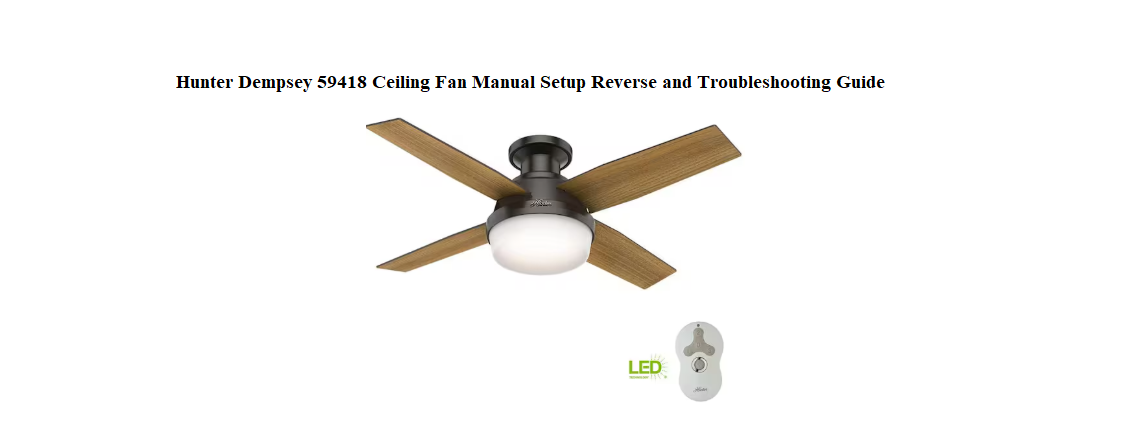
Hunter ships the Dempsey 59418 with a mounting bracket, a remote control, and an installation guide that assumes you’ve installed a dozen fans before. There’s no friendly manual that explains how to pair the remote, what the reverse switch actually does, how to stop a wobble, or why the lights flicker on certain dimmers. So every summer, thousands of people search for a “Hunter Dempsey 59418 manual” looking for clear, step-by-step help.
This companion is the missing instruction book for your fan. I’ve hung this exact model from a living room ceiling, paired the remote three times, switched direction for winter, and figured out the quirks that the official guide glosses over. Whether you’re mounting it for the first time or dealing with a hum that won’t go away, you’ll find the answer here. Bookmark this page—the next time the fan blades won’t spin, the light blinks, or you just want to clean it safely, the fix is right here.
What Comes in the Box
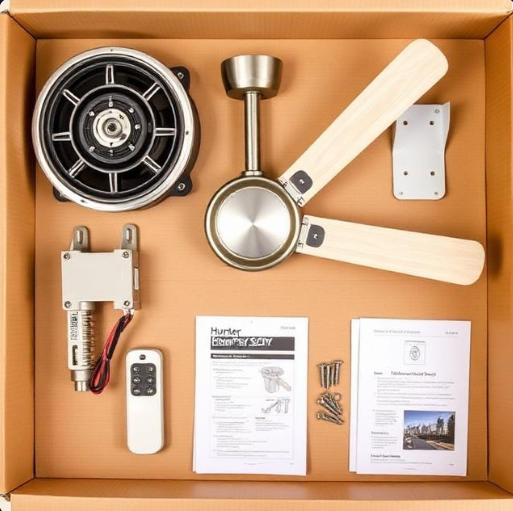
Your box should contain:
- Motor assembly with integrated light fixture (pre-assembled)
- Five wood-grain blades
- Mounting bracket and hardware (screws, washers, wire nuts)
- Handheld remote control with wall cradle
- LED light bulbs (two, already installed in the frosted glass shades)
- Pull chain extensions (optional)
- Installation guide and warranty card
The motor housing is heavy; have a helper hold it while you make the electrical connections.
Installing the Mounting Bracket
Turn off the power
At the main circuit breaker, switch off the electricity to the room where you’re installing the fan. Tape the breaker switch down so no one turns it back on while you’re working.
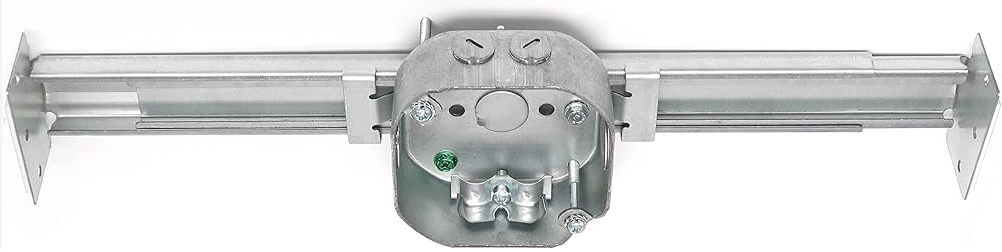
Mount the bracket
- Remove the existing light fixture and the old bracket.
- Attach the Hunter mounting bracket to the ceiling electrical box using the provided screws and washers. The bracket must be tight against the box and level.
- The ceiling box must be rated for fan support (marked “For Fan Support”). A standard light box is not strong enough.
Assemble the downrod
- Thread the wires from the motor housing through the downrod and the canopy.
- Slide the downrod into the motor housing, align the holes, and secure it with the clevis pin and cotter pin. Tighten the set screws on the housing.
- Lift the fan and seat the hanger ball into the mounting bracket. Rotate until the ball locks into the groove.
Wiring the Fan and Light
Connect the wires
- Green or bare copper wire from the ceiling connects to the green ground screw on the bracket and to the green wire from the fan. Secure with a wire nut.
- White wire from the ceiling connects to the white wire from the fan (neutral). Twist together and cap with a wire nut.
- Black wire from the ceiling connects to the black wire from the fan (power). Cap with a wire nut.
If your house has an extra red wire (for a separate light circuit), cap it off. The Dempsey 59418 controls both the fan and light from a single power source via the remote receiver inside the motor housing.
Secure the canopy
Slide the canopy up the downrod to cover the bracket, and tighten the two canopy screws until the canopy is flush with the ceiling. Do not overtighten—the canopy should not press against the hanger ball.
Attaching the Blades and Light Kit
Blade installation
- Match each blade with the blade bracket (already attached to the motor). The blades are non-reversible.
- Insert two screws through each blade and into the bracket. Tighten evenly, but do not overtighten. Overtightening can warp the blade and cause wobble.
- Once all blades are on, measure the vertical distance from each blade tip to the ceiling. If one blade is noticeably lower, loosen its screws, adjust, and retighten.
Light kit and shades
- Remove the protective disc from the light socket area if it’s still in place.
- The LED bulbs should already be installed. If not, screw in the included bulbs.
- Align the frosted glass shade with the threaded posts on the light fixture, then secure it with the thumbscrews. Do not use a tool; finger-tighten only.
Pairing the Remote and Understanding the Buttons

The Dempsey 59418 comes with a handheld remote that controls fan speed and light brightness.
Pairing the remote
- Turn the wall switch (or breaker) on to supply power to the fan.
- Within 3 minutes of turning on power, press and hold the “Fan Off” button on the remote for 5 seconds.
- The light on the fan will blink once and the fan may click. The remote is now paired.
Remote buttons
- Fan Speed (1–4): Each press increases speed. 1 is low, 4 is high.
- Fan Off: Stops the fan instantly.
- Light: Press once to turn the light on or off. Press and hold to dim or brighten the LED bulbs.
- Reverse: Press once to change the fan’s direction. The blades will slow, stop, and start spinning in the opposite direction. The small indicator on the remote shows the current direction.
Wall cradle
The remote stores in a wall-mount cradle that can be screwed next to the existing light switch. The cradle acts as a convenient wall controller.
Using the Reverse Function for Summer and Winter
The reverse feature is one of the main reasons to own a ceiling fan, but many owners never use it.
Summer mode (counter-clockwise)
The blades push air straight down, creating a cooling wind chill. Use this mode on warm days. Run the fan on high speed for maximum cooling effect.
Winter mode (clockwise)
The blades pull air up toward the ceiling and push warm air (which naturally rises) down the walls. This recirculates the heat trapped near the ceiling and makes the room feel warmer. Run the fan on low speed in winter to avoid a draft.
How to change direction
Press the Reverse button on the remote. The fan will slow, stop, and restart in the opposite direction. A small arrow or LED on the remote indicates which direction is active. The fan should be running when you press the button.
Troubleshooting Common Issues
| Problem | Likely Cause | What to Try |
|---|---|---|
| Fan won’t start | Power or remote pairing | Check the circuit breaker and wall switch. Re-pair the remote (press Fan Off for 5 seconds within 3 minutes of power on). |
| Remote not working | Dead battery or pairing lost | Replace the A23 12V battery in the remote (slide off the back cover). Re-pair. |
| Fan wobbles or shakes | Loose blades, unbalanced blades, or loose mounting | Tighten all blade screws and bracket screws. Use a blade balancing kit (included in the box). Check that the mounting bracket is tight against the ceiling box. |
| Light flickers or buzzes | Incompatible dimmer or bulb | The LED bulbs are dimmable only with the included remote. If the light is on a wall dimmer, turn the dimmer to full and use the remote to dim. Replace any third-party bulbs with Hunter-compatible LEDs. |
| Fan hums or buzzes | Speed setting or loose screws | A slight hum on low speed is normal. Check that all blade screws, light screws, and canopy screws are tight. The motor should not make a grinding noise. |
| Fan runs but light doesn’t work | Bulb or connection issue | Check that the bulbs are seated properly. If the bulbs are fine, check the wire connection inside the light kit (turn off power first). |
| Remote controls only one function | Receiver dip switch issue | The remote and receiver are pre-paired at the factory. If you have two similar fans in the same room, interference can occur. Re-pair each fan separately, powering only one at a time. |
Cleaning and Maintenance
Blade cleaning
Dust the blades weekly with a dry microfiber cloth or a long-handled duster. For a deeper clean, mix a few drops of mild dish soap with warm water. Dampen a cloth, wring it out thoroughly, and wipe each blade. Dry immediately with a clean cloth. Never spray water or cleaner directly onto the motor housing.
Light fixture cleaning
Turn the fan and light off and let the bulbs cool. Remove the glass shade by loosening the thumbscrews. Wash the shade in warm, soapy water, rinse, and dry completely before reinstalling.
Check hardware annually
Once a year, climb up (with the power off) and tighten all visible screws: blade screws, bracket screws, canopy screws, and light kit thumbscrews. Over time, vibration can loosen them.
Lubrication
The Dempsey 59418 uses sealed bearings and does not require oiling. If the motor ever becomes stiff or noisy, contact Hunter support—do not attempt to oil it yourself.
How to Reset and Re-Pair the Fan
Soft reset (power cycle)
Turn the wall switch off (or the circuit breaker) for 10 seconds, then turn it back on. The fan will reboot without losing its remote pairing.
Hard reset (re-pair the remote)
- Turn off the circuit breaker for at least 10 seconds.
- Turn the breaker back on. The fan’s receiver enters pairing mode for 3 minutes.
- Within those 3 minutes, press and hold the Fan Off button on the remote for 5 seconds. The fan light will blink or click to confirm pairing.
Reset the remote to factory default
Remove the battery from the remote. Press and hold any button for 10 seconds to drain residual power. Reinstall the battery and re-pair using the steps above.
Quick Reference Card
| Action | How |
|---|---|
| Pair remote | Turn on power, press and hold Fan Off for 5 seconds within 3 minutes |
| Change fan direction | Press Reverse button on remote while fan is running |
| Dim the light | Press and hold Light button |
| Re-pair remote after power outage | Turn off breaker, turn on, press Fan Off for 5 seconds |
| Balance a wobbly blade | Use the included balancing kit (clip and weights) |
| Clean blades safely | Dry microfiber cloth; for deeper clean, use damp cloth with mild soap, dry immediately |
| Replace remote battery | Slide off back cover, replace with A23 12V battery |