June 13, 2026

Wyze Cam v3 Manual – Complete Setup, Settings and Troubleshooting Guide

Wyze-logo-productsmanuals.com

Wyze Cam v3 Manual – Complete Setup, Settings and Troubleshooting Guide

Wyze-Cam-v3-Manual –-Complete-Setup,-Settings-and-Troubleshooting-Guide-product-image

Why This Companion Is Handy

Wyze ships the Cam v3 with a USB cable, a wall adapter, a mounting disc, and a quick‑start card that covers just the basics. The full manual is online, but it doesn’t always answer real‑world questions like “why won’t the camera scan the QR code,” “how do I get the microSD card to work,” or “what does the flashing yellow light mean.” Thousands of people search for a “Wyze Cam v3 manual” every day because they want clear, practical answers. This companion gives you exactly that.

What’s in the Box

Wyze-Cam-v3-Manual –-Complete-Setup,-Settings-and-Troubleshooting-Guide-fig-1

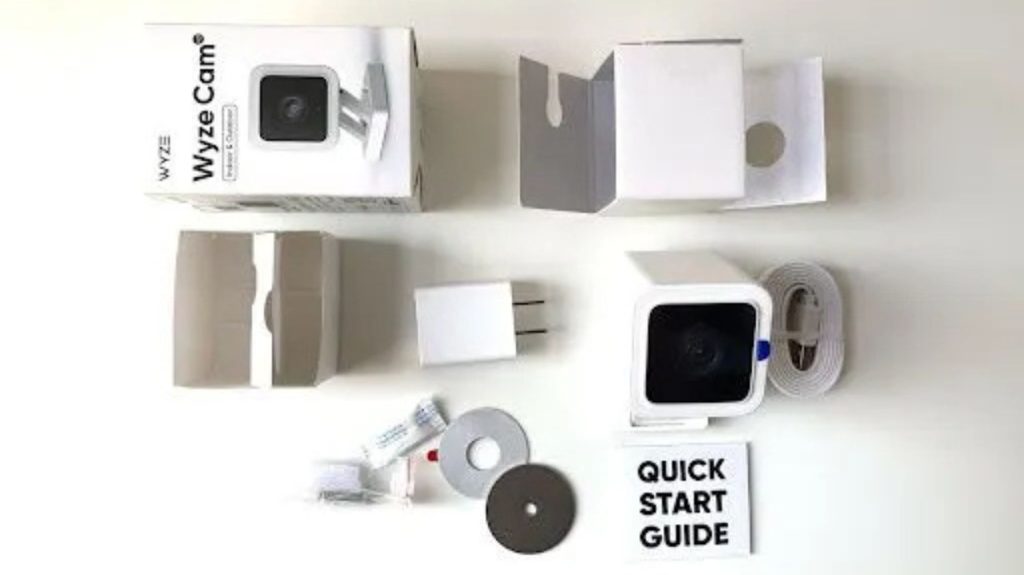
Your package includes:

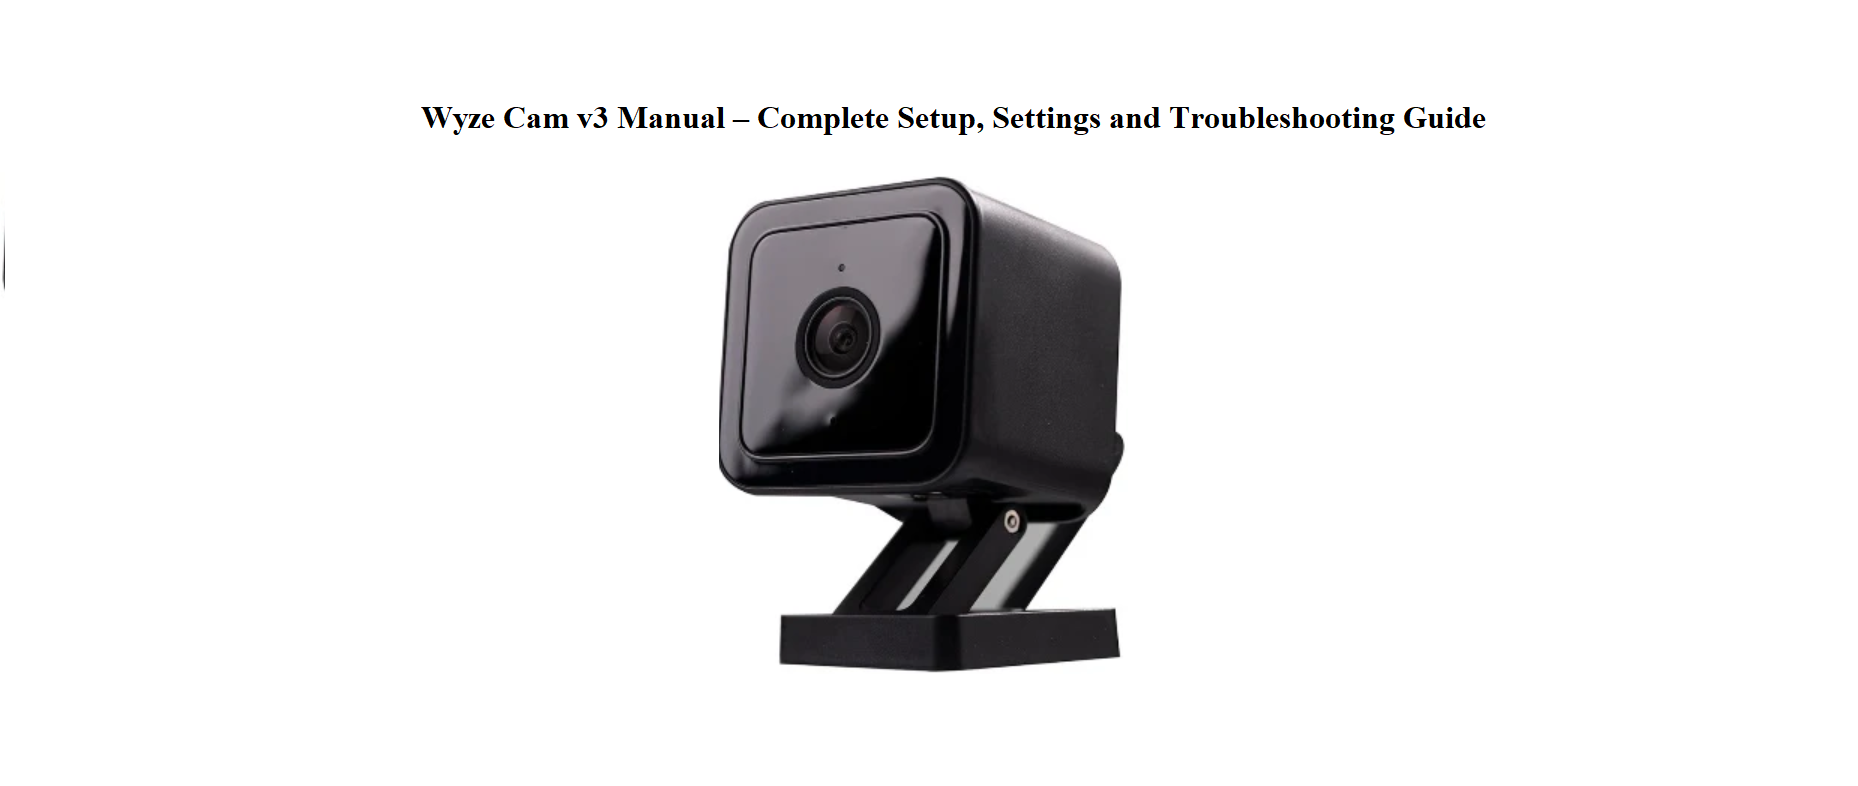
  • The Wyze Cam v3 (indoor/outdoor, magnetic base)
  • A 6‑foot micro‑USB power cable (flat, to fit through window gaps)
  • A USB wall adapter
  • A round metal mounting disc (for sticking to walls)
  • A screw kit with anchors (for permanent mounting)
  • A quick‑start card and safety leaflet

No microSD card is included; you’ll need to buy one separately if you want continuous recording or event playback without a subscription.

Getting to Know the Camera

Wyze-Cam-v3-Manual –-Complete-Setup,-Settings-and-Troubleshooting-Guide-FIG-2

The camera has a few physical features worth knowing by touch.

  • Lens: The black circle on the front. Behind it are two infrared LEDs for night vision.
  • Status light: A small LED on the front. Solid red means powered and working. Flashing red means ready to connect. Flashing blue means connecting to Wi‑Fi. Solid blue means connected.
  • Micro‑USB port: On the back, under a rubber cover. Plug the cable in tightly; a loose connection causes the camera to reboot randomly.
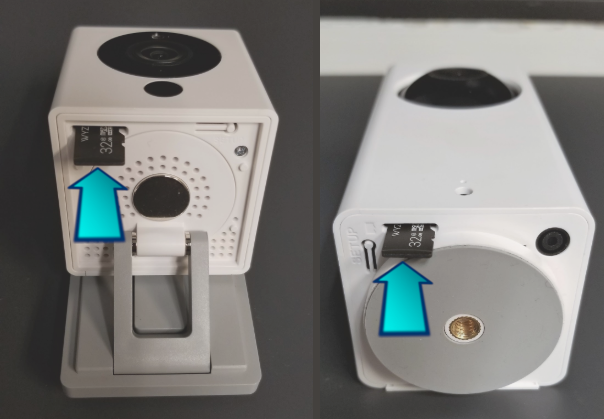
  • microSD slot: Under the same rubber cover, next to the power port. Insert a microSD card (up to 256 GB, FAT32 format) for local recording.
  • Setup button: A small recessed button on the bottom. Press and hold it to factory reset the camera.
  • Magnetic base: The flat bottom is magnetic. You can stick it to any metal surface without tools. The included metal disc can be stuck to a wall for non‑magnetic surfaces.

Setting Up the Camera in the Wyze App

Wyze-Cam-v3-Manual –-Complete-Setup,-Settings-and-Troubleshooting-Guide-Fig-3

  1. Download the Wyze app (iOS or Android) and create a free account.
  2. Plug the camera into the included wall adapter (not a TV USB port — the camera needs steady power).
  3. The status light will flash red after a few seconds. If it doesn’t, press and hold the setup button on the bottom for 10 seconds until it says “Ready to connect.”
  4. In the app, tap the “+” button, then “Add Device” > “Cameras” > “Wyze Cam v3.”
  5. The app will ask you to connect to a 2.4 GHz Wi‑Fi network (the Cam v3 does not support 5 GHz). Enter the password.
  6. The app displays a QR code. Hold the camera about 15–20 cm from the phone screen. The camera will scan the code — you’ll hear a voice prompt saying “QR code scanned.”
  7. Tap “Next.” The camera will connect to your Wi‑Fi. The status light turns solid blue when it’s online.

If the QR code won’t scan, increase your phone’s screen brightness to maximum, remove any screen protector, and ensure the camera is not too close or too far. Try resetting the camera and scanning again.

Mounting the Camera Indoors or Outdoors

The Cam v3 is IP65 weather‑resistant, so it can live outside in rain or snow. Here’s how to mount it securely.

  • Magnetic mount: The base sticks strongly to any steel surface (like a refrigerator, a metal shelf, or a metal junction box). Just place it — no screws needed.
  • Wall mount with disc: Peel the adhesive backing off the metal disc, stick it to a clean, dry wall, then attach the camera magnetically. For outdoor use, place the disc under an eave or overhang to protect the camera from direct heavy rain.
  • Screw mount: For the most permanent hold, use the included screws and anchors. Run the flat USB cable through a window or door gap (the flat design allows the window to close over the cable).

Positioning tip: Place the camera at about 2–2.5 metres high, angled slightly downward. This captures faces clearly and reduces false motion alerts from passing cars or branches.

Status Light and Voice Prompts

Understanding the Status Light and Voice Prompts

The camera communicates through light colours and spoken messages.

Light / Sound Meaning
Solid red Camera is powered on and working
Flashing red Ready to connect (setup mode)
Flashing blue Connecting to Wi‑Fi
Solid blue Connected and streaming
Yellow (solid or blinking) microSD card issue (not formatted, full, or incompatible)
“QR code scanned” The camera has read the Wi‑Fi QR code
“Ready to connect” Setup mode activated
“Pairing is successful” Camera connected to the app

Using a microSD Card

Using a microSD Card for Continuous Recording

Wyze-Cam-v3-Manual –-Complete-Setup,-Settings-and-Troubleshooting-Guide-Fig-4

The camera can record to a microSD card (sold separately). This is optional but highly recommended.

  • Card type: microSD card, up to 256 GB, formatted as FAT32. Use a Class 10 or higher card.
  • Inserting the card: The slot is under the rubber cover on the back. Push the card in until it clicks. The camera may reboot. If the light turns solid yellow, the card needs to be formatted.
  • Formatting: In the Wyze app, tap the live view of the camera, then the gear icon (Settings) > Advanced Settings > Manage microSD Card > Format.
  • Continuous recording: Once formatted, go to Settings > Advanced Settings > Local Recording to microSD Card and choose Continuous. The card will fill up and then overwrite the oldest files.
  • Event recording (without subscription): Without a card, the camera records 12‑second motion clips to the cloud, but there’s a 5‑minute cooldown between clips. With a card, you can set it to record events only, saving space.

Motion Detection and Setting

Motion Detection, Notifications, and Event Settings

  • Motion detection sensitivity: In Settings > Event Recording > Motion Detection, you can set sensitivity from 1 (low) to 100 (high). For outdoor cameras, start around 30 to avoid alerts for every passing leaf. For indoor, 50–60 works well.
  • Detection zone: Tap Detection Zone and drag the grid to block out areas you don’t want monitored (like a busy footpath or a swaying tree). Only motion within the shaded area will trigger alerts.
  • Notifications: In Settings > Notifications, toggle on “Send Notifications.” You can also mute notifications temporarily from the app’s home screen.
  • Person Detection: The Cam v3 can detect people (requires a Wyze Cam Plus subscription in some regions). If enabled, you’ll get fewer false alarms from pets or shadows. Turn it on in Settings > Event Recording > Smart Detection.

Night Vision and Image Settings

  • Night vision modes: In Settings > Advanced Settings > Night Vision, you can choose Auto (switches based on ambient light), On (always infrared black‑and‑white), or Off (stays colour). In low light, the Starlight sensor on the v3 can produce a surprisingly good colour image — leave it on Auto for most situations.
  • IR lights: When night vision is active, you’ll see two faint red dots near the lens. These are the infrared LEDs. If you notice a reflection in a window, move the camera closer to the glass or place a dark cloth behind it to reduce glare.
  • Image rotation: If you mount the camera upside down, go to Settings > Advanced Settings > Rotate Image 180° and toggle it on.

Troubleshooting Common Problems

Problem Likely Cause What to Try
Camera won’t connect to Wi‑Fi Wrong network band or password Ensure you’re using a 2.4 GHz network. Double‑check the password. Move the camera closer to the router during setup.
Status light flashing yellow microSD card not formatted or incompatible Format the card in the app. If the light still blinks yellow, try a different card.
Camera offline in the app Power loss or weak Wi‑Fi signal Check the micro‑USB cable is fully plugged in. Restart the camera by unplugging and replugging. Move the router closer or add a Wi‑Fi extender.
QR code not scanning Glare or low phone brightness Max out phone brightness, clean the lens with a soft cloth, and hold the phone steady about 15 cm away. Remove any screen protector that might blur the code.
No sound in live view Microphone or speaker disabled in app In the live view, tap the microphone icon to enable two‑way audio. Check your phone’s volume.
Camera keeps rebooting Loose USB connection or weak power adapter Use the included adapter and cable. Plug it into a wall outlet, not a TV USB port. Make sure the micro‑USB plug is pushed in all the way.

How to Restart and Factory Reset

Soft restart: Unplug the USB cable, wait 10 seconds, and plug it back in. The camera will reboot and reconnect automatically. No settings are lost.

Factory reset (clear all settings and Wi‑Fi credentials):

  1. Keep the camera powered on.
  2. Press and hold the setup button on the bottom of the camera for about 10 seconds.
  3. The camera will say “Ready to connect” and the status light will flash red. Release the button.
  4. The camera is now in setup mode. Re‑add it in the Wyze app.

Quick Reference Card

Task How
Enter setup mode Press and hold setup button until “Ready to connect”
Format microSD card App > Settings > Advanced Settings > Manage microSD Card > Format
Turn off camera LED Settings > Advanced Settings > Status Light > Off
Share camera access App > camera settings > Share > Add a friend
Rotate image 180° Settings > Advanced Settings > Rotate Image 180°
Toggle night vision Settings > Advanced Settings > Night Vision

Download the Wyze Cam v3 Cheat Sheet

A one‑page PDF with light meanings, setup steps, microSD tips, and reset instructions. Print it and keep it near your router for the next time the camera goes offline.

Wyze Cam v3 Quick Guide (PDF)

Official Wyze Support and Manuals

For warranty, firmware updates, and the official PDF manual, visit: https://support.wyze.com

FAQs

Q. Does the Wyze Cam v3 work without a subscription?
A. Yes. Without a subscription, you get 12‑second motion‑activated cloud clips with a 5‑minute cooldown. You can also insert a microSD card for continuous local recording without any subscription.

Q. Is the Wyze Cam v3 really waterproof?
A. It has an IP65 weather resistance rating, which means it can handle rain, snow, and dust. It’s designed for outdoor use, but it shouldn’t be submerged in water or placed directly in the path of a heavy water jet.

Q. What kind of microSD card should I use?
A. Use a microSD card up to 256 GB, Class 10 or faster, formatted as FAT32. The Wyze app can format the card for you. Avoid using cards larger than 256 GB, as they may not be recognized.

Q. Why does the camera sometimes go offline for no reason?
A. This is often due to a weak Wi‑Fi signal or a loose power connection. Ensure the USB cable is firmly plugged into the camera and the adapter is providing steady power. If the camera is far from the router, consider a Wi‑Fi extender.

Q. How do I stop the camera from recording audio?
A. In the Wyze app, go to Settings > Advanced Settings > Record Sound and toggle it off. This disables audio recording for both cloud clips and microSD recordings.

Q. Can I view the camera on my computer?
A. Wyze does not offer a native desktop app for Windows or Mac, but you can use an Android emulator or view the live stream through a compatible third‑party service if you enable RTSP in Settings > Advanced Settings > RTSP. (The RTSP firmware is separate; check the Wyze website.)

A Quick Sign‑Off

This guide was written to help your Wyze Cam v3 become the quiet, reliable sentinel it was designed to be. May the night vision always stay sharp, the motion alerts always be real, and the microSD card never fail when you need that crucial clip. If a neighbour ever buys the same camera and can’t get it past the yellow blinking light, pass them this page — it’ll save them an hour of frustration.

Copyright Warning!

Copyright 2026 productsmanuals.com All rights reserved. This Wyze Cam v3 manual is original content and may not be copied, republished, or redistributed without written permission. Wyze, Wyze Cam, and the Wyze logo are trademarks of Wyze Labs, Inc. This guide is unofficial and not affiliated with Wyze.

Leave a Reply

Your email address will not be published. Required fields are marked *