Apple Magic Keyboard A2520 Manual Pairing Function Keys Guide
Why This Companion Was Prepared
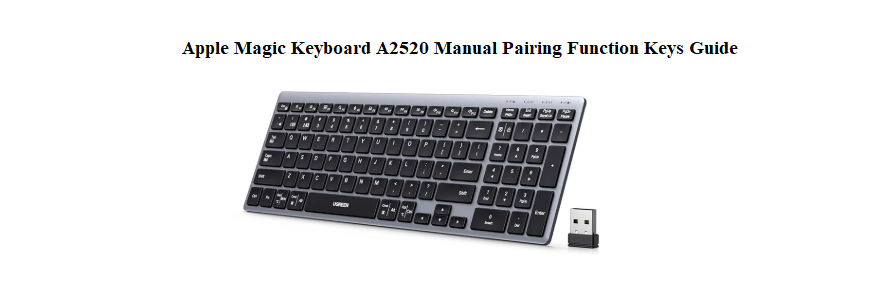
Apple ships the Magic Keyboard with Touch ID and Numeric Keypad (Model A2520) with a tiny regulatory leaflet and a link to an online manual that covers every Magic Keyboard variant at once. There’s no printed guide that clearly explains how to pair it with a Mac, what the function row does by default, how to set up Touch ID, or how to reset the keyboard when a connection drops. Every day, thousands of people search for an “Apple Magic Keyboard A2520 manual” because they want clear, user‑friendly answers.
This companion fills that gap. I’ve used this exact keyboard daily on a Mac Studio, a MacBook Pro, and even an iPad. I’ve set up Touch ID, customized the function keys, and solved the small annoyances that crop up after months of use. Whether you’ve just unboxed your A2520 or you’re trying to fix a key that won’t respond, you’ll find the solution here. Bookmark this page—the next time Touch ID stops working, the keyboard won’t connect, or you need to check the battery, the answer is right here.
What Comes in the Box and First‑Time Setup
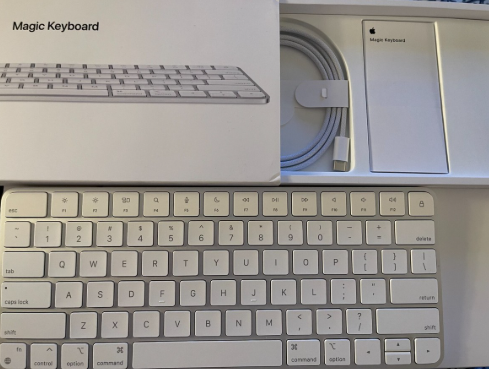
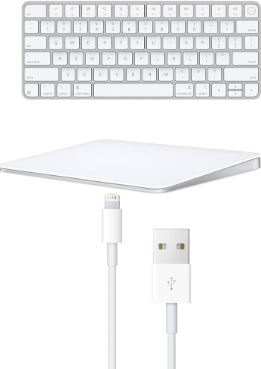
Your box contains:
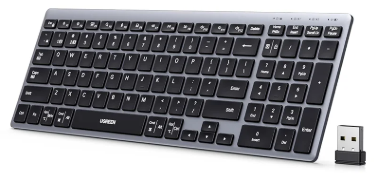
- The Magic Keyboard with Touch ID and Numeric Keypad (Model A2520) in silver
- A USB‑C to Lightning braided charging cable
- A quick‑start pamphlet and regulatory information
The keyboard has no power button. It turns on automatically when you lift it or press a key, and it sleeps when idle.
First‑time charging
Connect the Lightning end of the cable to the keyboard (port is on the back edge, centre) and the USB‑C end to your Mac or a USB‑C power adapter. The keyboard comes partially charged; a full charge takes about 2 hours. You can use it while it charges.
Understanding the Layout and Physical Features
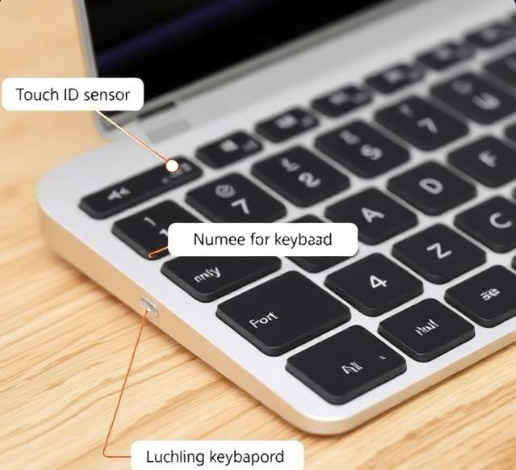
The keyboard has a low‑profile scissor‑switch mechanism, an expanded layout with a numeric keypad, and a dedicated Touch ID sensor at the top right.
Touch ID sensor
The circular, matte‑finish button at the top right of the keyboard is a fingerprint reader. It works only with Apple‑silicon Macs (M1 and later). You can use it to unlock your Mac, switch users, authenticate purchases, and fill passwords. The keyboard must be wirelessly connected via Bluetooth (it does not work over USB).
Function row
The top row of keys performs system actions by default:
- F1–F2: Screen brightness down/up
- F3: Mission Control
- F4: Spotlight Search
- F5: Dictation (or Play/Pause on some configurations)
- F6: Do Not Disturb
- F7–F9: Media rewind, play/pause, fast‑forward
- F10–F12: Volume mute, down, up
- The very top‑right key is the eject key (or lock screen on newer macOS).
To use a standard function key (e.g., F5 to refresh a webpage), press and hold the Fn key (bottom left, next to Control) and then press the desired F‑key. You can swap this behaviour in System Settings > Keyboard > “Use F1, F2, etc. keys as standard function keys.”
Numeric keypad
The numeric keypad includes dedicated Home, End, Page Up, Page Down, Delete, and Clear keys. The Clear key is the upper‑left button of the keypad. These work in spreadsheets and documents exactly as expected.
Pairing the Keyboard to a Mac, iPad, or Other Device
Pairing to a Mac (Wireless)
- Connect the keyboard to your Mac using the included Lightning cable. This automatically pairs it; the Mac recognizes the keyboard instantly.
- Once paired, you can unplug the cable. The keyboard will stay connected wirelessly via Bluetooth. A notification on the Mac confirms the connection.
- If you need to pair manually (e.g., after a reset), open System Settings > Bluetooth, then press and hold the Shift + Option keys and click the Bluetooth icon in the menu bar. Choose “Reset the Bluetooth module” (advanced, but rarely needed). Then put the keyboard in pairing mode by turning it off (via the slider on some models) and back on, or by connecting it via cable first.
Pairing to an iPad
- Plug the keyboard into the iPad using a USB‑C to Lightning cable (iPad must have USB‑C; for Lightning iPads, use a USB‑C to Lightning adapter). The keyboard pairs automatically.
- Alternatively, go to Settings > Bluetooth on the iPad. Put the keyboard into pairing mode by holding the Eject key (top right) and Control key simultaneously for a few seconds until the LED near the function row flashes, then select “Magic Keyboard” from the list.
Switching between multiple devices
The A2520 can only be paired to one device at a time via Bluetooth. To switch to a different Mac or iPad, you must disconnect it from the current device and pair it to the new one.
Using the keyboard with Windows (limited)
The keyboard works with Windows via Bluetooth, but Touch ID, Mission Control, and the media keys won’t function correctly. The layout will differ; the Command key acts as the Windows key.
Touch ID Setup and Troubleshooting
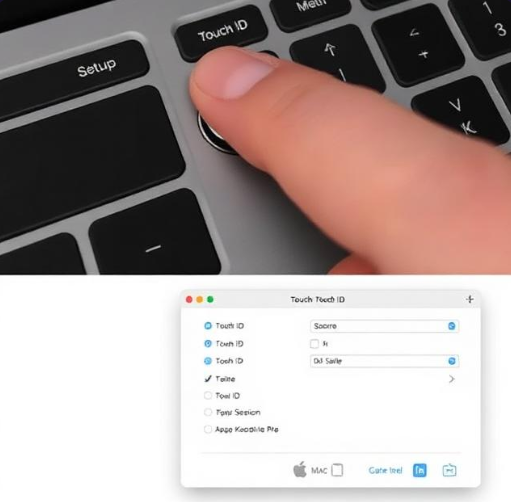
Setting up Touch ID
- On your Apple‑silicon Mac, open System Settings > Touch ID & Password.
- Click “Add Fingerprint.” Follow the on‑screen instructions to lift and rest your finger on the Touch ID sensor repeatedly.
- You can enrol up to three fingerprints. Enrol the same finger twice for faster recognition.
Touch ID not working
- Ensure your Mac is an Apple‑silicon model (M1 or later). Touch ID on the Magic Keyboard does not work with Intel Macs.
- Verify the keyboard is connected wirelessly via Bluetooth. Touch ID does not work when the keyboard is connected only with the Lightning cable.
- Clean the Touch ID sensor with a dry, lint‑free cloth. Moisture or oil can prevent reading.
- Re‑enrol your fingerprints in System Settings. Delete the old prints and add new ones.
- If the sensor is physically damaged or unresponsive after cleaning, contact Apple Support.
Using Touch ID for purchases and passwords
After enrolment, you can use the Touch ID sensor to unlock your Mac, authorize App Store downloads, authenticate Apple Pay, and auto‑fill passwords in Safari. In some apps, you can also use it to switch user accounts quickly.
Battery Life, Charging, and Power Management
- Battery life: About a month on a full charge with average daily use (backlighting is not present on this keyboard). The exact duration depends on usage.
- Battery level check: Click the Control Center icon in the menu bar (or the Bluetooth icon) and look for your keyboard. The battery percentage is displayed next to the device name. You can also add the Bluetooth battery widget to Notification Centre.
- Charging: Plug the Lightning cable into the keyboard and a USB power source (Mac, USB‑C adapter, etc.). A green LED near the function row briefly illuminates; there is no persistent charging light. To see the charging status, check the battery percentage on the Mac.
- Low battery warning: macOS sends a notification when the keyboard battery drops below 10%. The keyboard continues to function for a few days on low battery but may disconnect briefly when power is very low.
If the keyboard dies completely
Connect the Lightning cable and wait 5 minutes. It will turn on and reconnect automatically once sufficient charge is available.
Troubleshooting Common Issues
| Problem | Likely Cause | What to Try |
|---|---|---|
| Keyboard won’t connect via Bluetooth | Pairing lost or interference | Connect the keyboard to your Mac with the Lightning cable; it pairs automatically. If that fails, restart your Mac, then reconnect the cable. |
| Touch ID not responding | Dirt on sensor or not connected wirelessly | Clean the sensor. Ensure the keyboard is connected via Bluetooth, not just the cable. Re‑enrol fingerprints. |
| Certain keys not working | Software mapping or debris | Check System Settings > Keyboard > Keyboard Shortcuts. Blow compressed air around the affected key. |
| Media keys don’t work | Keyboard assigned to wrong layout | Go to System Settings > Keyboard > Keyboard Shortcuts and ensure the correct function key behaviour is set. |
| Random disconnections | Low battery or interference | Charge the keyboard. Move metal objects away from the keyboard and Mac. |
| Double‑typing or missed keystrokes | Interference or physical debris | Use a can of compressed air to clean around the keys. Charge the keyboard. |
| Keyboard works only when plugged in | Bluetooth module fault | Unpair the keyboard (System Settings > Bluetooth > Forget Device), then reconnect via Lightning cable. |
How to Reset and Restart the Keyboard
Soft restart
Unplug the Lightning cable. The keyboard remains on. Wait a few seconds, then press a key. This re‑establishes the connection if it was temporarily lost.
Force restart
Connect the keyboard to your Mac using the Lightning cable. This forces a reset of the internal Bluetooth module and re‑pairs it immediately. No data is lost.
Factory reset (clear pairings)
- On your Mac, go to System Settings > Bluetooth.
- Click the “i” next to “Magic Keyboard” and choose “Forget This Device.” Confirm.
- Reconnect the keyboard using the Lightning cable. It will pair as a new keyboard, and all previous settings (including Touch ID) are removed. You’ll need to enrol fingerprints again.
If the keyboard is completely unresponsive
Connect it to a power source for at least 15 minutes, then try the force restart. If it still doesn’t respond, contact Apple Support.
Quick Reference Card
| Task | How |
|---|---|
| Pair to Mac | Connect with Lightning cable; it pairs automatically |
| Check battery | Click Bluetooth icon in menu bar or Control Center |
| Use standard F‑keys | Hold Fn key, then press F1–F12 |
| Toggle Fn lock | Go to System Settings > Keyboard > “Use F1, F2, etc. keys as standard function keys” |
| Enrol fingerprints | System Settings > Touch ID & Password > Add Fingerprint |
| Reset keyboard | Forget device in Bluetooth settings, then reconnect with Lightning cable |
| Clean Touch ID sensor | Wipe with dry, lint‑free cloth |
Download the Apple Magic Keyboard A2520 Cheat Sheet
A one‑page PDF with pairing steps, function key guide, Touch ID setup, battery check instructions, and reset procedures. Print it and keep it near your desk—it’s ready when a connection drops and you need a quick fix.
“Apple Magic Keyboard A2520 Quick Guide (PDF)”
Official Apple Support and Manuals
For warranty, service, and the official Apple Magic Keyboard user guide, visit:
https://support.apple.com/guide/magic-keyboard/welcome/web
A Final Thought Before You Type
This companion was written to help your Magic Keyboard A2520 become the silent workhorse of your desk. May every keystroke feel crisp, your Touch ID always read your finger on the first try, and your battery last through the longest work weeks. If a friend ever buys the same keyboard and can’t figure out why Touch ID won’t work, share this guide—it’ll save them a frustrating morning and maybe a trip to the Apple Store.
Copyright Warning!
Copyright 2026 productsmanuals.com All rights reserved. This Apple Magic Keyboard A2520 manual is original content and may not be copied, republished, or redistributed without written permission. Apple, Magic Keyboard, Touch ID, and the Apple logo are trademarks of Apple Inc. This guide is unofficial and not affiliated with Apple.