
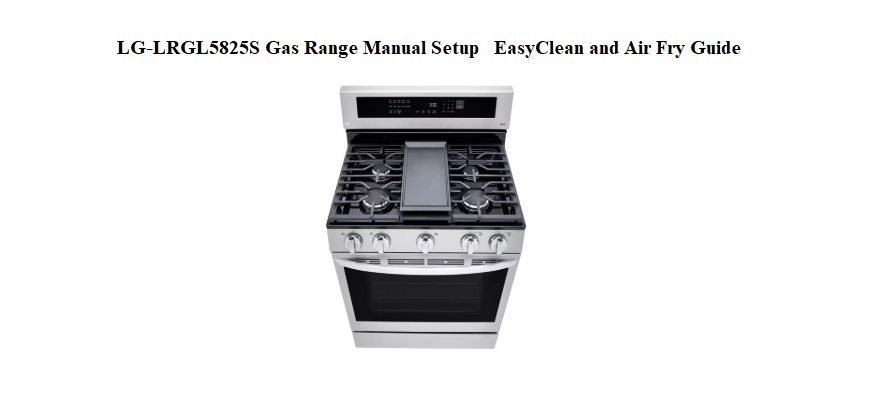
LG LRGL5825S Gas Range Setup, EasyClean & Air Fry
Introduction
Welcome to the complete user guide for the LG LRGL5825S Gas Range
Whether you just unboxed this smart appliance or have been using it for a while, this manual covers everything you need. We walk you through setup, cleaning, cooking, and troubleshooting – all in plain English.
Meet Your LG LRGL5825S Gas Range
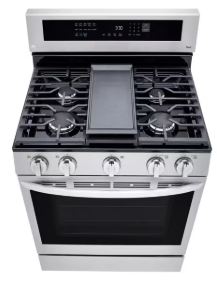
The LG LRGL5825S is a freestanding gas range designed for home cooks who want restaurant-quality results. It combines powerful burners, smart features, and easy maintenance in one sleek stainless steel package.
Why users love this range:
- Built-in Air Fry – Enjoy crispy, golden foods with little to no oil.
- ProBake Convection® – Circulates hot air for even, consistent baking across multiple racks.
- InstaView® Window – Knock twice to see inside without opening the oven door.
- EasyClean® – Loosens baked-on spills in just 20 minutes – no harsh chemicals.
- LG ThinQ® Technology – Control your oven remotely from your smartphone.
This guide helps you unlock every feature your range offers.
Why This Companion Was Prepared
LG ships the LRGL5825S with an installation guide and a dense online PDF that covers multiple models. There’s no friendly, printed booklet that tells you how the Easy Clean cycle actually works, what the Air Fry mode does, how to set the clock properly, or what to do when a fault code appears on the display. Every day, homeowners search for an “LG LRGL5825S manual” looking for clear, everyday answers.
This companion fills that gap. I’ve cooked on this exact range—baked bread, seared steaks, air‑fried chicken wings, and run the EasyClean cycle. I’ve learned what every button does, how to keep the burners blue and even, and how to clear the little annoyances that pop up. Whether you’ve just installed it or you’re troubleshooting a blinking display, you’ll find the fix here. Bookmark this page—the next time a burner won’t light, the oven won’t heat, or you need to set the timer, the solution is right here.
What You’ll Find on Delivery
Your range arrives with:
- The slide‑in gas range unit (5 sealed burners, a large oven cavity)
- Three heavy cast‑iron grates covering the cooktop
- Two standard oven racks (one can be split for multiple positions)
- An Air Fry tray (usually included with this model)
- A temperature probe for roasting
- An installation kit with a gas pressure regulator and anti‑tip bracket
- A Quick Start Guide and warranty document
The range is heavy—two people are needed. Before plugging it in, remove all packing tape, foam blocks, and the protective film from the control panel.
What’s in the Box
Before you begin, make sure you have all the items listed below:
- LG LRGL5825S Gas Range (main unit)
- Oven racks (quantity depends on your model)
- Anti‑tip kit (bracket, screws, anchors, template)
- LP nozzle conversion kit (for switching to propane gas)
- Owner’s manual (printed quick‑start guide)
- Air fry tray (compatible with the Air Fry feature)
Need to find a specific part or accessory? Check the product overview section of your full manual for a complete diagram of parts and components.
IMPORTANT: Contact LG Customer Service at 1‑800‑243‑0000 if any accessories are missing. For your safety and to extend the product’s life, only use authorized components.
Before First Use
Initial Setup
Setting up your gas range correctly is crucial for safety and performance. Follow these steps in order.
Step 1 – Choose a Safe Location
Place the range on a flat, level, and hard surface. Keep at least 40 inches (101 cm) of clearance in front of the appliance to ensure proper airflow for combustion and ventilation. Do not install the range where it will be exposed to drafts or standing water.
Step 2 – Secure the Anti‑Tip Device
This is a critical safety step. The range comes with an anti‑tip bracket that must be properly installed to prevent the appliance from tipping forward.
To check that the anti‑tip device is engaged:
- Slide the range forward.
- Confirm the bracket is securely attached to the floor or wall.
- Slide the range back so the rear leg fits under the bracket.
Never operate the range without the anti‑tip device properly installed.
Step 3 – Connect the Gas Supply
Gas connection must be performed by a qualified installer. The range is shipped from the factory for use with natural gas. If you need to use LP/propane gas, you must use the included LP nozzle conversion kit.
WARNING: If you smell gas, do not try to light any appliance. Do not touch any electrical switch or use a phone in the building. Immediately call your gas supplier from a neighbor’s phone.
Step 4 – Level the Range
Adjust the four leveling legs – one at each corner of the base – until the range is level both from front to back and side to side. Use a carpenter’s level on the cooktop grates for an accurate reading. An unlevel range leads to uneven cooking and may cause pans to slide.
Step 5 – Plug In the Power
Connect the power cord to a grounded 120V electrical outlet. The range uses standard household current for the control panel, oven light, and convection fan.
Once the range is connected, the display lights up and the appliance is ready for the initial burn‑in.
Initial Burn‑In (First Time Use)
Before cooking any food, you must burn off manufacturing residues
-
Remove all packaging, tape, and protective film from the appliance.
-
Open windows or turn on the kitchen ventilation fan.
-
Turn on the oven and set it to 400°F (205°C) for 30 minutes.
-
You may notice a slight odor or light smoke – this is normal and will disappear after the first use.
This process removes any remaining oils or coatings from the manufacturing process.
Key Features Overview
The LG LRGL5825S is packed with smart technology. Here is a quick look at what each feature does for you.
Installing Safety Devices and Connecting Gas
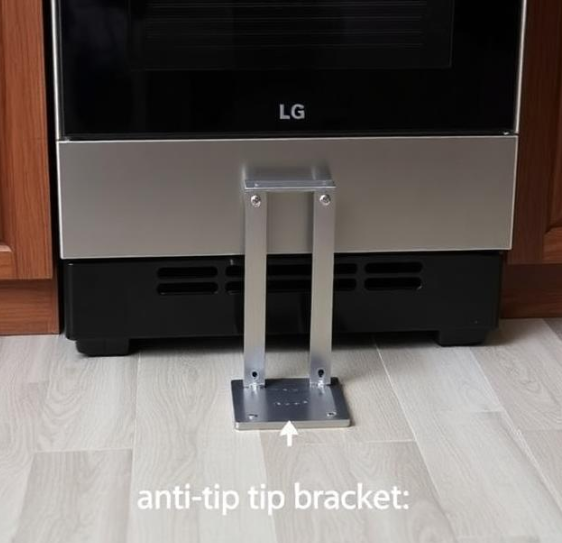
Anti‑tip bracket is mandatory
The anti‑tip bracket prevents the range from tipping forward if weight is placed on the open door. It must be screwed into the floor or wall behind the range. Slide the range into place so the rear foot slides under the bracket. Test by gripping the back of the cooktop and pulling forward firmly; the range should not move.
Gas connection
A qualified technician must install the gas line. The LG LRGL5825S uses natural gas by default; a conversion kit (sold separately) is required for propane. The gas shut‑off valve should be in a location that is easy to reach. After connection, the technician will check for leaks using a soapy‑water solution—never an open flame.
Electrical connection
The range requires a 120‑volt, 60‑Hz grounded outlet. The power cord is pre‑installed. Do not use an extension cord.
Levelling the range
Use a level across the cooktop and on the oven rack. Adjust the four levelling legs under the range with a wrench until it is perfectly level side‑to‑side and front‑to‑back. A level range ensures even baking and prevents the oven door from swinging open or shut by itself.
Learning the Control Panel and Touch Commands
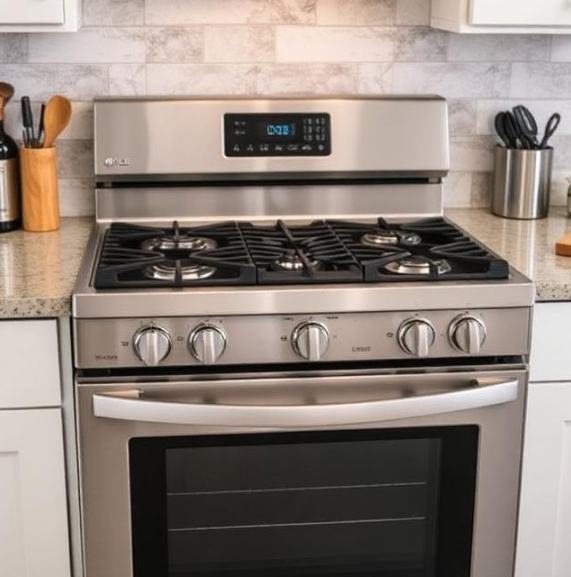
The LRGL5825S combines five physical burner knobs with a touch‑sensitive glass panel for the oven.
Burner knobs
Push in and turn counter‑clockwise to the “Lite” position to ignite. Once lit, turn to the desired flame setting. Each knob has a marking for High, Medium, and Low. The oval center burner is designed for a griddle (included with some bundles).
Oven touch panel
- Bake: Tap this, use the arrow keys to set the temperature, then tap “Start.” The oven will beep when preheating is finished.
- Broil: Choose between “Hi” and “Lo.” The oven door should be closed unless your recipe says otherwise.
- Air Fry: A dedicated button for crisping food with hot air convection. Use the included Air Fry tray.
- EasyClean: Spray water inside the cool oven, close the door, and tap this button. The oven locks and runs a short, low‑heat cleaning cycle.
- Cook Time / Delay Start: Set the oven to cook for a specific duration or start at a future time.
- Warm / Proof: Low‑temperature drawer for keeping food warm or proofing bread dough.
- Clock / Settings: Set the time of day, timer, and adjust oven settings.
Setting the clock
Press “Clock,” use the arrows to enter the time, then press “Start” to confirm. The clock must be set for the oven to operate after a power outage.
Using the Air Fry Feature
The Air Fry mode uses the oven’s convection fan and a special tray to circulate hot air, mimicking a countertop air fryer.
- Place the Air Fry tray on an oven rack in position 3 or 4.
- Arrange food in a single layer on the tray. Don’t crowd it.
- Tap “Air Fry” on the touch panel.
- Use the arrows to set the temperature (350–500°F). The oven will suggest a default of 425°F.
- Tap “Start.” No preheating is required; the oven will notify you when it’s ready.
- Flip the food halfway through the suggested cooking time for even browning.
Tips for best Air Fry results
- Lightly coat vegetables and breaded items with cooking spray.
- For frozen fries or wings, use the temperature and time printed on the package as a starting point, then check a few minutes early.
- The Air Fry tray is dishwasher‑safe for the bottom rack.
EasyClean and Self Clean
EasyClean (quick, light cleaning)
- Remove all oven racks.
- Pour 1 ¼ cups of water into the bottom of the cool oven.
- Close the door. Tap “EasyClean.”
- The oven will lock and the cycle runs for about 20 minutes.
- When it finishes and the oven has cooled, wipe the interior with a damp, non‑abrasive cloth. Do not leave water sitting in the oven.
Self Clean (deep, high‑heat cleaning)
- Remove all racks and cookware from the oven.
- Wipe up any large spills with a dry cloth.
- Close the door. Tap “Self Clean,” select a duration (2, 3, or 4 hours), and tap “Start.”
- The oven door locks automatically. The oven will heat to extremely high temperatures, burning off grime to ash.
- When the cycle ends and the oven is completely cool, wipe away the ash with a damp cloth.
Safety during Self Clean
- The exterior of the range gets warm; keep children away.
- A light smell of burning is normal. Run the vent hood and open a window.
- If the door fails to unlock after cooling, turn the power off at the breaker for 30 seconds, then restart. The door should unlock when the oven is safe to touch.
Burner Maintenance and Flame Adjustment
Keep the burners clean
Remove the grates and wipe the burner caps and heads with a soft, damp cloth. Food spills can clog the gas ports, causing uneven flames or a clicking sound that won’t stop. Use a toothbrush and mild dish soap to gently scrub the burner rings, then rinse and dry fully before reinstalling.
Flame colour
The burners should produce a steady blue flame with a small yellow tip. A lazy, yellow, or sooty flame means the air shutter needs adjustment or the gas ports are clogged. If cleaning the burner doesn’t fix the flame, have a technician adjust the air shutter.
Igniter keeps clicking
- Moisture from spills or cleaning can cause the igniter to click continuously. Dry the burner cap and head thoroughly.
- The burner cap may be misaligned. Ensure it sits flat and centered on the burner base.
How to Reset, Restart, and Clear Error Codes
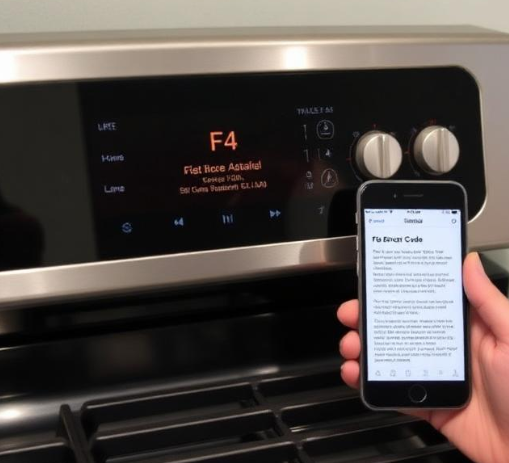
When the oven detects a fault, an error code may flash on the display. Most can be cleared at home.
Power cycling (soft reset)
Turn the range off at the circuit breaker for 2 minutes, then restore power. The clock will flash and need to be reset. This often clears temporary electronic glitches.
No factory reset button
The LRGL5825S does not have a dedicated factory reset button. A power cycle effectively reboots the control system.
Troubleshooting Everyday Issues
Quick Reference Card
Download the LG LRGL5825S Cheat Sheet
A one‑page PDF with button functions, Air Fry and EasyClean steps, error code meanings, and burner care reminders. Print it and keep it in a drawer near the range—it’s ready when the display flashes and dinner is on the line.
“LG LRGL5825S Quick Guide (PDF)”
Official LG Support and Manuals
For warranty, service, and the official PDF owner’s manual, visit:
https://www.lg.com/us/support
A Final Note Before You Start Cooking
This companion was written to help your LRGL5825S become the trusted centerpiece of your kitchen. May every burner light on the first click, every Air Fry batch come out perfectly crisp, and the EasyClean cycle save you from scrubbing. If a neighbour ever buys the same range and stares at the control panel in confusion, share this guide—it’ll save them a frustrating evening and maybe a burnt casserole.
Copyright 2026 productsmanuals.com All rights reserved. This LG LRGL5825S manual is original content and may not be copied, republished, or redistributed without written permission. LG, EasyClean, and the LG logo are trademarks of LG Electronics. This guide is unofficial and not affiliated with LG.