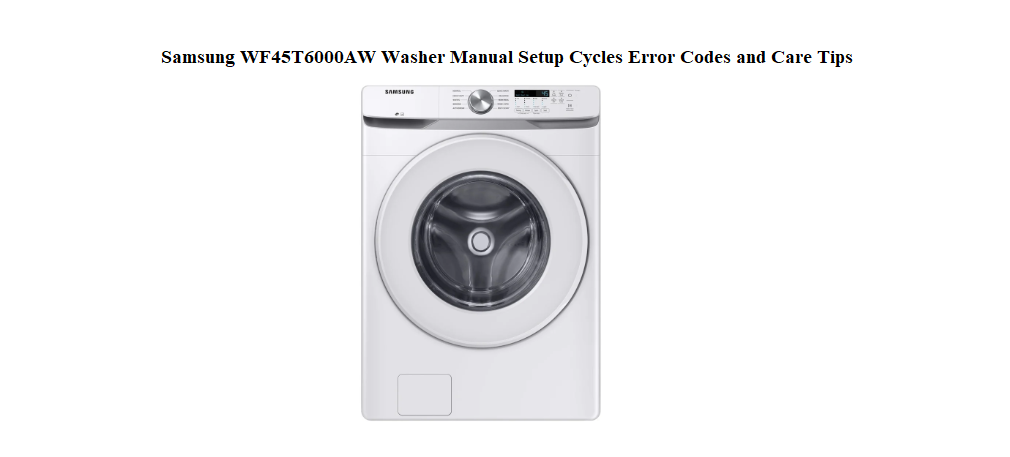
Samsung WF45T6000AW Washer Manual Setup Cycles Error Codes and Care Tips
Why This Guide Was Put Together
Samsung ships the WF45T6000AW with an installation guide, a warranty slip, and a link to an online manual that’s more of a technical reference than a real user guide. There’s no friendly printed book that explains what all the buttons on the display actually do, how to load the washer properly, which cycle to pick for a load of towels, what to do when a fault code flashes, or how to keep the drum smelling fresh. Every day, hundreds of people search for a “Samsung WF45T6000AW manual” because they want clear, human‑friendly help—not a wiring diagram.
This companion is the missing instruction book for your front‑load washer. I’ve used this exact model through muddy jeans, delicate dresses, steam cycles, and self‑cleans, and I’ve learned what works, what doesn’t, and which settings actually matter. Whether you’re connecting the washer for the first time, trying to understand a blinking light, or just want to make your laundry smell better and last longer, you’ll find practical answers here. Bookmark this page—the next time the washer stops mid‑cycle and a code appears on the display, you’ll have the solution in seconds.
Unboxing and Checking the Parts
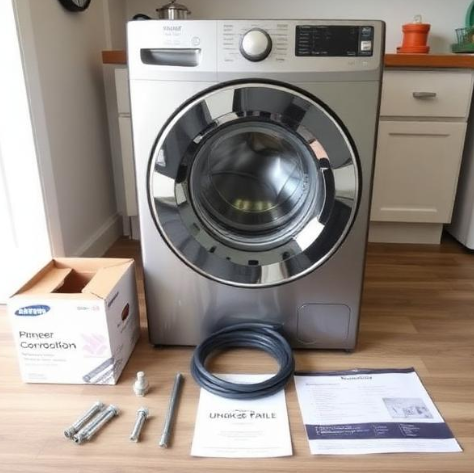
Inside the box, you should find:
- The washing machine unit (door taped shut)
- Two water inlet hoses (hot and cold, with rubber washers)
- A drain hose with clamp
- Cable tie and hose guide
- A set of four shipping bolts (already installed in the back, but must be removed)
- A quick‑start guide and warranty booklet
- A sound‑deadening pad or foam spacer (may be attached to the back)
Before plugging anything in, remove all packing tape and the foam blocks inside the drum.
Removing the Shipping Bolts and Levelling the Machine
This is the single most important step. If you skip it, the washer will shake violently and may damage itself.
Removing the bolts
- Using the supplied wrench (or a 3/8‑inch socket), loosen all four shipping bolts on the back panel. They’re bright silver and impossible to miss.
- Pull each bolt out completely. Keep them somewhere safe—you’ll need to reinstall them if you ever move the machine.
- Insert the four plastic hole plugs (supplied) into the empty bolt holes. They prevent dust and moisture from getting in.
Connecting the water hoses
Screw the blue‑ringed hose to the cold water tap and the red‑ringed hose to the hot water tap. Hand‑tighten firmly, then give a quarter turn with pliers. Open both taps and check for drips. If your laundry room only has a cold water tap, you can connect both hoses using a Y‑adapter, or the washer will heat its own water for warm cycles.
Installing the drain hose
Attach the drain hose to the outlet on the back, secure it with the clamp, and insert the other end into a standpipe at least 60 cm high. Do not push it more than 15 cm into the standpipe—it needs an air gap to siphon properly. Use the cable tie to secure the hose so it can’t pop out during a drain cycle.
Levelling
Tilt the washer back gently and locate the levelling legs underneath. Turn each leg clockwise to lower it or counter‑clockwise to raise it. Place a spirit level on top of the washer—first side to side, then front to back. Once the machine is perfectly level, tighten the locking nuts against the base. A level washer runs quietly and won’t walk across the floor.
Getting to Know the Control Panel
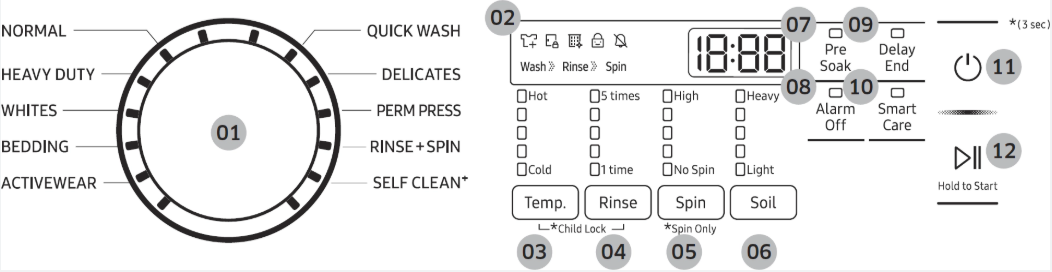
The control panel is simple once you learn the logic.
Power button
Press to wake the machine. The display lights up and the washer is ready.
Cycle selector dial
Turn the dial to choose from: Normal, Heavy Duty, Whites, Delicates, Bedding, Quick Wash, Rinse + Spin, and Self Clean. The display shows the estimated time for the selected cycle.
Start/Pause button
After you’ve chosen a cycle and any options, press and hold Start/Pause for about 3 seconds to begin. Press once during a cycle to pause. The door unlocks after a few seconds if the temperature inside is safe.
Display
Shows the remaining cycle time, selected options, and any error codes. The large numbers count down minutes.
Option buttons (from left to right)
- Temp: Press to cycle through Hot, Warm, Eco Warm, Cold, and Tap Cold. Use Hot for heavily soiled whites, Cold for colours and delicates.
- Soil: Adjusts wash intensity—Light, Normal, or Heavy. Heavy adds extra time and agitation for really dirty loads.
- Spin: Choose Low, Medium, High, or Extra High spin speed. Delicates and waterproof items should spin on Low or Medium.
- Delay End: Set the washer to finish at a specific time, up to 24 hours ahead.
- Self Clean: This button starts a cleaning cycle directly. The machine will heat water to a high temperature and run for about an hour to clean the drum, hoses, and gasket.
- Pre‑Soak: Adds a 30‑minute soaking period before the main wash. Great for ground‑in stains.
- Extra Rinse: Adds an additional rinse cycle. Helpful for people with sensitive skin or when using a strong detergent.
- Steam: Adds a steam phase at the end of the cycle to reduce wrinkles and odours. Only available on Normal, Heavy Duty, Whites, and Bedding cycles.
- Sound: Turns the end‑of‑cycle chime on or off.
Using the Right Detergent and Loading the Drum
Detergent type and amount
The WF45T6000AW requires HE (High Efficiency) detergent. Regular detergent creates too many suds, which can cause the washer to overflow or throw an error code. Use the amount recommended on the detergent bottle, but err on the side of less—front‑load washers use far less water than top‑loaders, and too much detergent leaves residue on clothes and inside the drum.
Detergent drawer
Pull the drawer out from the left side of the control panel. It has three compartments:
- Main wash (largest, marked with a flap): Powder or liquid detergent. If using liquid, insert the provided liquid detergent cup.
- Pre‑wash (small compartment, sometimes marked with a “I” symbol): Only used if you select the Pre‑Soak option. You can put a small amount of detergent here.
- Softener (marked with a flower symbol): Pour liquid fabric softener up to the MAX line. Do not exceed it; softener can overflow and leave marks.
Bleach
Pour liquid chlorine bleach into the bleach compartment on the left side of the drawer, up to the MAX line. The washer dilutes and adds it at the correct time. Never pour undiluted bleach directly onto clothes.
Loading the drum
Place items loosely in the drum. Fill it no more than about three‑quarters full for a main wash. Clothes need room to tumble against each other; an overloaded drum won’t clean or rinse properly, and it can cause the washer to vibrate excessively. Always empty pockets, fasten zippers, and turn delicate items inside out.
Cycle Selection Guide and Typical Times
| Cycle | Best For | Approx. Time |
|---|---|---|
| Normal | Everyday cottons, mixed fabrics | 50–60 min |
| Heavy Duty | Jeans, towels, muddy sports gear | 1 hr 20–1 hr 40 min |
| Whites | White cottons, bleach‑safe items | 1 hr 10 min |
| Delicates | Lingerie, blouses, sheer fabrics | 45–50 min |
| Bedding | Sheets, duvet covers, blankets | 55–70 min |
| Quick Wash | Lightly soiled small loads (2–3 items) | 30 min |
| Rinse+Spin | Extra rinse only | 20 min |
| Self Clean | Empty drum cleaning cycle | 1 hr |
The Quick Wash cycle is designed for a handful of items that you need in a hurry. Don’t use it for full loads or heavily soiled clothes—it won’t clean them thoroughly. For a basket of towels, choose Heavy Duty with an Extra Rinse.
Daily Care and Preventing Odours
Front‑load washers need a tiny bit of daily attention to stay fresh.
Wipe the door gasket after the last load
The rubber seal around the door opening collects water, lint, and stray hair. After the final load of the day, use a dry cloth to wipe the inside of the gasket, especially the folds. Pull the gasket back gently to check for small objects (coins, buttons, hairpins) that may have fallen out.
Leave the door and drawer open
When the washer isn’t in use, leave the door slightly ajar and the detergent drawer pulled out a few centimeters. This allows moisture to evaporate and prevents mildew.
Run Self Clean monthly
The WF45T6000AW will flash a reminder after about 40 washes. When you see it, run a Self Clean cycle with no laundry inside. You can add a washing machine cleaner tablet or a cup of liquid bleach to the detergent drawer. The cycle heats water to sanitizing temperatures and scrubs the drum, hoses, and drain pump.
Clean the detergent drawer
Pull the drawer all the way out, press the release tab (inside the softener compartment), and remove it. Rinse it under warm water, scrubbing any dried detergent with an old toothbrush. Wipe the drawer housing inside the washer with a damp cloth.
Understanding and Clearing Error Codes
When something isn’t right, the washer shows a code on the display. Most are fixable without a technician.
| Code | Meaning | What to Do |
|---|---|---|
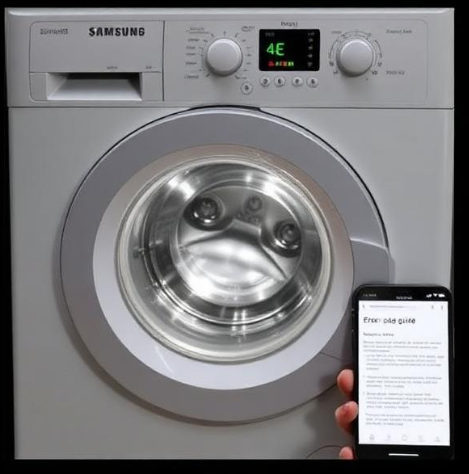
| 4E | Water supply issue | Check both taps are fully open. Ensure hoses aren’t kinked. Clean the inlet filters (small mesh screens inside the hose connectors) with an old toothbrush. |
| 5E | Drain problem | The drain hose may be kinked or pushed too far into the standpipe. Straighten the hose. Clean the debris filter (see below). |
| UE or Ub | Unbalanced load | The drum couldn’t balance the load. Pause, open the door, redistribute the clothes evenly, and restart. For a single heavy item (like a blanket), add a few towels to balance the drum. |
| LE or LC | Water leak detected | Check all hose connections for drips. Look under the washer for puddles. Tighten any loose connections. If no leak is visible, the internal leak sensor may have triggered—unplug, tilt the machine back, and check for water in the base. |
| SE or 5E | Drain pump filter clogged | The debris filter (located behind the small access door at the bottom left) is likely blocked. Place a shallow container and a towel under it, unscrew the filter slowly (water will drain out), clean out any debris, and reinstall tightly. |
| dE | Door lock error | The door isn’t fully closed or the lock is obstructed. Press firmly on the door until you hear a click. If the error persists, clean the door seal and lock mechanism. |
| HE1 or HE | Water temperature fault | The washer detects water that is too hot or too cold. Ensure the hoses are correctly connected (hot to hot, cold to cold). Run a cycle with cold water only to test. |
| tE | Temperature sensor error | Unplug the washer for 2 minutes, then plug it back in. If the error returns, the temperature sensor may need service. |
Cleaning the debris filter
The debris filter is the hero of front‑load washers. It catches everything from coins to lint. Clean it every 2–3 months. Open the small access door at the bottom left of the machine. Place a bowl and a towel underneath, then slowly unscrew the filter cap. Expect water to flow out. Remove the filter, rinse it under the tap, and pull out any trapped objects. Push it back in and tighten firmly.
How to Restart, Reset, and Recalibrate
Soft restart
Press the Power button to turn off the washer, then press it again. The previous cycle settings are cleared.
Power cycle (full reset)
Unplug the washer from the wall outlet for 2 minutes. Plug it back in. This reboots the control board and often clears persistent error codes.
Factory reset (drain and spin)
There is no dedicated “factory reset” button, but a forced drain cycle often does the trick:
-
Turn on the washer.
-
Select the Rinse+Spin cycle.
-
Press and hold Start/Pause until the cycle begins.
-
Let it complete. This forces the washer to drain any remaining water and reset internal sensors.
Recalibrating the drum
If the washer shakes more than usual even when level, the drum sensor may need recalibration. Samsung typically calibrates automatically after a few normal cycles. If you need to force it, run a Self Clean cycle with an empty drum. The machine uses the opportunity to check drum balance and sensor readings.
Vibration and Noise Fixes
Washer vibrates or walks during spin
The floor under the washer must be solid (concrete or reinforced). If the floor is wooden or the washer is on a pedestal, use a rubber anti‑vibration mat. Recheck the levelling legs—all four must be firmly in contact with the floor. Tighten the locking nuts.
Banging or thumping sound
This is almost always an unbalanced load. Stop the machine, redistribute the clothes, and restart. If it bangs when the drum is empty during Self Clean, check that the shipping bolts have been completely removed.
High‑pitched squeal or grinding
A squeal during spin may indicate a worn belt. This requires a service technician. A grinding sound could be a foreign object between the drum and tub. Use a flashlight to inspect the space between the door seal and the drum, looking for a stray coin or bra wire.
Quick Reference Card
| Action | How |
|---|---|
| Pause a cycle | Press Start/Pause once |
| Cancel a cycle | Press Power to turn off, then Power to turn on again |
| Add a forgotten item | Pause, wait for door to unlock, open, add item, close door, press Start/Pause |
| Force drain | Select Rinse+Spin, press Start/Pause |
| Run Self Clean | Press Self Clean button, then Start/Pause (empty drum) |
| Turn sound off | Press the Sound button until the icon disappears |
| Clean debris filter | Open bottom left access door, unscrew filter, clean, reinstall |
| Test a cycle | Run Quick Wash with a couple of towels to check operation |
Download the Samsung WF45T6000AW Cheat Sheet
A one‑page PDF with cycle times, error code fixes, cleaning reminders, and reset steps. Pin it near your washer—it’s ready when the display flashes and you need a quick answer.
“Samsung WF45T6000AW Quick Guide (PDF)”
Official Samsung Support and Manuals
For warranty, service, and the official PDF manual, visit Samsung’s support page:
https://www.samsung.com/us/support/washers/front-load/
A Short Note Before the Next Load
This guide was written so that your WF45T6000AW can serve you quietly and reliably, load after load. May your whites stay bright, your towels stay soft, and your washer never throw a mystery code at midnight. If a friend ever struggles with this same model, send them this companion—it’ll save them from a cold, soapy floor and a headache.
Copyright Warning!
Copyright 2026 productsmanuals.com. All rights reserved. This Samsung WF45T6000AW manual is original content and may not be copied, republished, or redistributed without written permission. Samsung and the Samsung logo are trademarks of Samsung Electronics. This guide is unofficial and not affiliated with Samsung.