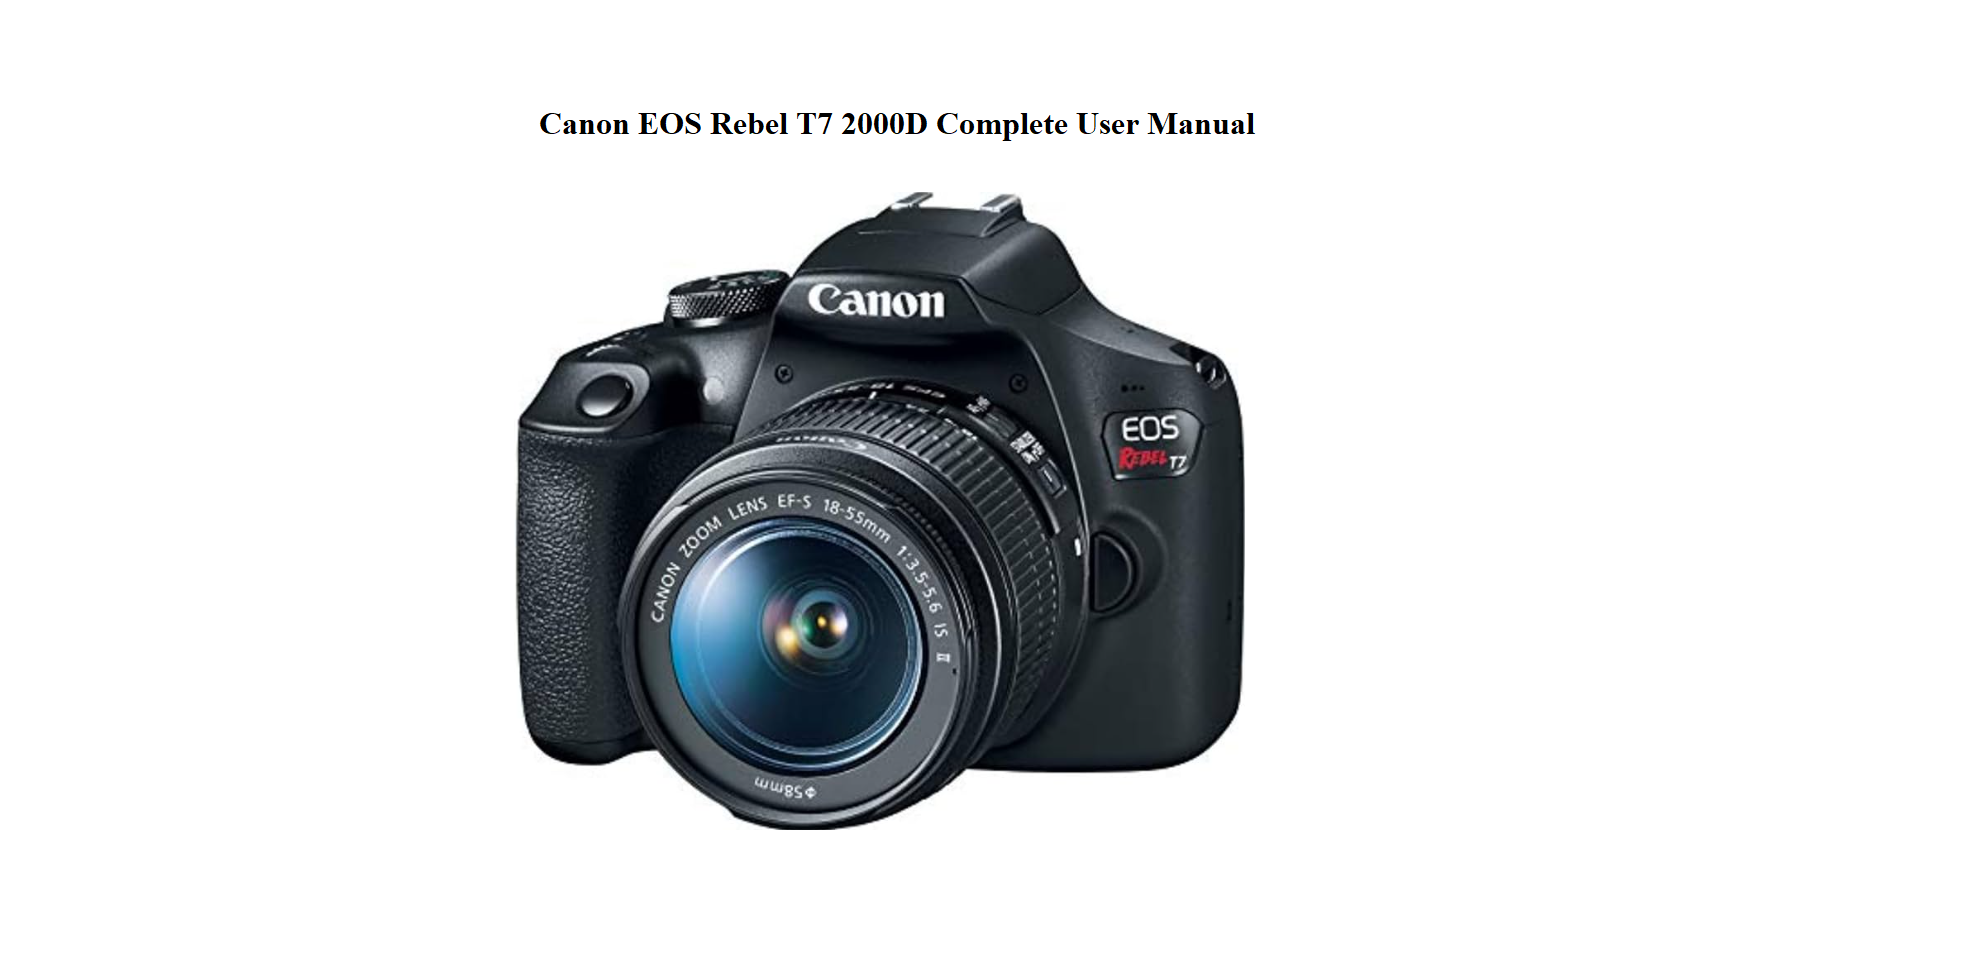
Introduction
Getting Started with Your DSLR
The Rebel T7 ships with an 18–55mm kit lens, a battery, a charger, and a strap. The printed instruction booklet is thick but often skipped. This companion explains the essentials in a straightforward way — how to switch out of Auto mode, how to focus sharply, what the buttons on the top and back do, how to send photos to your phone, and what to check when the camera won’t turn on. It’s built for beginners who want to move beyond the green square.
What’s in the Box and First Charge
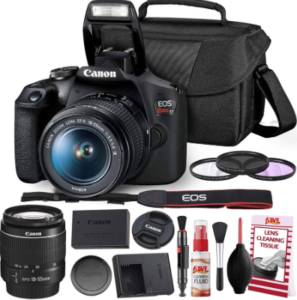
Your box includes:
- The Rebel T7 body (also called EOS 2000D)
- EF‑S 18–55mm f/3.5‑5.6 IS II kit lens
- A rechargeable LP‑E10 battery
- A battery charger (LC‑E10E or similar)
- A neck strap
- An instruction booklet and warranty card
No SD card is included; you’ll need a Class 10 SDHC/SDXC card (up to 128 GB) to start shooting.
Physical Controls and What They Do
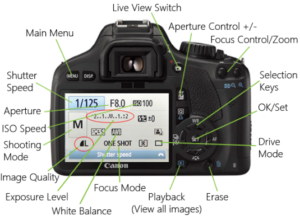
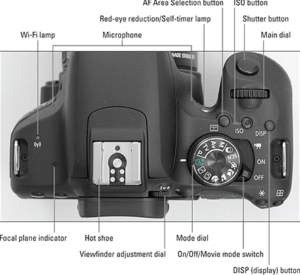
- Mode dial: On top of the camera. Rotate to select Auto (green A+), Scene modes, Creative Auto, P (Program), Tv (Shutter priority), Av (Aperture priority), and M (Manual). Start with Av for portraits (control background blur) or Tv for action.
- Shutter button: Press halfway to focus, fully to take the picture.
- Main dial: Just behind the shutter button. Turn it to adjust aperture in Av mode or shutter speed in Tv mode.
- Q button: Opens the Quick Control screen, where you can change ISO, white balance, autofocus mode, drive mode, and more.
- DISP button: Cycles through display styles on the LCD.
- Playback button: Shows the last image taken.
Shooting Modes That Give You More Control
Av (Aperture Priority): You set the aperture (f‑number), and the camera picks the shutter speed. Small f‑number (like f/4) blurs the background; larger f‑number (like f/11) keeps more of the scene sharp.
Tv (Shutter Priority): You set the shutter speed, and the camera picks the aperture. Use a fast speed (1/500 or higher) to freeze action; use a slow speed (1/30 or lower) on a tripod for blur effects.
M (Manual): You set both aperture and shutter speed. The exposure indicator on the screen shows if the image will be under‑ or over‑exposed.
Scene modes (SCN): Pre‑set modes for portraits, landscapes, close‑ups, sports, night portraits, etc. Good for quick shots but don’t offer much creative control.
Autofocus and How to Get Sharp Images
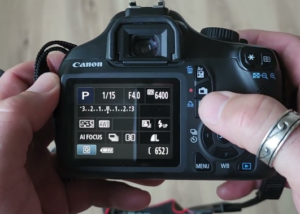
Press the Q button and select AF operation.
- One‑Shot AF: For still subjects. The camera focuses once and locks. Good for portraits and landscapes.
- AI Servo AF: For moving subjects. The camera focuses continuously while you hold the shutter button halfway. Use this for sports or pets.
- AI Focus AF: Switches automatically between One‑Shot and Servo if the subject starts moving.
Selecting AF points: Through the viewfinder, press the AF point selection button (the one with a cross) and use the main dial or arrow keys to choose which point to focus on. Auto AF point selection often picks the nearest object, not always your subject.
Connecting to Wi‑Fi and Transferring Images
The Rebel T7 has built‑in Wi‑Fi, not Bluetooth. To send photos to your phone:
- Press the Wi‑Fi button (if equipped) or go to Menu > Wireless settings > Wi‑Fi settings > Enable.
- Select Connect to smartphone. The camera displays an SSID and password.
- On your phone, download the Canon Camera Connect app. Connect to the camera’s Wi‑Fi network, then open the app.
- Once connected, you can browse images on the card and download JPEGs. RAW transfers are not supported wirelessly; use a card reader for those.
If the connection keeps dropping, turn off your phone’s mobile data and stay within a few metres of the camera. The Wi‑Fi range is short, and thick walls can interfere.
Lens Care
Lens Care, Focal Length, and Image Stabilization
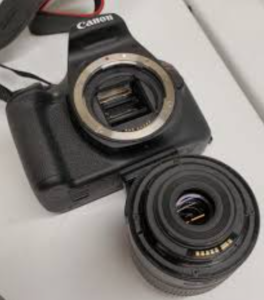
- Attaching the lens: Align the white dot on the lens with the white dot on the camera mount. Rotate the lens clockwise until it clicks.
- Zooming: Rotate the zoom ring (the larger ring). At 18mm, you get a wide view; at 55mm, the subject appears closer.
- Focusing in AF mode: The focus ring (the smaller ring) should not be forced — the camera controls focus. In MF (manual focus) mode, you can turn it to focus manually.
- Image Stabilization (IS): The kit lens has a stabilizer switch. Keep it ON for handheld shooting; turn it OFF when the camera is on a tripod, or you might get a subtle blur from the stabilizer trying to correct non‑existent movement.
-
Cleaning the lens: Use a rocket blower to remove dust, then a lens cleaning cloth. Avoid touching the glass directly.
Memory Cards and Image Quality Settings
- Format a new card: Menu > Settings (wrench icon) > Format card. Always format in the camera, not on a computer.
- Image quality: Press the Q button, select Image quality, and choose L (Large/Fine JPEG) for everyday photos, or RAW + JPEG if you plan to edit. RAW files give more editing control but take up much more space.
- Drive mode: From the Quick Control screen, select single shot, continuous shooting (about 3 frames per second), or self‑timer (2‑second or 10‑second delay). Use the 2‑second self‑timer on a tripod to avoid camera shake.
Troubleshooting Common Problems
| Problem | What to Check |
|---|---|
| Camera won’t turn on | Ensure the battery is fully charged and inserted correctly. The LP‑E10 charger LED turns green when full. |
| “No Card” message | Insert an SD card formatted in the camera. Check the card’s write‑protect switch on the side (must be up). |
| Photos are blurry | Shutter speed may be too slow. In Av mode, check the shutter speed on the display; if it drops below 1/60, raise the ISO or use a tripod. |
| Autofocus won’t lock | The subject may lack contrast. Switch to manual focus (MF) on the lens, or focus on a high‑contrast edge at the same distance. |
| Flash doesn’t pop up in Auto | In P, Tv, Av, or M modes, the flash must be manually raised by pressing the flash button (lightning bolt icon). It only pops up automatically in full Auto or some scene modes. |
| “Card cannot be accessed” error | Re‑format the card in the camera. If the error persists, the card may be damaged — try a different one. |
How to Reset the Camera to Factory Settings
A full reset clears custom settings, Wi‑Fi info, and shooting parameters. It does not erase images on the card.
- Press the Menu button.
- Navigate to the Settings (wrench icon) tab.
- Select Clear settings.
- Choose Clear all camera settings.
- Confirm. The camera will restart. Wi‑Fi settings and the date/time will be reset, so you’ll need to set the clock again.
Soft restart (power cycle): Turn the camera off, remove the battery for 10 seconds, reinsert, and turn on. This clears temporary glitches without losing settings.
Quick Reference Card
| Task | How |
|---|---|
| Take a photo in Auto | Set mode dial to A+, point, half‑press shutter to focus, fully press to shoot |
| Use Av mode | Turn mode dial to Av, use main dial to set aperture |
| Change ISO | Press Q, select ISO, use main dial or arrows |
| View photos | Press the play button (triangle icon) |
| Delete a photo | In playback, press the trash button, confirm |
| Record a video | Turn mode dial to video icon, press Live View button, press start/stop |
| Connect to Wi‑Fi | Menu > Wireless settings > Enable, then Camera Connect app |
| Factory reset | Menu > Settings tab > Clear settings > Clear all camera settings |