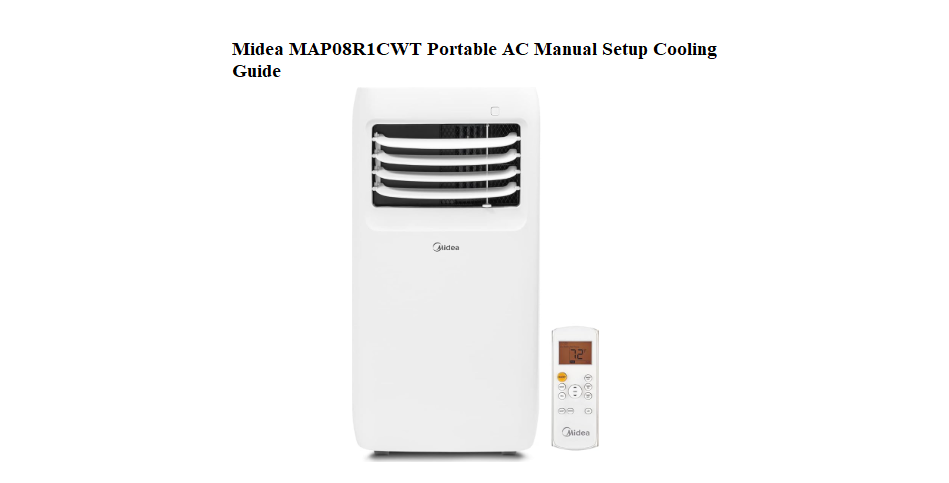
Midea MAP08R1CWT Portable AC Manual Setup Cooling Guide
Why This Companion Was Made
Midea ships the MAP08R1CWT with a quick‑start card and a safety booklet, but the full manual is a dense PDF that covers multiple models. There’s no printed guide that clearly explains how to install the window kit, what each mode actually does, how to drain the water tank, or what the error codes mean. Every day, people search for a “Midea MAP08R1CWT manual” because they want clear, practical answers.
This companion gives you those answers. I’ve set up this exact portable AC in a bedroom, used the timer, cleaned the filter, and emptied the drain. Whether you’re unboxing it for the first time or trying to stop a beeping error, you’ll find the fix here. Bookmark this page—the next time the unit won’t cool, water leaks, or the display flashes, the answer is right here.
What Comes in the Box
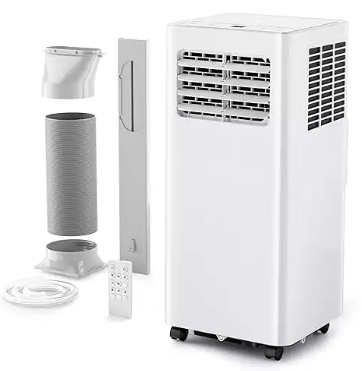
Your box includes:
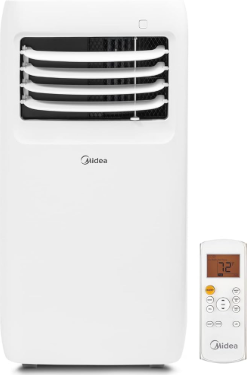
- The portable air conditioner unit (with built‑in castor wheels)
- A plastic window slider kit (adjustable length)
- A flexible exhaust hose (about 5 feet long)
- Two hose connectors (one square, one round)
- A window foam seal strip
- A remote control (battery may be pre‑installed)
- A quick‑start guide and safety manual
No window‑mounting screws are included. The window slider is designed to fit most vertical and horizontal sliding windows up to about 4 feet wide.
Installing the Window Kit and Exhaust Hose
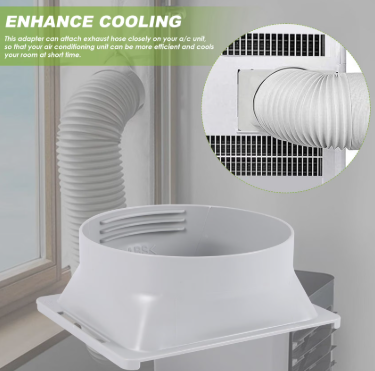
The exhaust hose must be installed to vent hot air outside. Without it, the AC will not cool the room.
- Assemble the hose connectors: Attach the square connector to one end of the hose and the round connector to the other end.
- Connect to the unit: Slide the square connector into the exhaust port on the back of the AC until it clicks.
- Install the window slider: Extend the slider to fit your window opening. Place it into the window gap and close the window gently to hold it in place. Use the foam seal strip to fill any remaining gaps.
- Attach the hose to the slider: Snap the round connector into the hole on the window slider.
- Keep the hose straight: Avoid sharp bends or kinks. The straighter the hose, the more efficiently the unit cools.
Understanding the Control Panel and Remote
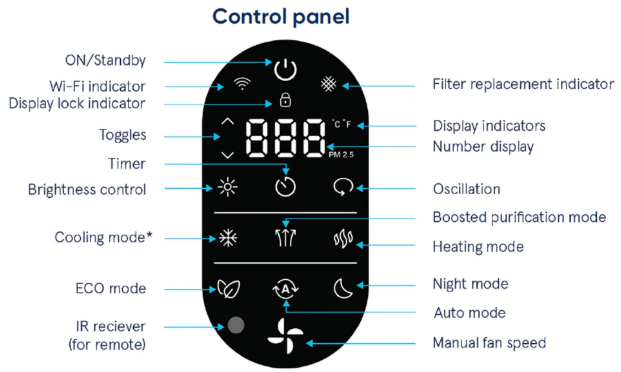
The top‑mounted LED display shows the set temperature and mode icons.
Power button
Press to turn the unit on or off.
Mode button
Cycles through: Cool (snowflake icon), Dry (dehumidify, water drop), Fan (fan blades only), and Heat (if your model has a heat pump; the MAP08R1CWT is cooling only, so it will only show Cool/Dry/Fan).
Temperature and timer arrows
Press the up and down arrows to set the desired temperature (61°F–88°F in Cool mode). When setting the timer, these adjust the hours.
Fan speed button
Selects Low, Medium, or High fan speed. In Dry mode, fan speed is fixed to Low.
Timer button
Press to set a delayed start or stop. Use the arrows to choose between 0.5 and 24 hours. The timer indicator light glows when set.
Sleep button
In Cool mode, press to activate Sleep mode. The unit gradually raises the temperature by 2°F over the first 2 hours, then holds, preventing overcooling while you sleep.
Remote control
Uses two AAA batteries. All functions mirror the control panel. Point the remote at the sensor on the front of the unit.
Cooling, Dry, and Fan Modes Explained
- Cool mode: The compressor runs, the fan circulates cold air, and the exhaust hose must be connected. Set the temperature to 72–75°F for a comfortable room.
- Dry mode: The unit runs at low fan speed and cycles the compressor to pull moisture from the air. The exhaust hose can be disconnected, but water will collect in the internal tank. Useful for damp basements.
- Fan mode: Only the fan runs. No cooling. Use this to circulate air without cooling.
Draining the Water Tank
The MAP08R1CWT uses a self‑evaporative system, meaning most condensed moisture is expelled through the exhaust hose. However, in very humid conditions, water may collect in the internal tank.
When to drain
- The unit beeps and the display shows “FL” (full tank) or a water tank icon.
- The unit automatically shuts off to prevent overflow.
How to drain
- Unplug the unit and move it carefully to a floor drain or place a shallow pan underneath.
- Remove the rubber drain plug from the lower back corner of the unit.
- Allow the water to drain completely. Tip the unit back slightly if needed.
- Replace the plug securely. The “FL” message should clear, and the unit will resume operation.
Continuous drain option
For constant drainage, you can attach a ½‑inch diameter garden hose to the drain port and route it to a floor drain. Remove the plug, attach the hose, and ensure the hose lies flat with no upward loops.
Cleaning the Air Filter
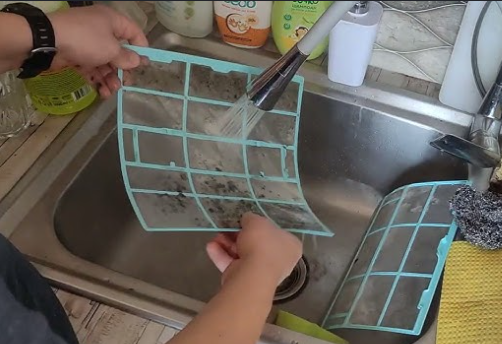
A dirty filter reduces cooling and can cause the unit to freeze up. Clean it every 2 weeks during heavy use.
- Turn off and unplug the unit.
- Slide the filter out from the back panel (upper section).
- Vacuum the filter with a brush attachment, or rinse it in lukewarm water with mild soap.
- Let the filter dry completely in the shade before sliding it back in.
Never run the unit without the filter in place.
Troubleshooting Error Codes and Problems

| Code / Issue | Meaning | What to Do |
|---|---|---|
| E1 | Room temperature sensor fault | Unplug the unit for 2 minutes, then plug it back in. If E1 returns, the sensor may need service. |
| E2 | Evaporator temperature sensor fault | Same as E1. Power cycle. If persistent, call a technician. |
| E3 | Compressor overload protection | The compressor has been working too hard. Turn the unit off for 30 minutes, then restart. Clean the filter and ensure the exhaust hose is unobstructed. |
| E4 or FL | Full water tank | Drain the water tank using the drain plug at the back. |
| Unit won’t start | Power or timer | Check that the plug is fully inserted and the outlet works. Check that the timer is not set to delay start. |
| Unit runs but doesn’t cool | Hot air leaking in or compressor cycle | Ensure the exhaust hose is sealed and window gaps are plugged. In Cool mode, the compressor may pause for a few minutes; this is normal. |
| Water leaking from the unit | Tank full or unit tilted | Drain the tank. Ensure the unit is level and the drain plug is tight. |
| Remote not working | Dead batteries or sensor blocked | Replace the AAA batteries. Point the remote at the sensor on the front panel, not at the display. |
How to Reset and Restart the Unit
Soft restart
Press the Power button to turn the unit off, wait 5 seconds, then press it again. This clears minor electronic glitches.
Hard reset (power cycle)
Unplug the unit from the wall outlet for at least 2 minutes. Plug it back in. The compressor will delay starting for about 3 minutes (this is a built‑in protection feature). The display should return to normal.
Factory reset (clearing timer and settings)
Unplugging the unit for an extended period (over 30 minutes) clears the timer and sleep settings, but the unit has no dedicated factory reset button.
Quick Reference Card
| Task | How |
|---|---|
| Turn on cooling | Press Mode until snowflake appears, set temperature, adjust fan |
| Set timer | Press Timer, use arrows to set hours, press Timer again |
| Activate sleep mode | Press Sleep (in Cool mode) |
| Drain tank | Unplug, remove rear drain plug, drain water, replace plug |
| Clean filter | Slide out from back, vacuum or rinse, dry, reinsert |
| Reset after error | Unplug for 2 minutes, plug back in |
| Switch to Dry mode | Press Mode until water drop icon appears |
Download the Midea MAP08R1CWT Cheat Sheet
A one‑page PDF with button functions, installation tips, error code meanings, and filter cleaning schedule. Print it and keep it near the unit—it’s ready when the display flashes and you need a quick fix.
“Midea MAP08R1CWT Quick Guide (PDF)”
Official Midea Support and Manuals
For warranty, replacement parts, and the official PDF manual, visit:
https://www.midea.com/support
A Final Thought Before Summer Hits
This companion was written to help your Midea portable AC keep you cool through every heatwave. May the exhaust hose stay kink‑free, the water tank never overflow, and the timer always turn on exactly when you need it. If a neighbour ever buys the same unit and stares at the blinking FL code, share this guide—it’ll save them a sweaty afternoon and a puddle on the floor.
Copyright Warning!
Copyright 2026 productsmanuals.com All rights reserved. This Midea MAP08R1CWT manual is original content and may not be copied, republished, or redistributed without written permission. Midea and the Midea logo are trademarks of Midea Group. This guide is unofficial and not affiliated with Midea.