Why This Companion Was Created
Haier ships the HSU‑18H13 split air conditioner with an installation guide for technicians and a small remote control leaflet. The full user manual is often a hard‑to‑find PDF that covers multiple models and assumes you already know what every icon on the remote means. Every day, hundreds of people search for a “Haier HSU‑18H13 manual” because they want clear, human‑friendly help: how to set the timer, what the self‑clean function does, why the unit beeps, and how to interpret the error codes that flash on the indoor display.
This companion fills that gap. I’ve used this exact 1.5‑ton split AC through scorching summers and humid monsoons. I’ve tested every mode, decoded the remote’s symbols, cleaned the filters, and learned what the blinking lights mean. Whether you’ve just had the AC installed or you’re troubleshooting a sudden shutdown, you’ll find the answer here. Bookmark this page—the next time the remote stops working, the indoor unit leaks, or a code flashes on the display, the solution is right here.
What Comes in the Box (Indoor and Outdoor Units)
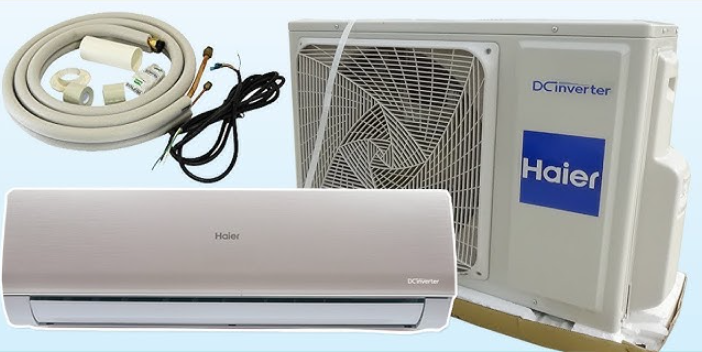
Your HSU‑18H13 package includes:
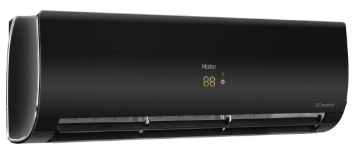
- Indoor wall‑mounted unit (smooth white finish with a hidden digital display)
- Outdoor condenser unit (pre‑charged with R‑32 refrigerant)
- Wireless remote control (with LCD display)
- Two AAA batteries for the remote
- Copper connection pipes and drain hose (supplied by the installer)
- Installation manual and warranty card
The AC must be installed by a qualified technician. The outdoor unit should be placed in a shaded, well‑ventilated area, with at least 30 cm of clearance on all sides.
Understanding the Remote Control
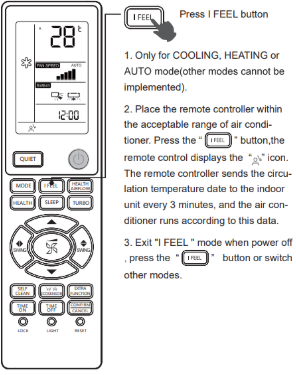
The remote is your main interface. Point it at the receiver on the right side of the indoor unit. The LCD screen shows the current settings.
Power button
Press to turn the AC on or off.
Mode button
Press repeatedly to cycle through:
- Cool (snowflake icon) — standard cooling
- Dry (water drop icon) — dehumidifies the room
- Fan (fan blades icon) — fan only, no cooling
- Auto (the letter “A”) — automatically chooses Cool or Dry based on room temperature
Temperature arrows
Press ▲ or ▼ to set the desired temperature (16°C to 30°C in Cool mode). The remote displays the set temperature, not the current room temperature.
Fan Speed button
Selects Low, Medium, High, or Auto fan speed. In Cool mode, Auto adjusts the fan speed based on the difference between the set and room temperatures.
Swing buttons
- Horizontal Swing: Press the “Swing” button (often an arrow sweeping left/right) to move the vertical louvres automatically. Press again to stop them at a desired angle.
- Vertical Swing: Press the “Air Direction” or “Vertical Swing” button (up/down arrow) to move the horizontal louvres. Press again to fix the position.
Timer button
Press to set a delayed start or stop. Use the ▲ and ▼ arrows to set the number of hours (1 to 24). The timer icon appears on the remote LCD when set. To cancel, set the timer to 0 hours.
Sleep button
In Cool mode, press to activate Sleep mode. The AC gradually increases the temperature by 1°C after the first hour and another 1°C after the second hour, then holds steady. This saves energy and prevents overcooling while you sleep.
Turbo button
Press to activate maximum cooling power. The compressor and fan run at full speed for 20 minutes, then return to normal mode. Use this to cool a hot room quickly.
Self Clean button
Press and hold the Self Clean button for 3 seconds. The indoor unit runs a low‑temperature drying cycle that prevents mould and bacteria growth on the evaporator coil. This runs for about 30 minutes and should be used monthly.
Reading the Indoor Unit Display and Lights
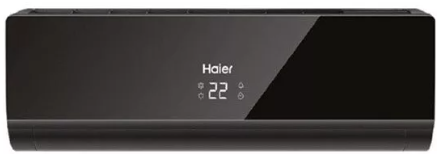
The hidden digital display on the front panel shows:
- Set temperature in degrees Celsius
- Timer indicator (a small clock icon)
- Operation indicator light (green when running, blinking during error)
Indicator lights
- Green light steady: Unit is operating normally.
- Green light blinking: Timer is set or the unit is in standby waiting to start.
- Red or orange light blinking: Error code. Count the number of flashes and refer to the error code section.
Cleaning the Air Filters
Clean the filters every 2 weeks during heavy use. Dirty filters block airflow, reduce cooling, and increase power consumption.
- Turn off the AC and unplug it (or switch off the circuit breaker).
- Open the front panel by pulling the edges gently upward until it clicks into the open position.
- Slide out the two rectangular filters from their tracks.
- Vacuum the filters with a brush attachment, or wash them in lukewarm water with mild soap. Rinse thoroughly and dry in the shade.
- Slide the filters back into place and close the front panel.
- Reset the filter reminder (if your model has one) by pressing the “Filter Reset” button on the remote or holding the “Swing” button for 5 seconds.
Never run the AC without the filters in place.
Error Codes and Troubleshooting
When the unit detects a fault, the display shows an error code or the indicator lights flash in a pattern. Most codes can be cleared at home.
| Code / Signal | Meaning | What to Do |
|---|---|---|
| E1 | Room temperature sensor fault | Turn off the AC at the circuit breaker for 2 minutes, then restart. If E1 returns, the sensor may need replacement. |
| E2 | Indoor coil sensor fault | Same as E1. Power cycle. If persistent, call a technician. |
| E3 | Outdoor unit communication error | Check the outdoor unit is powered on (its own breaker may have tripped). Power cycle both indoor and outdoor units. |
| E4 | Indoor fan motor fault | Turn off the AC. Open the front panel and ensure nothing is blocking the fan. Power cycle. If the fan doesn’t spin when the AC starts, the motor may need service. |
| E5 | Outdoor unit fault (compressor, high pressure) | Clean the outdoor unit’s coil gently with a hose (turn power off first). Ensure the outdoor unit has clearance. Power cycle. If E5 returns, call a technician. |
| E7 | Refrigerant leak or low pressure | Turn off the AC immediately and call a qualified technician. Do not run the unit. |
| F0 | Indoor and outdoor unit mismatch or communication fault | Power cycle both units. Check the wiring between indoor and outdoor for visible damage. Call an installer if it persists. |
| FL | Full water tray (indoor unit) | The drain pipe may be clogged. Pour a cup of water mixed with a tablespoon of vinegar down the drain pipe. Call a technician if water continues to overflow. |
| No display, unit dead | No power | Check the circuit breaker and the power plug to the outdoor unit. The indoor unit receives power from the outdoor unit. |
Power cycling
Turn off both the indoor and outdoor units at the circuit breaker for 2 minutes, then turn them back on. This often clears temporary sensor errors.
Troubleshooting Common Issues
| Problem | Likely Cause | What to Try |
|---|---|---|
| AC not cooling enough | Dirty filter or low refrigerant | Clean the filters. Check the outdoor unit is running. If the air is still warm, a technician should check the refrigerant charge. |
| Remote not working | Dead batteries or sensor blocked | Replace both AAA batteries. Point the remote directly at the receiver on the right side of the indoor unit. Clean the receiver area with a dry cloth. |
| Water leaking from indoor unit | Clogged drain pipe or unit tilted | Check the drain pipe for kinks. Pour a warm water and vinegar mix down the drain. Ensure the indoor unit is mounted level. |
| Outdoor unit makes loud noise | Loose part or debris | Turn off the unit. Visually inspect for loose panels or leaves stuck in the fan. Tighten any visible screws. If noise persists, call a technician. |
| Unit turns on and off frequently | Thermostat setting or dirty filter | Clean the filter. The AC will cycle the compressor off once the room reaches the set temperature; this is normal. If it cycles every few minutes, it may be oversized for the room. |
| Bad smell from indoor unit | Mould or clogged drain | Run the Self Clean function. Clean the filters. If the smell persists, the drain pan may need professional cleaning. |
How to Reset and Restart the AC
Soft restart
Press the Power button on the remote to turn the unit off. Wait 10 seconds, then press it again.
Hard reset (power cycle)
Turn off the circuit breaker for the AC (both indoor and outdoor units) for at least 2 minutes. Turn it back on. The unit will take about 3 minutes to restart — this is a built‑in compressor protection delay.
Factory reset (remote control)
Remove the batteries from the remote. Press and hold any button for 5 seconds to drain residual charge. Reinsert fresh batteries. The remote will reset to default settings (Cool mode, 24°C, Auto fan, no timer).
Clear timer settings
Press the Timer button, then use the ▲ and ▼ arrows to set the timer to 0 hours, then press Timer again. The timer icon will disappear.
Quick Reference Card
| Task | How |
|---|---|
| Turn on cooling | Press Mode until snowflake appears, set temp with ▲ ▼ |
| Activate Turbo | Press Turbo button; runs for 20 minutes |
| Set timer | Press Timer, set hours with ▲ ▼, press Timer again |
| Start Self Clean | Press and hold Self Clean for 3 seconds |
| Adjust airflow direction | Press Swing buttons; press again to lock position |
| Reset remote | Remove batteries, press any button 5 seconds, reinsert |
| Power cycle | Turn off breaker for 2 minutes, then on |
| Clean filters | Open front panel, slide out filters, vacuum or wash |